Lingenfelter L460030000 Lingenfelter RPM-001 RPM Activated Switch v4.01 User Manual
Page 4
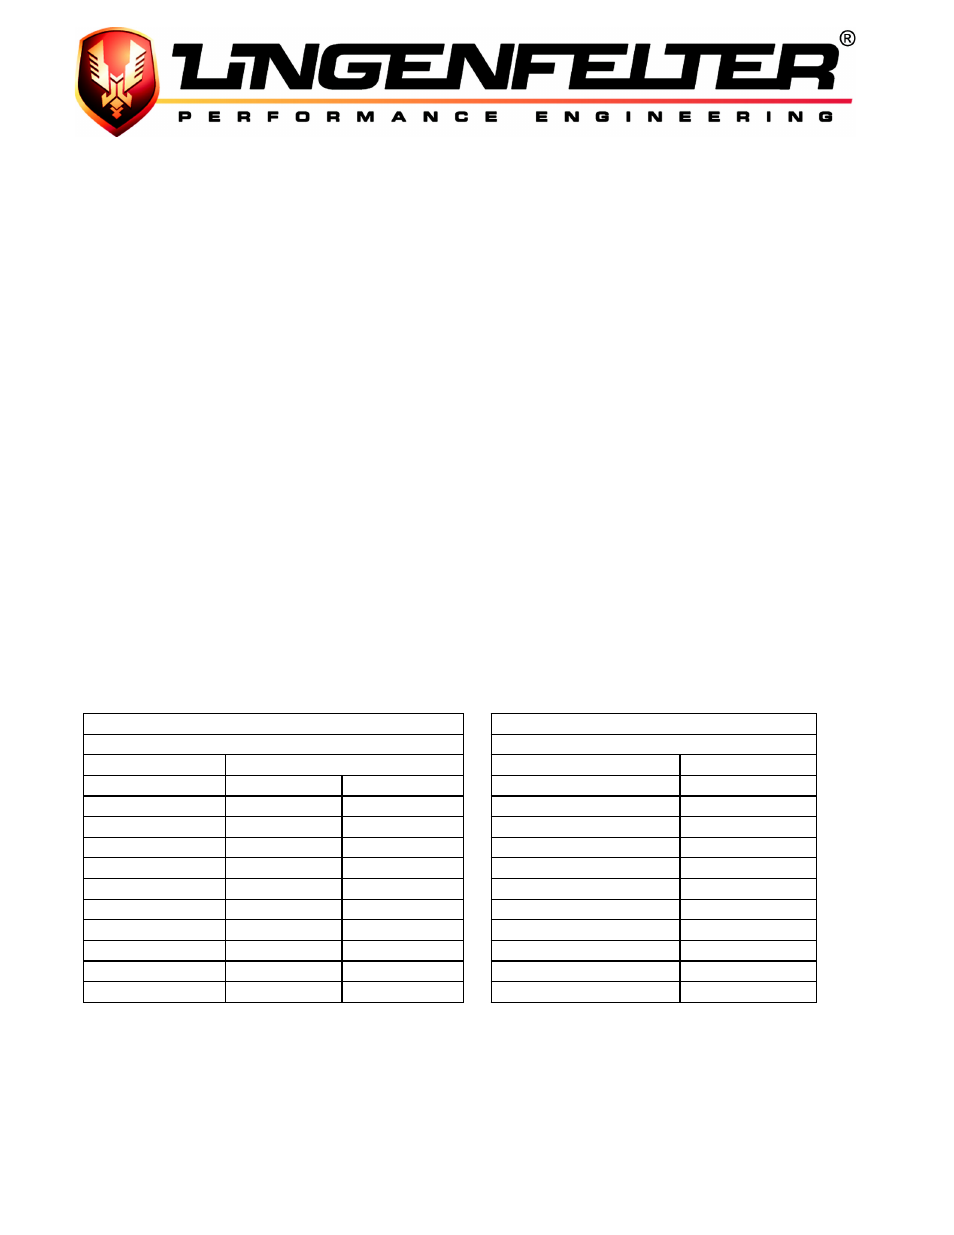
Left side switch selects rpm in thousands (X000)
Right side switch selects rpm in hundreds (0X00)
0 to 9 equal to 0 to 9000 rpm (in LOW) & 10000 to 19000 (in HIGH)
0 to 9 equal to 0 to 900 rpm (in LOW and in HIGH)
RPM
Setting
LOW mode
HIGH mode
Setting
RPM
0
0
10000
0
0
1
1000
11000
1
100
2
2000
12000
2
200
3
3000
13000
3
300
4
4000
14000
4
400
5
5000
15000
5
500
6
6000
16000
6
600
7
7000
17000
7
700
8
8000
18000
8
800
9
9000
19000
9
900
Page 3 of 4
Installation:
•
Remove negative battery terminal.
•
Connect black wire of RPM switch to a suitable vehicle ground.
•
Connect the red wire to a switched and fused +12 volt DC source.
•
Connect the white wire to the tachometer output lead of the vehicle or the switched side of the
ignition coil (negative side).
•
If you will be using the normally off output, such as to control a shift light, connect the yellow wire
to the ground side of the device you plan to activate.
•
If you will be using the normally on output, connect the gray wire to the ground side of the device
you plan to activate.
•
If the device you will be controlling draws more than 2 amps, make sure to control the device
through a relay.
•
Set the desired RPM switch activation point using the two ten position rotary switches for the 1000
rpm increment (X000) and the 100 rpm increment (0X00), as labeled on page 2.
•
Set the pulse per revolution (PPR) setting to the correct setting for your vehicle application.
•
Reconnect the negative battery terminal.
RPM Setting Switch Positions: