Step 4, Step 5, Step 1 – Hope Tech Direct Mount stem User Manual
Page 2: Step 2, Step 3
STEP 4:
When you are satisfied with the handlebar position and orientation,
tighten first the 2 top clamp bolts to 9-10 Nm. Alternate between the
2 bolts until torque setting is achieved and the top of each clamp is
sitting flush against the stem body.
STEP 4:
When you are satisfied with the handlebar position and orientation,
alternatively tighten the 4 bolts screwed into the top crown in a
cross pattern to 10-12N.m
STEP 5:
Install and tighten the 2 remaining M6x25mm bottom clamp bolts to
9-10 Nm. Alternate between the 2 bolts until torque setting is achieved.
There should be an assembly gap between the clamps and the stem body
STEP 5:
Install and tighten the 2 remaining M6x25mm bottom clamp bolts to
9-10 Nm. Alternate between the 2 bolts until torque setting is achieved.
There should be an assembly gap between the clamps and the stem body
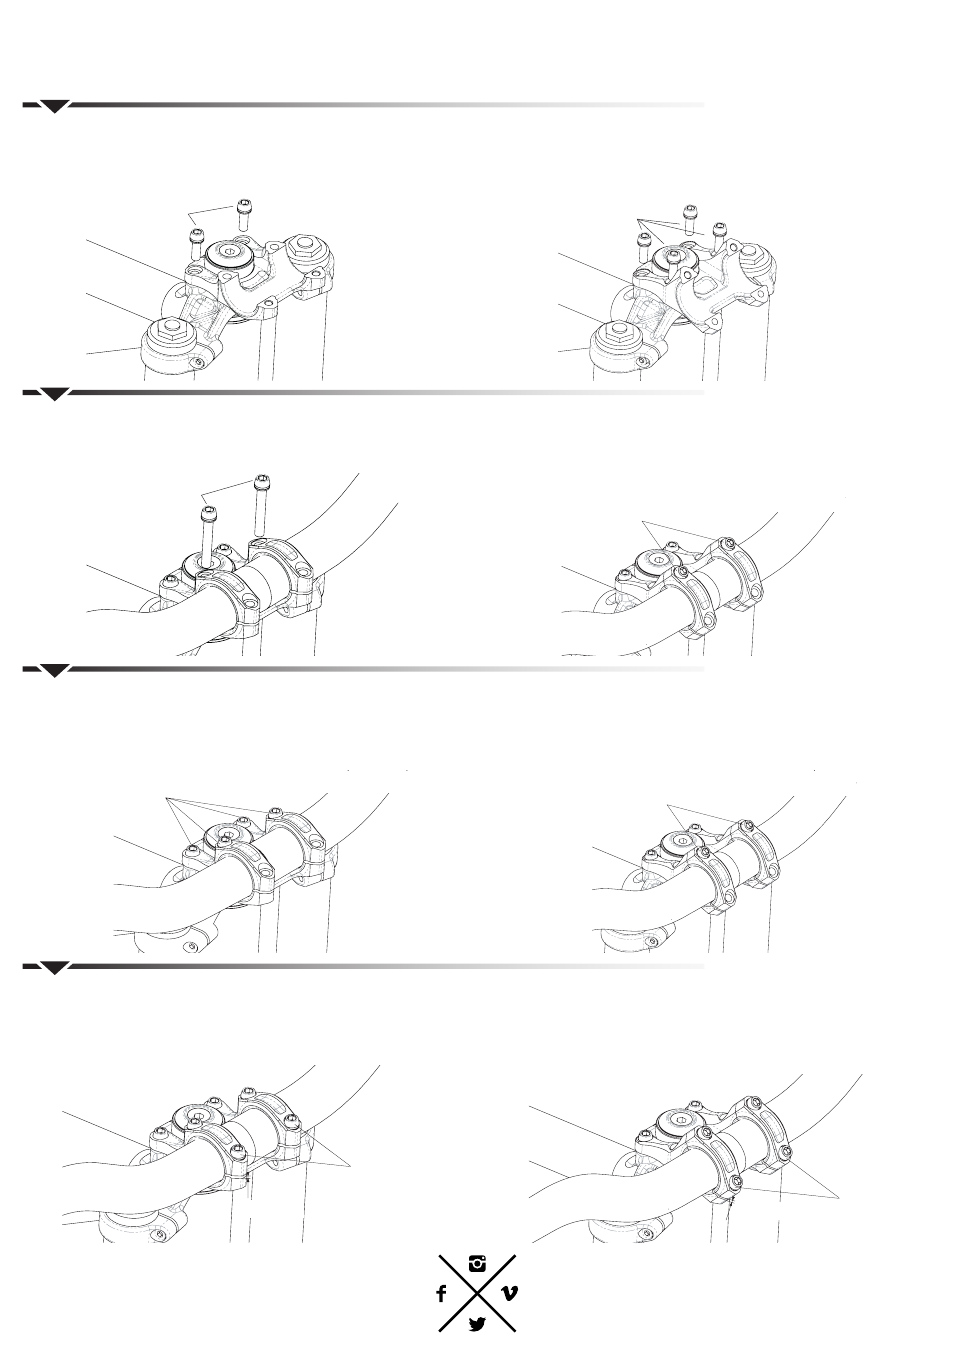
40mm DIRECT MOUNT STEM INSTALLATION:
50mm DIRECT MOUNT STEM INSTALLATION:
STEP 2:
Install the direct mount stem on the top of the upper crown and thread
in by hand the 2x M6x18mm bolts
STEP 1:
Remove the existing stem if present
STEP 1:
Remove the existing stem if present
STEP 2:
Install the direct mount stem on the top of the upper crown and thread
in by hand the 4x M6x18mm bolts. Tighten the 4 bolts in a cross pattern
to 10-12 Nm torque
STEP 3:
Install the handlebar in the desired position and fit the 2 top clamps.
Install the 2x M6x25mm top clamp bolts and slightly tighten them
STEP 3:
Install the handlebar in the desired position and fit the 2 top clamps.
Thread by hand the 2x M6x40mm bolts and slightly tighten them
2 x M6x18mm
2 x M6x40mm
2 x M6x40mm
2 x M6x25mm
9-10 N.m
Assembly gap
Assembly gap
4 x M6x18mm
10-12 N.m
2 x M6x25mm
9-10 N.m
2 x M6x25mm
9-10 N.m
2 x M6x25mm
9-10 N.m
hopetech.com