Setting up the vs-20, Operation of the vs-20, Vs-20 shown with optional large remote display – Hall Research VS-20 User Manual
Page 2
Setting up the VS-20
• Make sure the unit is powered off.
• Connect your video sources to the input connectors (labeled IN 1 through 20)
• Connect the Monitor or projector to the connector (labeled OUTPUT).
• Connect the keypad to the RS232 port on the device (labeled KEYPAD).
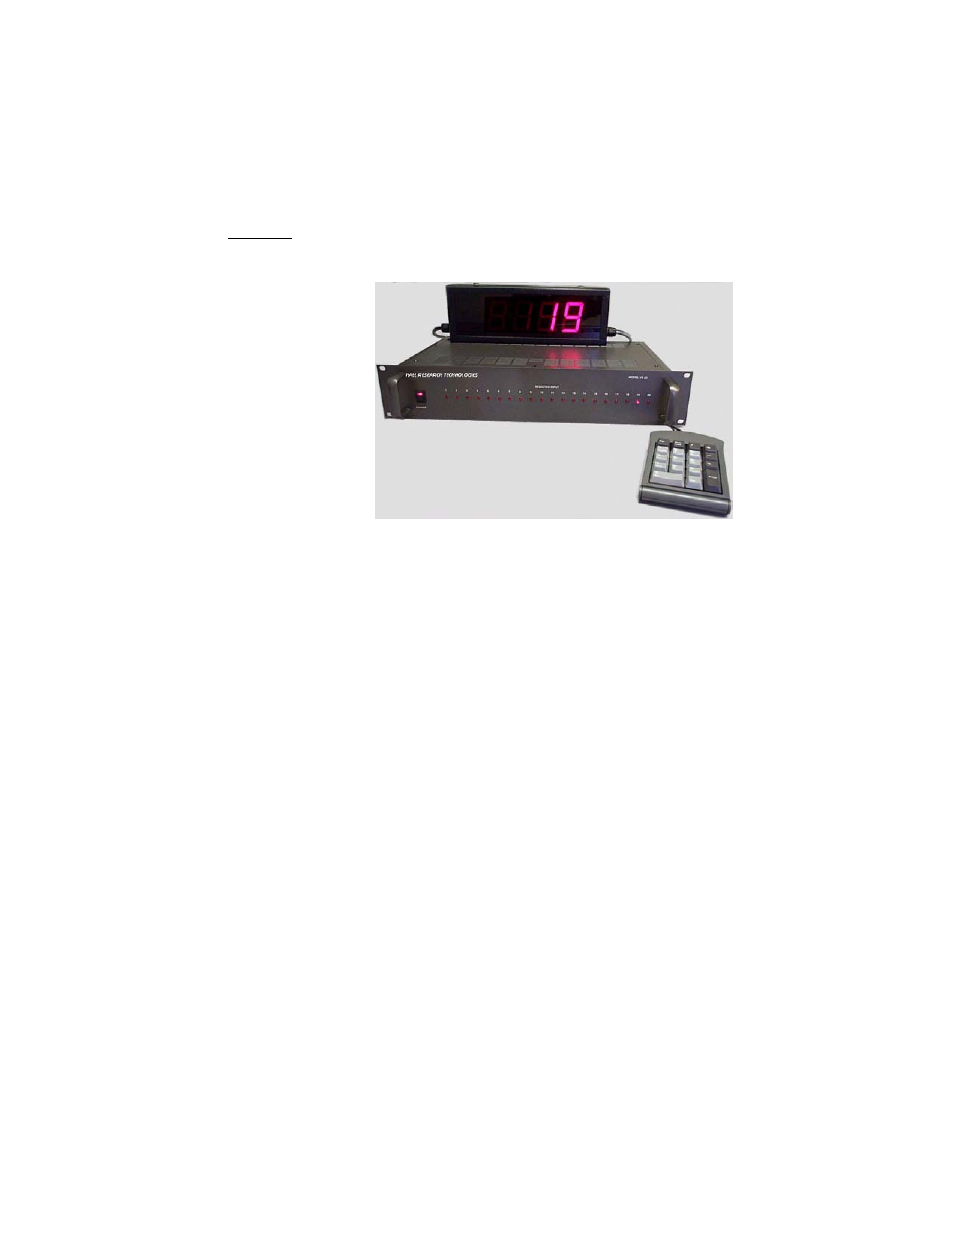
• Connect the optional large external numeric display to connector labeled DISPLAY.
• Plug the power cord to the unit and turn the unit on using the front panel switch.
VS-20 Shown
with
Optional
Large Remote Display
Operation of the VS-20
Upon power-up, the device performs a self-test and selects the last displayed channel (also recalls the compensation level
that was used for that channel.
Select input channels simply by pressing the following key sequence on the keypad:
Single or Double digit input channel number, followed by ENTER
For example, to select input #12 punch
: 12e
When selecting a channel the keys, you have 5 seconds to hit enter or the operation is automatically cancelled. So if you
stop for more than 5 seconds, the keypad automatically resets itself. Also, if you press a key that is unexpected (such as
Esc or *) or if the channel is out of range, it will be ignored and the keypad resets once again.
Special Characters:
¾
To blank the output signal altogether, enter zero for input.
i.e.:
0e
¾
To apply compensation to any input press:
+
This clears up the display when long cables are used. The LED on the front panel will be brightened.
¾
To turn compensation off for a particular input press:
-
This causes the signal gain to go down, and the LED on the front panel will be dimmed.
*** The compensation setting for each channel is stored in non-volatile memory ***
Page 2 of 4
12/01/05