Fig. 3, Fastening the ramp to the landing – EZ-ACCESS GATEWA SOLID SURFACE PORTABLE RAMP User Manual
Page 5
-5-
3.
FASTENING THE RAMP TO THE LANDING
The Gateway
ramp’s top lip transition plate must be fastened to the landing before use.
If your ramp includes handrails, it is necessary to install the end brackets on the ramp before
fastening the ramp to the landing (refer to SECTION 4).
3.1.
Place the ramp’s top lip transition plate so it extends onto the landing as far as possible.
3.2.
IF RESTING ON A WOODEN LANDING:
3.2.1.
Fasten
top lip transition plate by installing one ¼” x 1” long self-drilling, stainless
steel wood screw (not supplied) through each hole.
3.3.
IF RESTING ON CONCRETE LANDING:
3.3.1.
Use the two pre-drilled holes in the top lip transition plate as a template to mark
the positions to drill.
3.3.2.
Using a ¼” masonry bit, drill two holes at the marked locations. Drill to a depth
specified by the pin drive anchor manufacturer’s instructions.
3.3.3.
Align the top lip transition plate over the drilled holes.
3.3.4.
Install
¼” x 1 ½” pin drive concrete anchors (not supplied) into the holes of the
upper transition per the pin drive concrete anchor
manufacturer’s instructions.
3.4.
TEMPORARY INSTALLATION:
3.4.1.
Use the two pre-drilled holes in the top lip transition plate as a template to mark
the positions
and drill two 1/4” holes at least 1-1/2” deep.
After drilling, make sure that the holes are free of any residue and/or
debris.
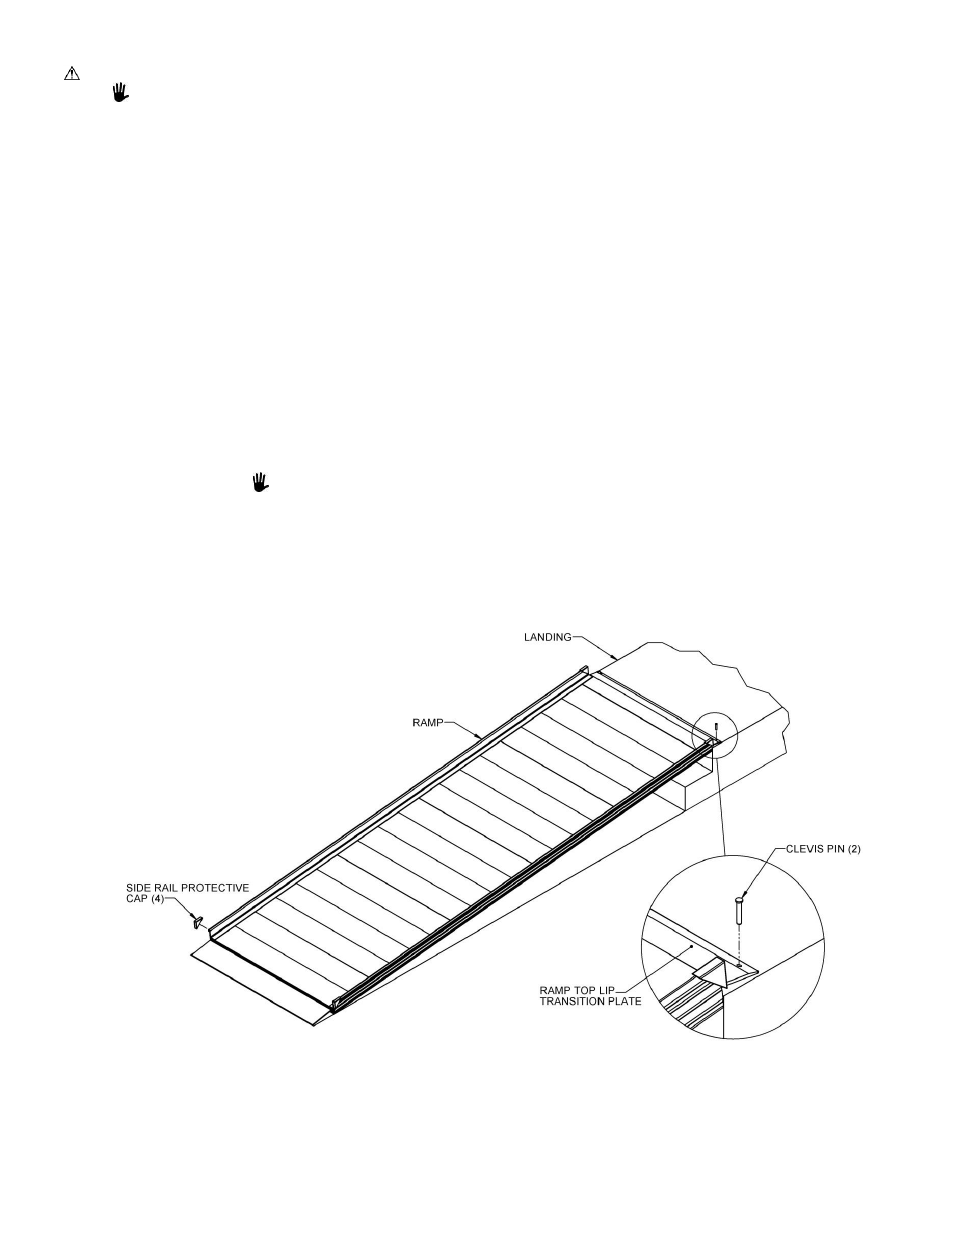
3.4.2.
Insert the supplied clevis pins through the holes in the top lip transition plate and
extending into the holes drilled in the previous step (FIG. 3).
3.5.
Install protective caps over side rail corners by placing one cap on each side at both the
top and bottom of the ramp. If necessary, use construction adhesive to bond the cap to the
ramp. (FIG 3.).
FIG. 3