Rear panel – Epifani Piccolo 600 Amplifier User Manual
Page 5
1 2 3
4
5
6 7
8
9
10 11 12
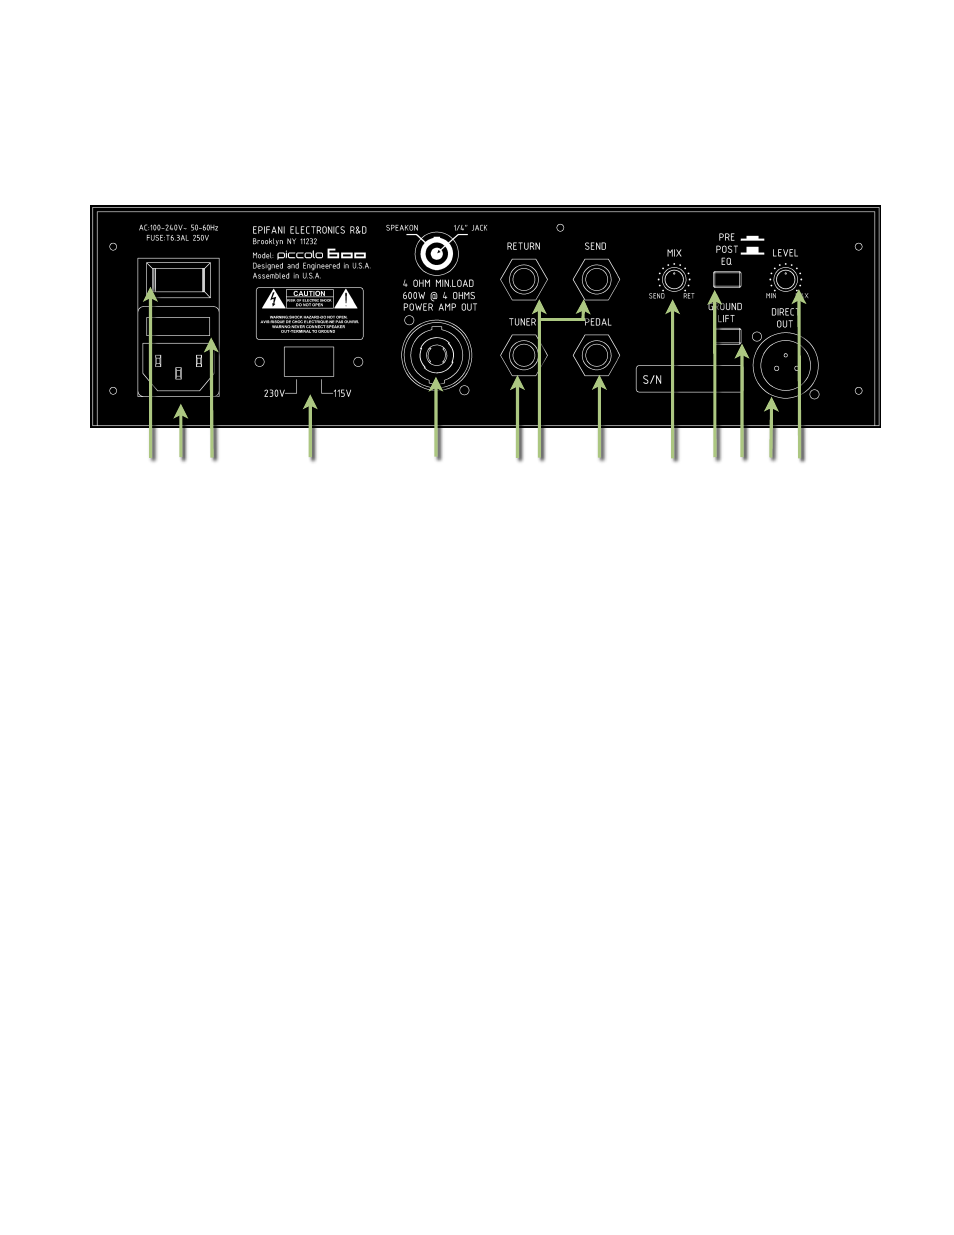
REAR PANEL
1. Power Switch – Turns the amplifier on and
off. Upon power-up, there is about a 3
second delay before the amplifier is fully
functional as it goes through a self
diagnostic process.
2. IEC Receptacle – Firmly plug the included
IEC compliant AC cable power cable in
here.
3. Fuse Sled – Contains the fuse. No
replacement fuse is needed. If the fuse
blows, contact Epifani.
4. Voltage Selector – Before turning on
amplifier, be sure you set this switch to the
proper line voltage of your region.
5. Speaker Output – This is a Neutrik
Speakon™/Phone Jack Combo connector.
Connect either a Speakon twist-lock or ¼”
phone speaker cable. For best results, use
Speakon to Speakon. If using a Speakon
to ¼” phone, turn the amplifier off before
making connections. Take care not to
exceed the minimum impedance of 4
Ohms.
6. Tuner Out – Use this output to connect an
electronic tuner. The Tuner Out sends
signal out even when the amplifier is muted
allowing for silent tuning.
7. Effects Loop – Use the Send jack to
connect to the input of external signal
processors. Connect the the output of your
signal processor to the Return jack.
8. Pedal – TRS 1/4” connector. Connect the
optional two-button foot-switch to this jack.
Button one will engage the Mute control
while button two activates the Mid Cut.
9. Mix – This feature
allows you to mix
between a dry (uneffected) signal and a
wet (effected) signal when an external
signal processor is connected to the Effects
Loop. When using a processor like a
Graphic EQ or a Compressor/Limiter, turn
the Mix all the way to right. This ensures
that 100% of the signal will go to the
processor. When using Reverb, Delay or a
Chorus/Flanger-type effect, gradually rotate
the knob to the left until the desired blend is
achieved.
10. Pre/Post EQ – Sets the DI Output to either
pre-EQ or post-EQ.
11. Ground Lift – Disconnects the chassis
ground from the DI Out signal to reduce 60-
cycle hum.
12. DI Output – This is a balanced, low
impedance output. Use a standard XLR
mic cable to send a signal to a mixing
console or recording device.
13. Level – This adjusts the output level of the
DI output.
13