Front panel features – Epifani UL Series User Manual
Page 5
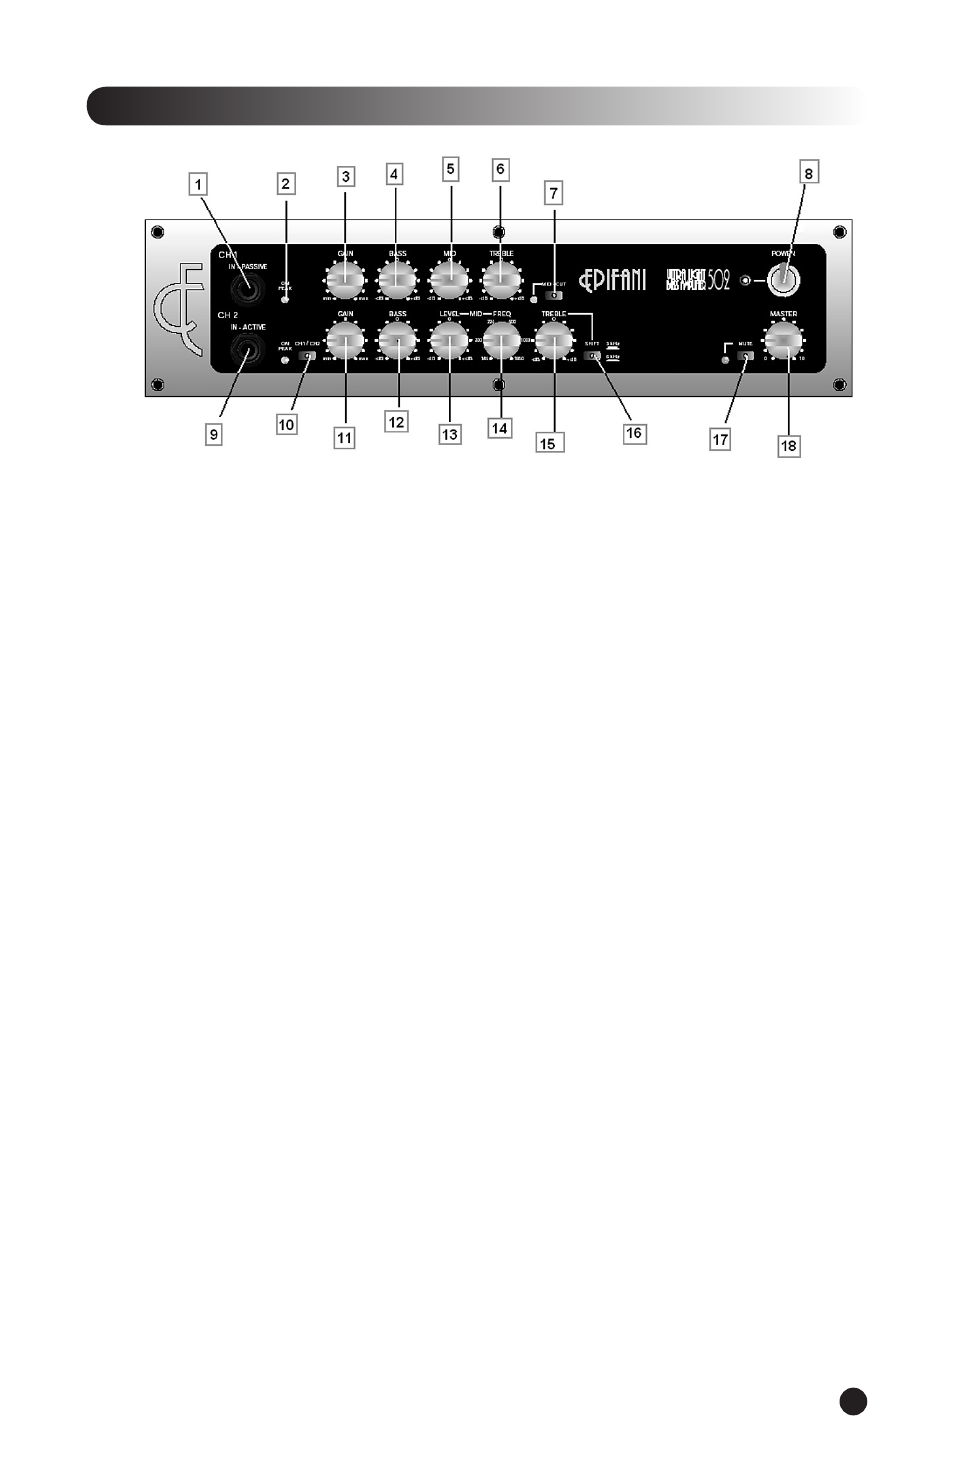
• Front Panel Features
1.) Passive Input – Input jack for a passive instrument.
2.) LED Channel Indicator & Peak Indicator – Indicates channel switching and gain limits.
3.) Channel 1 Gain – Adjusts the input signal to the appropriate level.
4.) Channel 1 Bass Control – Adjust the amount of low frequency
5.) Channel 1 Mid- Midrange Control – Adjusts the amount of midrange frequencies
6.) Channel 1 Treble Control – Adjusts the amount of high frequencies
7.) Channel 1 Mid-cut switch/w led – Eliminates specifi c midrange frequencies
8.) Power Switch – Turns the Amplifi er on or off.
9.) Active Input – Input jack for an instrument with Active electronics.
10.) Ch1/Ch2 Selector – Switches between Channel 1 and Channel 2 (engaged either manually or via
the footswitch).
11.) Channel 2 Gain – Adjusts the input signal to the appropriate level.
12.) Bass – Adjust the level accordingly to your preference. Start at the twelve o’clock position and
add/ deduct, as you prefer.
13.) Channel 2 Parametric Midrange Level Control – This feature allows you to boost or cut a
particular frequency chosen by the Mid-Frequency Control (14). * When the Level Control is set
at 12 o’clock it is at “0” (it is neither boosting nor cutting any frequencies), therefore you will
hear no difference when adjusting the Mid Frequency Control (14).
14.) Channel 2 Parametric Mid Frequency Control – This control allows you to select a center point
frequency between 180 & 2000 HZ. – That bandwidth can be boosted or cut via the Mid Level
Control (13).
15.) Channel 2 Treble Control – Adjusts the amount of high frequencies
16.) Channel 2 Treble Shift Selector – This feature “shifts” the treble frequency from 3 kHz to 6 kHz
17.) Master Mute Switch – Is engaged manually or via the optional footswitch. The Mute switch
mutes the amplifi er section but not the pre-amp section.
18.) Master Volume – Adjusts the overall output of the amplifi er.
5