0 maintenance – ENMET ISA-M User Manual
Page 13
ISA – M
ENMET Corporation
11
7.0 Maintenance
7.0 Maintenance
The ISA – M gas monitor is a safety instrument and requires periodic testing and calibration at regular intervals. In
addition, check for obvious mechanical damage or malfunctions such as burned out lamps. On units requiring purging,
purge the sensor periodically. This interval varies with the amount of contaminants in the atmosphere.
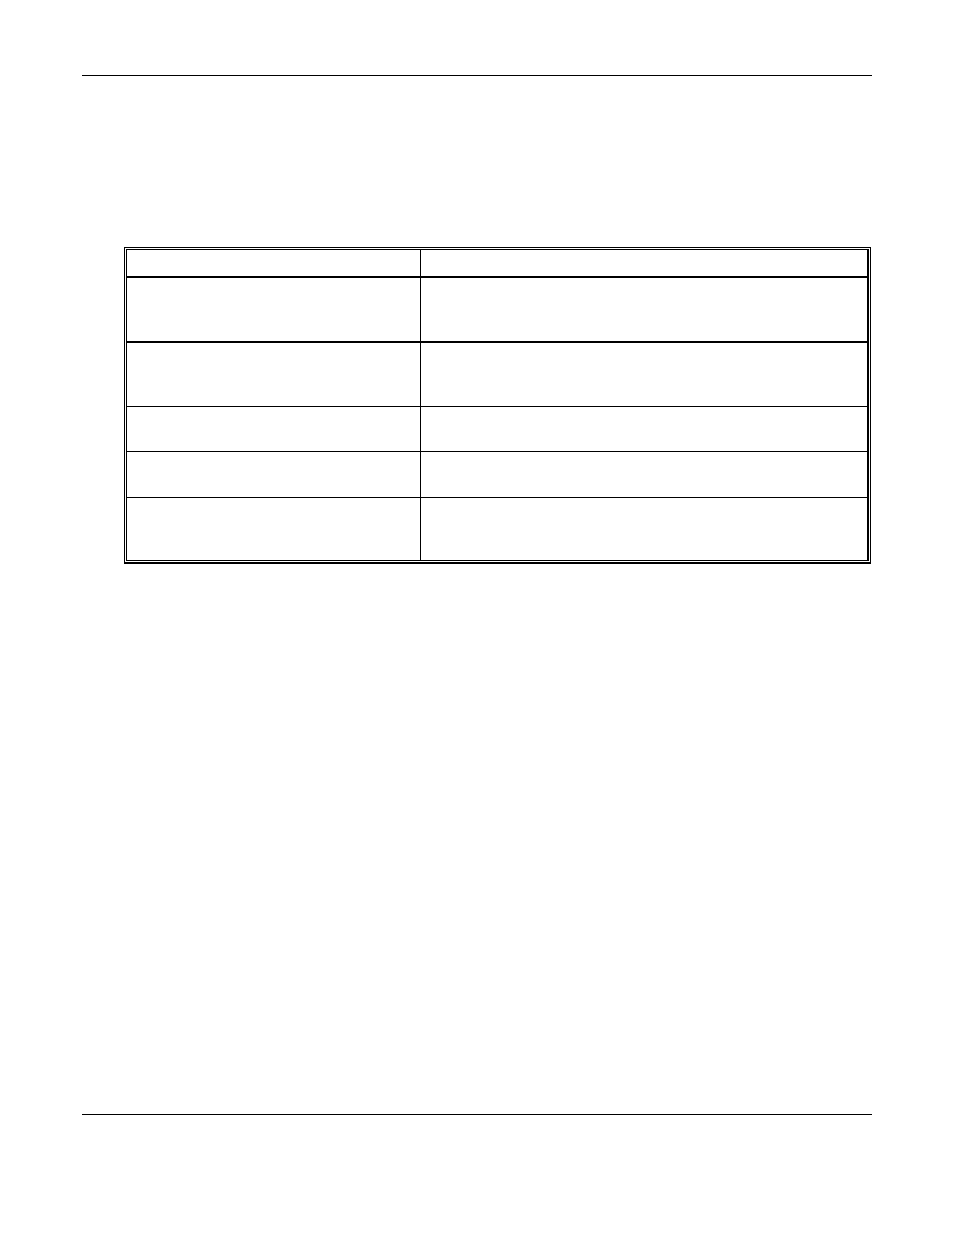
4.1 Basic Troubleshooting
Symptom
Problem/Correction
When first plugged in, the unit alarms for
up to 10 - 20 minutes.
If the unit has not been used recently, this is normal. The MOS
sensor is cold and/or contaminated. Keep unit ON or PURGE (on
units so equipped) overnight with the sensor in fresh air.
Red alarm light stays on continuously, even
after allowed to operate (or PURGED)
overnight.
Either hazardous gas conditions exist, or there is a contaminated
sensor, or a bad circuit. Contact ENMET for voltage checks.
Either green or amber or red lights do not
work.
There might be a burned out lamp.
Unit fails to alarm when calibration gas is
applied.
Recalibration may be necessary. See section 6.0 If recalibration
fails, check sensor voltage, cylinder contents and pressure.
Unit gradually creeps into alarm or
sensitive.
Either hazardous gas conditions exist, or too recalibration is
necessary. On units requiring purging, rotate to PURGE once a
week for one hour to clean sensor surface.
7.2 Sensor Replacement
The MOS sensor is durable, it can be purged of contaminants by operating in PURGE for a sufficient length of time
and at regular intervals.
Gross contamination usually occurs during unavoidable misuse. Close exposure to an open gas flame, dipping the
sensor in a hydrocarbon such as lacquer, or continuous exposure to heavy concentrations of industrial vapors will
grossly contaminate a sensor. A grossly contaminated sensor causes a continuous alarm.
If a sensor is bad, replace it.
P
ROCEDURE
:
1. Obtain a new sensor assembly. Make sure the sensor type is identical to your original sensor (019, 030, 812, 813
or 109).
2. Disconnect the orange, brown and blue sensor wires.
3. Unscrew the assembly from the sensor enclosure.
4. Replace the bad sensor and reconnect the wires.
5. Set the sensor heater voltage (See Section 4.4).
6. Recalibrate the instrument (See Section 6.0).