ENMET SPECTRUM-RAL User Manual
Page 12
ENMET Corporation
S
PECTRUM
RAL
10
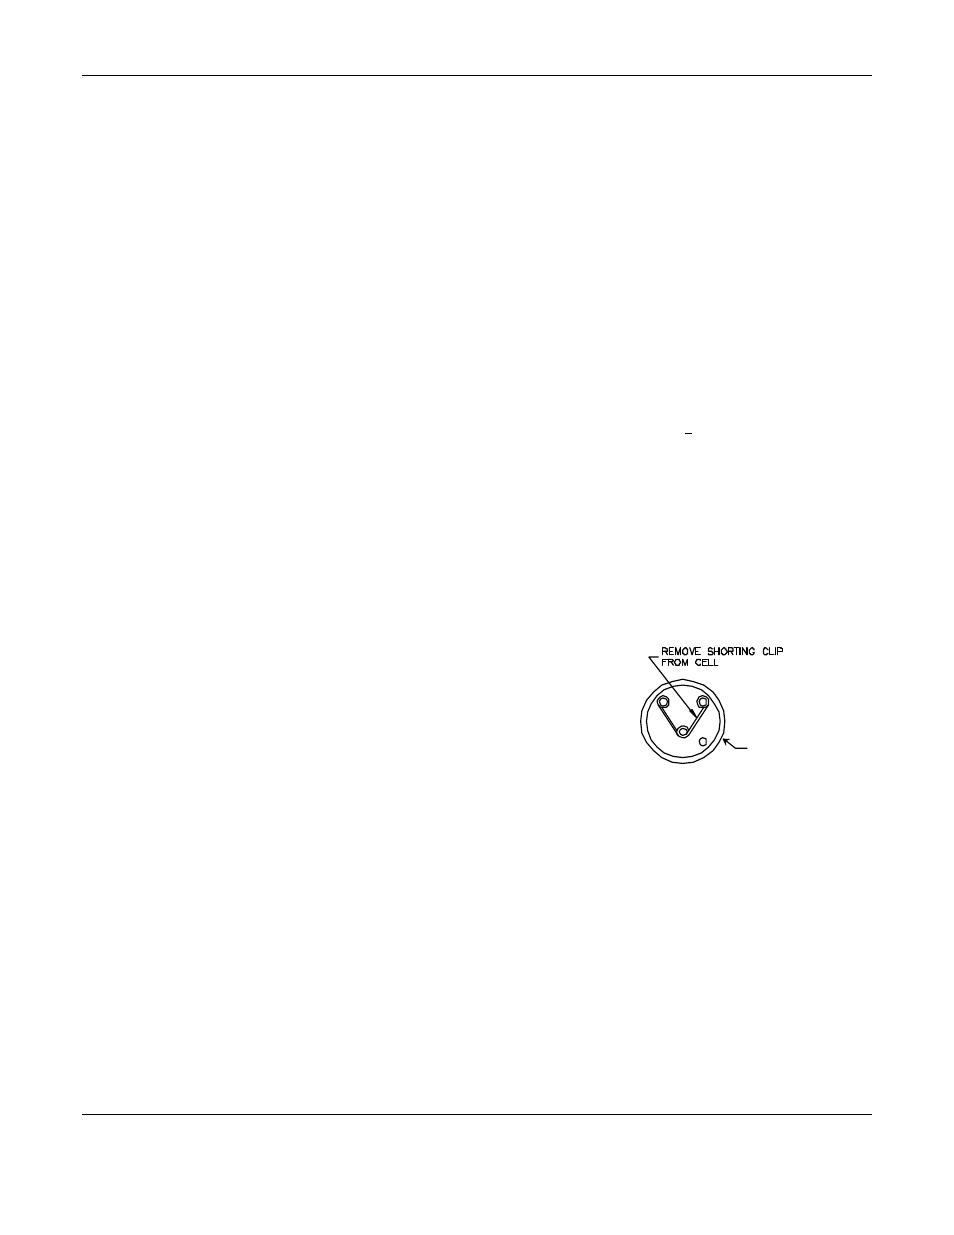
Sensor
Bottom View
4.5 Changing the Alarm Level
A valid key entry sets the instrument at the "run ZERO" location of the maintenance menu. Press the OPTION push
button twice to access the "set ALM" display, then press the SELECT button; ALM=0000" is displayed. This is
called the alarm update window, and the value displayed is the present alarm setpoint. The underscore cursor is under
the far left digit. Press the OPTION button to index the underscored digit; press the SELECT button to index the
underscore cursor one position to the right. When the desired new alarm point is set, press either the OPTION or
SELECT button to return to the alarm update window. If the new alarm setting is valid, "set ALM" is again
displayed. Press the OPTION button four times to return to the operations menu.
For the safety of the user, there is an upper limit past which the alarm setting is invalid, and the instrument does not
accept it. If an invalid alarm setting is attempted, after the numerical value is inserted in the "ALM=0000" window,
pressing the OPTION or SELECT button results in a momentary display of "INVALID" after which the display
returns to the alarm update window. Exiting the alarm update window at this point results in an alarm point setting
unchanged from the value present when the procedure was begun.
For the SPECTRUM-RAL, the factory default alarm setpoint is 10
P P M
, and the upper alarm limit is 50
P P M
.
4.6 Setting a New Key
A valid key entry sets the instrument at the "run ZERO" location of the maintenance menu. Press the OPTION button
four times to access the "set KEY" display. Press the SELECT pushbutton once; "KEY= 0000 is displayed. A new
key can be set by indexing the underscored number with the OPTION button and indexing the underscore cursor with
the SELECT button. Four digit key numbers should be selected carefully and recorded. Without the correct key, the
maintenance menu cannot be accessed. If a four digit key number is lost, call ENMET customer service personnel.
4.7 Changing Components
Changing the sensor requires that the front of the instrument be removed; remove the four phillips head cover retaining
screws, and then the cover.
A sensor must be replaced when it no longer responds adequately to the target gas. This is indicated by a low gas
concentration reading when exposed to a known concentration of the target gas, and the inability to calibrate the
instrument, with a "C-FAULT" display after calibration. The expected sensor lifetime in normal environments is one
to two years.
C
AUTION
: New sensors come with a shorting clip that must be removed
for proper operation.
Remove the front cover of the instrument enclosure. Unplug the sensor
from the circuit board. Remove the shorting clip from the new sensor
and plug it in place. Allow the sensor to stabilize in the instrument with
the power on for one hour before recalibrating.
Figure 5: Remove Shorting Clip
The initial calibration of a new sensor must be performed with the front cover of the enclosure removed. A calibration
cup is provided with the calibration kit. Follow the procedure for calibrating the instrument as outlined in Section 4.4
of this manual with the following modification.
N
OTE
: During this procedure make sure the
RED
calibration cup, 02552-008, stays centered over the sensor.
During the application of the span gas, the counter counts down from 120. When the counter gets down to 30,
adjust the potentiometer next to the display module on the instrument PC board, so that the display to the right
of the counter reads 0.65v. This is a one-time adjustment to align the sensor output with the instrument
electronics. It should only be performed upon sensor replacement. All future calibrations should follow the
procedure in Section 4.4.
Replace the front cover on the instrument enclosure. Calibrate the instrument according to the procedure in section 4.4.