Warning – EarthQuake 600050B User Manual
Page 14
Check for parts online at
www.getearthquake.com or call 800-345-6007 M-F 8-5
14
Operator's Manual
Trimmer Mower 600050 Series
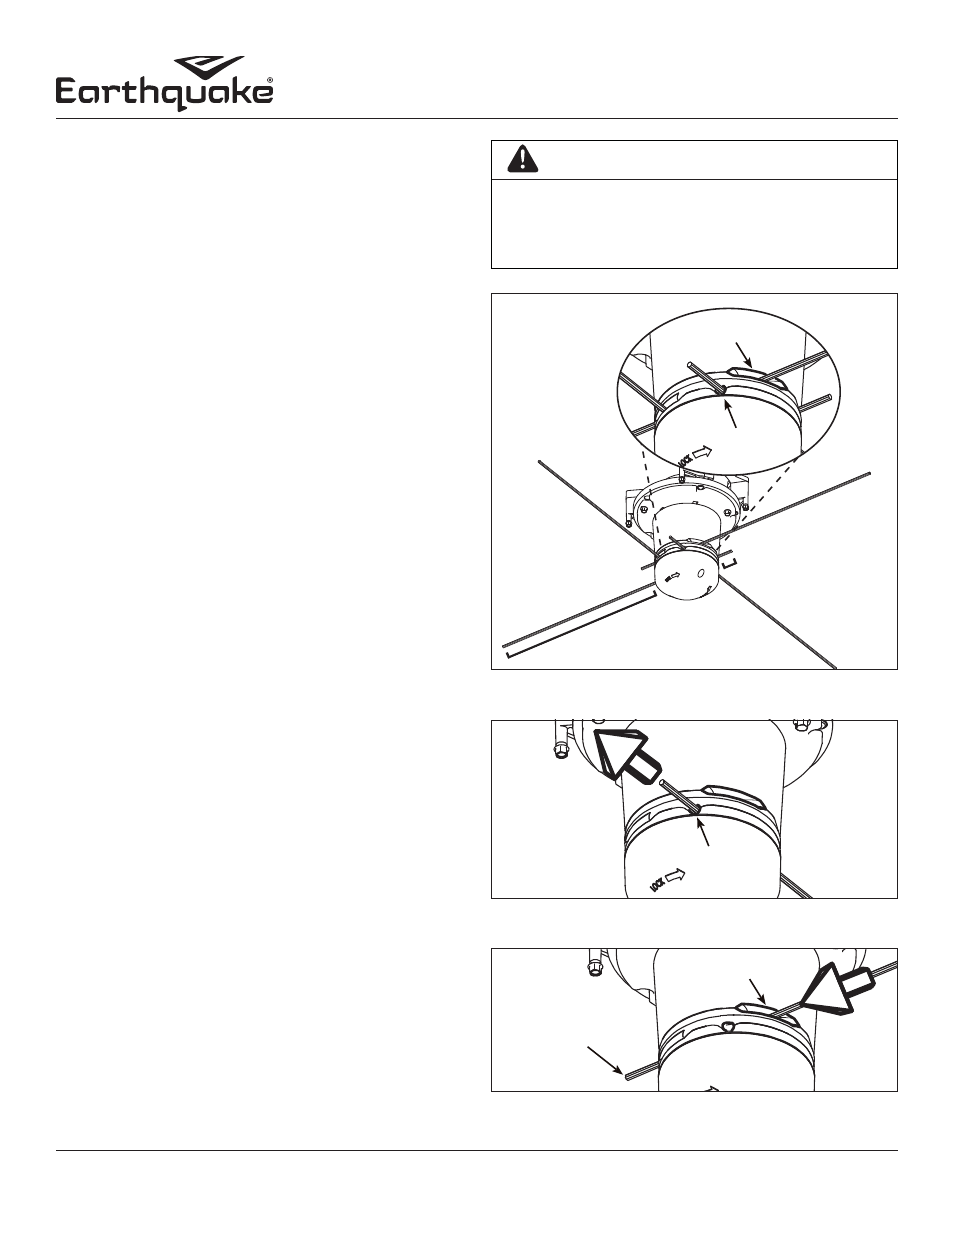
FIGURE 6: Trimmer head and trimmer line
TRIMMER HEAD SERVICE AND ADJUSTMENT,
SLIDE-THROUGH VERSION
Trimmer Line on Slide-Through Version
For the best performance, use a heavy gauge (0.155" diameter)
trimmer line. Recommended line cut to proper length can be
obtained through your dealer. If necessary cut the length of the
trimmer line to 15".
Do not allow the length of the lines to vary more than one inch.
This is important to make sure the trimmer head is balanced
and does not vibrate.
NOTE: To extend the life of the trimmer line, keep the
trimmer line moist. If not kept moist, the nylon trimmer line
will become dry and brittle. Keep extra trimmer line in a can
of water. The line will then stay flexible and easy to change.
A flexible line will also last much longer.
How to Replace the Trimmer Line on Slide-Through Version
Familiarize yourself with the trimmer head. (SEE FIGURE 6)
Trimmer head has four small exit holes and four large entrance
holes. Properly loaded trimmer line will have one inch exposed
out the small exit hole and the remaining portion of the line
sticking out of the large entrance hole.
1. Before replacing the trimmer line make sure the engine is
stopped and wait for all moving parts to come to a stop.
2. Remove old line pieces from trimmer head.
NOTE: One inch of trimmer line should be exposed from the
small exit hole. Grab onto this exposed line a pull old line
out of trimmer head through the exit hole. SEE FIGURE 7
3. Install the new trimmer line into the large entrance hole,
making sure to only expose one inch of line out of the exit
hole. SEE FIGURE 8
NOTE: Too little of line exposed on the exit side can make
it difficult to remove old line. Too much line exposed can
cause the line to pull out of the trimmer head.
4. Pull with force on the entrance hole side of the line to
ensure that the line is securely seated in the trimmer head.
NOTE: Trimmer line should only be able to feed in one
direction through the trimmer head. Use of recommended
line is important for proper function.
5. Repeat steps 1-4 for each piece of replacement trimmer
line.
WARNING
BEFORE YOU INSPECT, CLEAN OR SERVICE THE
TRIMMER, STOP THE ENGINE. MAKE SURE THAT ALL
MOVING PARTS HAVE STOPPED. DISCONNECT THE
WIRE FROM THE SPARK PLUG.
FIGURE 8: Insert new trimmer line into entrance hole
entrance hole
exit hole
1" of exposed trimmer
line on exit hole side
remaining trimmer line
on entrance hole side
exit hole
FIGURE 7: Pull old trimmer line out through exit hole
entrance hole
stop with 1" exposed
out exit hole