Se series sound enclosures – Display Devices SE-B1 Series Projector Sound Enclosure User Manual
Page 2
03/08
2
tel: 303.412.0399
www.displaydevices.com
fax: 303.412.9346
5880 Sheridan Blvd., Arvada, Colorado 80003
SE Series Sound Enclosures
Thanks for purchasing a Display Devices product. We’re sure your customer will use this product for
years to come. Our products are designed to be maintenance-free saving you future service time. If you
experience any difficulties, please contact us at 303-412-0399. Thank you for your support.
The Sound Enclosure is designed to relocate projector noise to above a false ceiling. Sound Enclosures
work best when installed as part of a complete sound isolation system. For optimum sound isolation, we
recommend the following:
Add intake and exhaust ducts to the enclosures’ fire dampers – six feet or longer – this disperses
the sound away from the area it originates.
Insulate around the upper cavity on top of the ceiling tiles/media. Insulating this area increases
the barrier you create between the viewer and the noise source.
Plumb the unit to an external fresh air source, plumb the exhaust to another area away from the
viewing room.
Air intake is located on the projection port side.
Tools required
: Material Lift
Phillips head screwdriver
Powered screwdriver with Phillips bit
¾”, 9/16” and 7/16” socket and open end wrenches
5” socket extension
Important:
DO Ensure the ceiling structure is capable of holding at least four times the combined weight of the
enclosure and projector. This is a minimum requirement. Follow any local or state codes that apply to
your specific area. We recommend two people and a material lift for this installation.
1.)
Install structural support for sound enclosure unit – utilize 3/8” (M10) threaded rod and
hardware to bolt the unit into place. We recommend using a structural channel above the
unit for lateral positioning of the box.
2.)
Remove access panel(s) to access mount holes (on the 2x2 configuration, one set of mount
holes are accessible at the fan intake). You may also reach in through the projector port for
access.
3.)
Raise the unit up on a material lift to the appropriate vertical height. The seam where the
upper and lower cavities are together in the closed position should be slightly above your
finished ceiling line. Be sure to have a sufficient amount of threaded rod to provide leveling
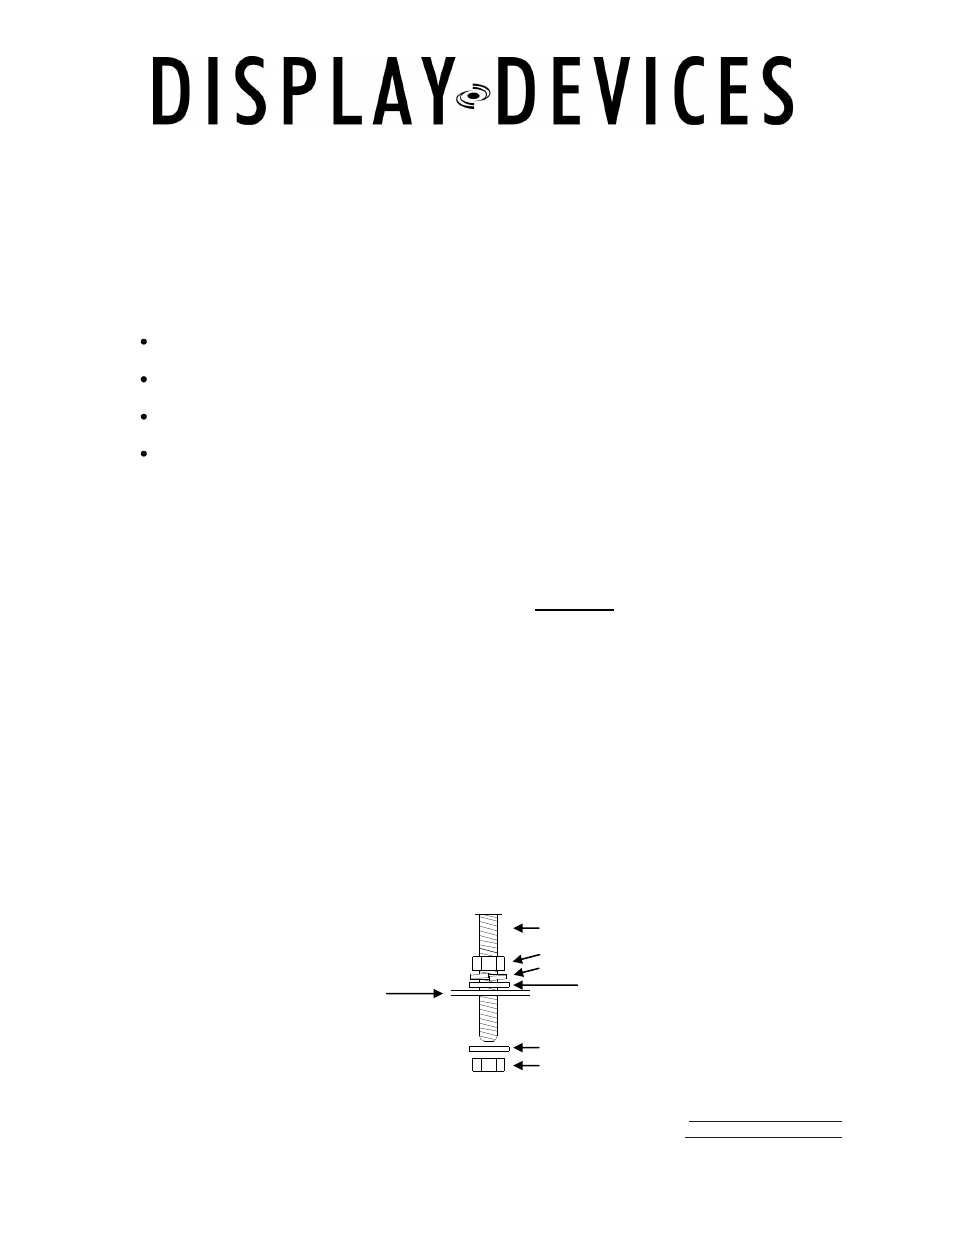
room. Add hardware as follows for leveling: above unit – nut/lock washer/flat washer;
underside of unit – washer and nut. Do not tighten yet.
Threaded rod
Nut
Flat washer
Split lock washer
Flat washer
Nut
Sound Enclosure