Care and maintenance, Porcelain enamel cooktop, Oven shelves – Danby DER241WC User Manual
Page 16: Lift-up cooktop, Lift-off oven door
Clean the shelves with an abrasive cleanser or steel wool. After cleaning, rinse the
shelves with clean water and dry with a clean cloth.
PORCELAIN ENAMEL COOKTOP
The porcelain enamel fi nish is sturdy, but breakable if misused. This fi nish is acid-resistant. However, any acidic foods
spilled (such as fruit juices, tomato or vinegar) should not be permitted to remain on the fi nish.
OVEN SHELVES
CARE AND MAINTENANCE
LIFT-UP COOKTOP
•
Clean the area under the cooktop often. Built-up soil, especially grease,
may catch on fi re.
•
To make cleaning easier, the cooktop may be lifted up and propped open.
•
Be sure all surface elements are turned off before raising the cooktop.
•
Remove the front surface and drip pans. See the Surface Elements and
Drip Pans section. Grasp the two front surface element wells and lift the
cooktop up and prop it open with the prop rod provided.
•
After cleaning underneath the cooktop with hot, soapy water and a clean
cloth, hold the cooktop up, return the prop rod to its storage position and
lower the cooktop until it snaps into position. Be careful not to pinch your
fi ngers. Replace the two front drip pans and surface elements. See the
Surface Elements and Dip Pans section.
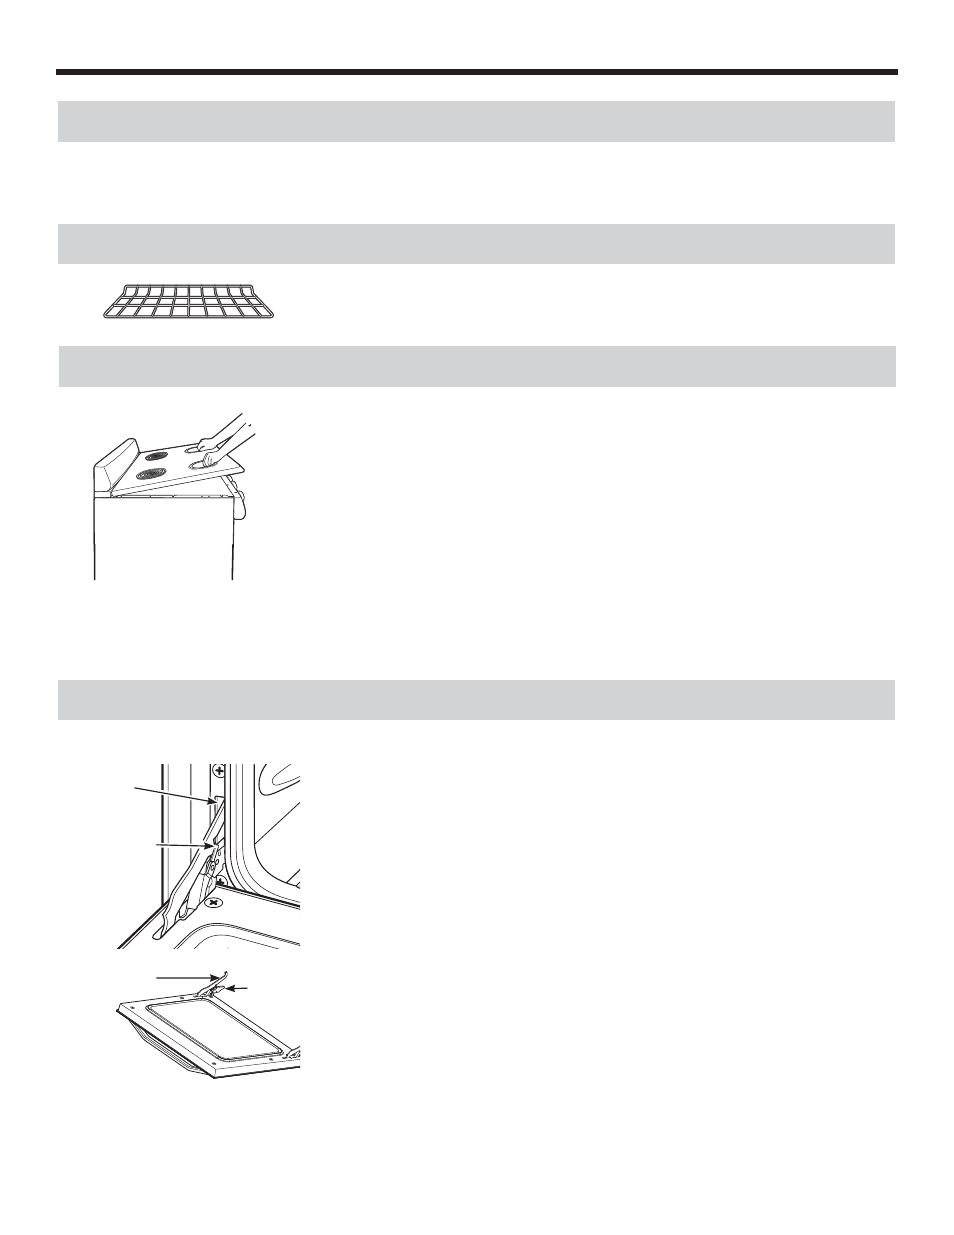
LIFT-OFF OVEN DOOR
The oven door is removable, but it is heavy. You may need help removing and
replacing the door.
To remove the door:
1. Open the door to the full open position.
2. Pull the hinge locks up over the hinge hooks on both sides.
3. Grasp the door fi rmly on each side, lift slightly and pull it straight out and
away from the oven.
To replace the door:
1. Firmly grasp both sides of the door at the top.
2. Insert and seat the upper and lower hinge arms into the oven slots.
3. Push the hinge locks down from the hinge hooks.
4. Close the oven door and make sure it is working properly. If it is not
working properly, remove and replace it following the above steps.
DO NOT ATTEMPT TO CLOSE THE DOOR UNTIL THIS STEP IS
COMPLETE. THE HINGE OR DOOR COULD BE DAMAGED.
Slot
Hinge
lock
Upper hinge
arm
Lower hinge
arm
14