Da-Lite UTB Contour User Manual
Page 7
7
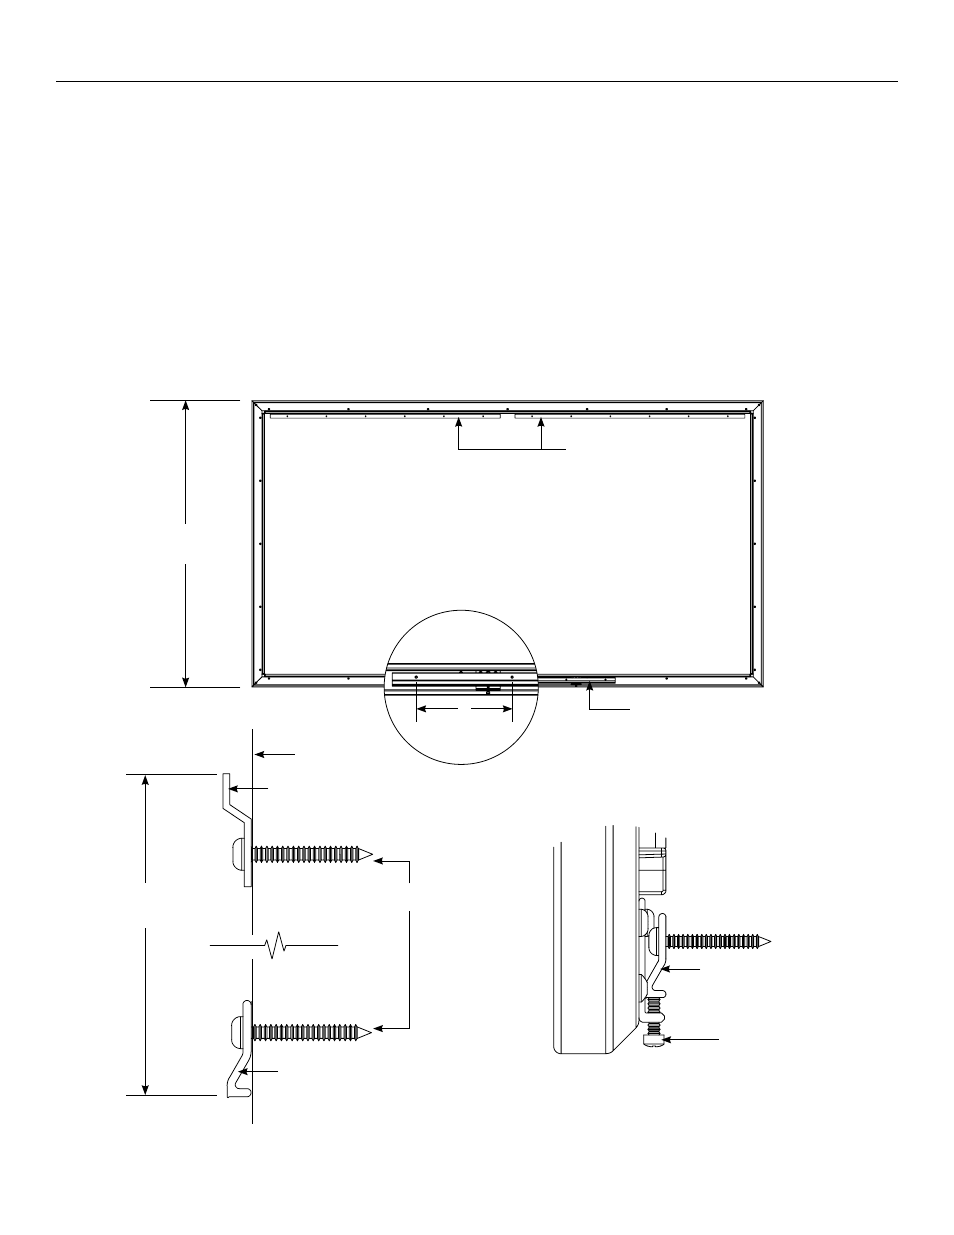
1. Secure the (2) large top wall bracket to wall studs at the desired
height. Make sure the brackets are level. The top of the screen will
be 2–1/4" above the top of the edge of this wall bracket when
mounted. You will need at least a 3" clearance above the brackets to
hang the screen (Figure 9).
2. To install the large bottom wall bracket, you must measure the
overall height of the screen and subtract 3". Draw a line on your wall
between the top edges of the two top wall brackets. Mark the center
point between the top wall brackets on this line. Using your screen
height minus 3”, measure down from this center point and mark the
wall. This will be the center point of the bottom edge of the bottom
wall bracket. Level the bottom wall bracket and mark the wall for the
six screw holes in this bracket (Figure 9).
Installation of Screens 104" and Over in Viewing Width
Overall Height
of Screen
Figure 9 — Screens 104" and Over in Viewing Width
(2) Large Wall Brackets
Large Bottom Wall Bracket
Fillister Screw
(2) Large Wall Brackets
Wall
Large Bottom
Wall Bracket
Large Bottom
Wall Bracket
Screws Not Provided
Overall Height
of Screen Less 3"
8"
3. Attach the bottom wall bracket to the wall.
4. Lift the screen at least 3" over the top wall brackets. Lower the
screen until the frame hooks onto the top wall brackets.
5. To secure your screen against wall, locate the fillister screws in
the bottom frame brackets. Tighten the screws until they touch
the bottom wall bracket, then rotate two more turns (Figure 9).
Note: This screw can be rotated up to three more turns if
stretching of viewing surface is needed.