Installation (continued) – Da-Lite Pro Imager Horizontal Masking System User Manual
Page 4
4
1. To install the Pro Imager over a Da-Lite Perm-Wall screen you
will need to place the supplied wooden spacers between the
screen and the wall.
Da-Snap and Imager screens do not require any spacers.
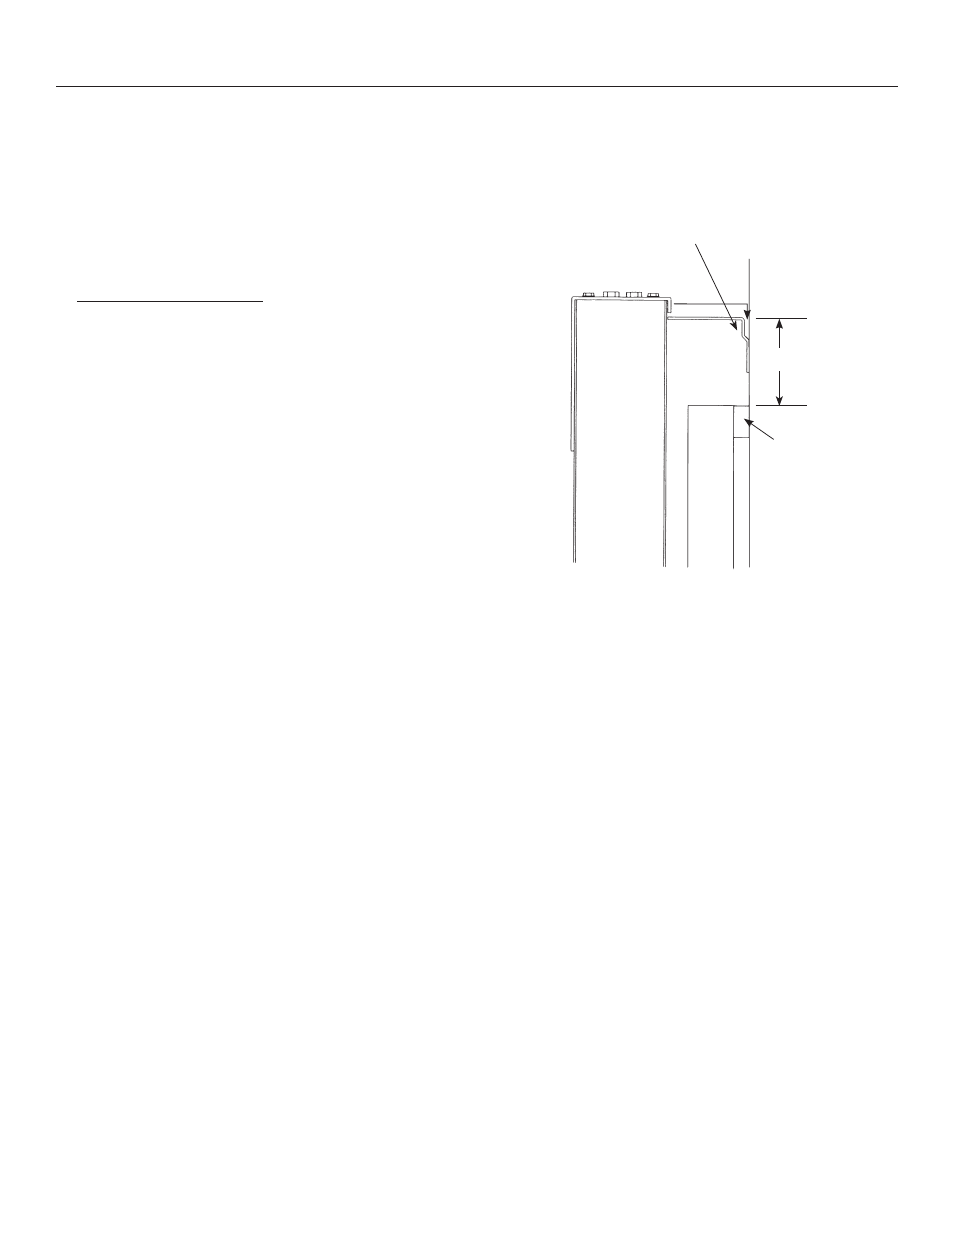
2. Refer to Figure 3 for hanger bracket location. Dimension A
will vary depending on the type of screen you have.
Dimension A is measured from the top of the screen frame to
the top of the hanger bracket.
Screen Type
Dimension A
Perm-Wall
3-7/8"
Imager
3-7/8"
Da-Snap
4-3/8"
Securely fasten the hanger bracket to the wall. It is
recommended that you use #10 x 1-3/4" wood screws
(not supplied) and fasten into the wall stud. Use a level
to make sure the bracket is level.
To provide easy access to the limit control switches (see
adjustment procedures) you will need at least 7" clearance
above the top of the Pro Imager.
3. Hang the frame assembly on the hanger bracket as shown
in Figure 3.
4. Fasten the bottom bracket to the wall with the appropriate
type fastener for your wall.
Installation (Continued)
Hanger
Bracket
A
Spacer
Block
Figure 3
Scr
een