Frame assembly – Da-Lite Pro Imager Horizontal Masking System User Manual
Page 3
3
Tools Required For Assembly
5/16" socket or wrench
Carpenters level
Tape Measure
1. Unpack frame pieces and lay them face down on the floor.
The top frame has the roller and motor assembly attached
to it. The side frames are the two short pieces.
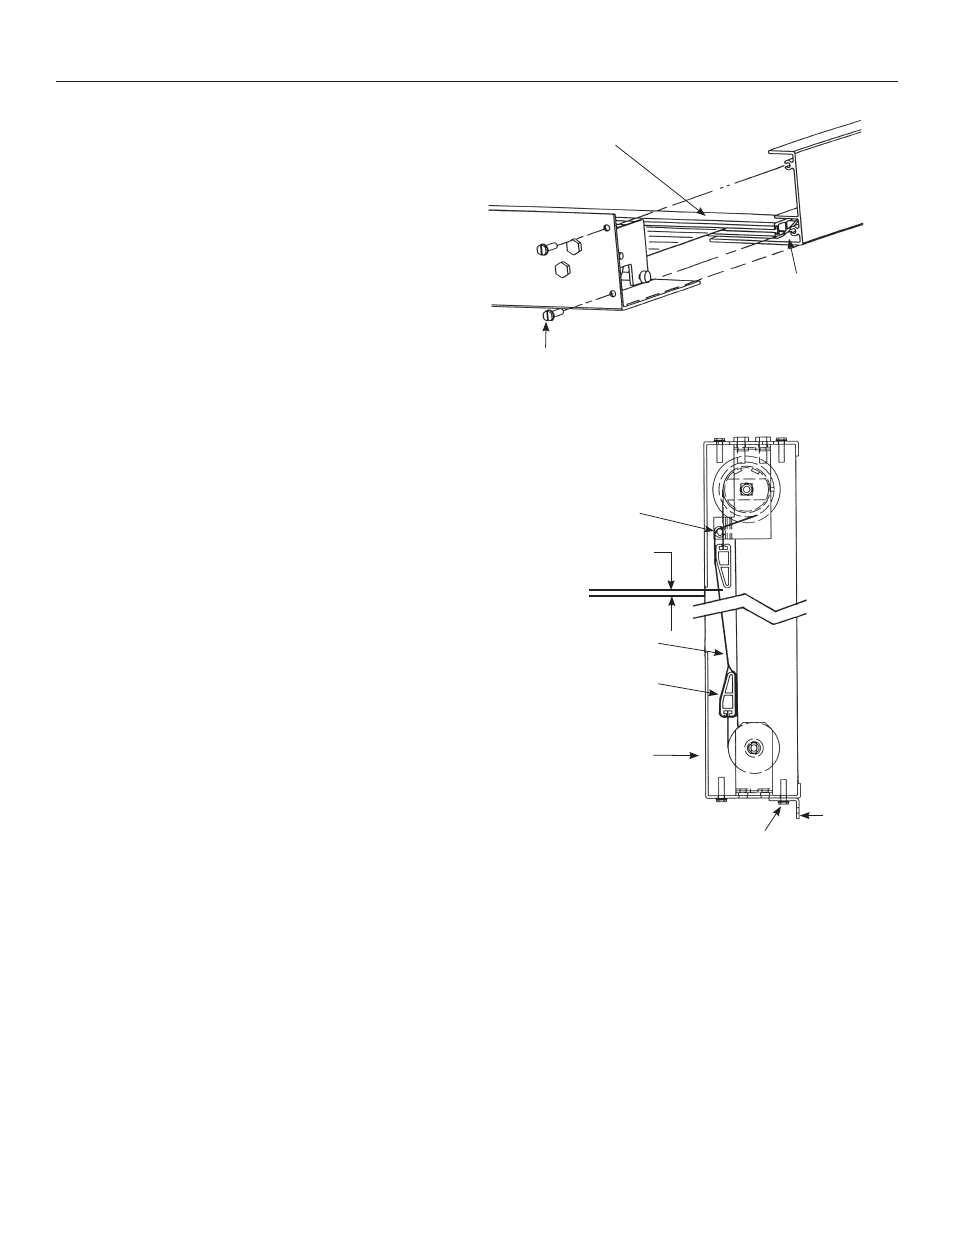
2. Attach the side frame pieces to the top frame. See Figure 1.
Insert the slat bar into the small channel located on the
side frame. Fasten the frame pieces with four #10 x 3/4"
hex head screws.
NOTE: the top and bottom frame pieces will overlap the
side frame pieces.
3. HORIZONTAL MASK ONLY – Attach the bottom frame with
four #10 x 3/4" hex head screws. Attach the bottom brackets
with the two screws at the back of the frame as shown in
Figure 2.
VERTICAL MASK ONLY – Attach the pull straps to the bottom
slat bar by sliding the looped end of the pull straps over the
ends of the slat bar (See Figure 2 for pull strap attachment).
The bottom roller is spring loaded and has an internal lock to
keep it from retracting during shipping. To disengage the lock
pull on the slat bar to unroll the mask but DO NOT let go of
the slat bar. To lock the roller let the mask retract slowly and
the lock will engage. The lock will only engage when the
frame is laying face down on the floor. When the frame
assembly is hanging on the wall the lock will not engage.
Insert the slat bar into the small channel on the side frame.
Fasten the bottom frame with four #10 x 3/4" hex head screws.
Attach the bottom brackets with the two screws at the back
of the frame as shown in Figure 2.
Frame Assembly
Slat Bar
Figure 1
Channel
1/8" Max.
Pull Strap
Guide
Pull Strap
Slat Bar
Viewing
Surface
Figure 2
#10 x 3/4" Screws
Bottom
Bracket
#10 x 3/4" Screw