Camera and speakerphone installation – Da-Lite ViewShare Tensioned Advantage Retrofit User Manual
Page 11
11
Camera and Speakerphone Installation
The following components are necessary and included for
camera and speakerphone installation.
• Local CAT5 to USB Extender with Power Supply
• 6’ USB Cable
• USB Speakerphone
• Powered USB Hub with 3' USB Cable
NOTE: A CAT5 cable is also required for installation. THE CAT5
CABLE IS NOT PROVIDED. The length of the CAT5 cable cannot
exceed 200 feet.
For computer system requirements, specifications and
troubleshooting, see the separate camera instruction located in
the installation kit and the speakerphone instruction located
inside the speakerphone box. Additionally, links to online
assistance for each device are located in the Troubleshooting
section of this instruction book.
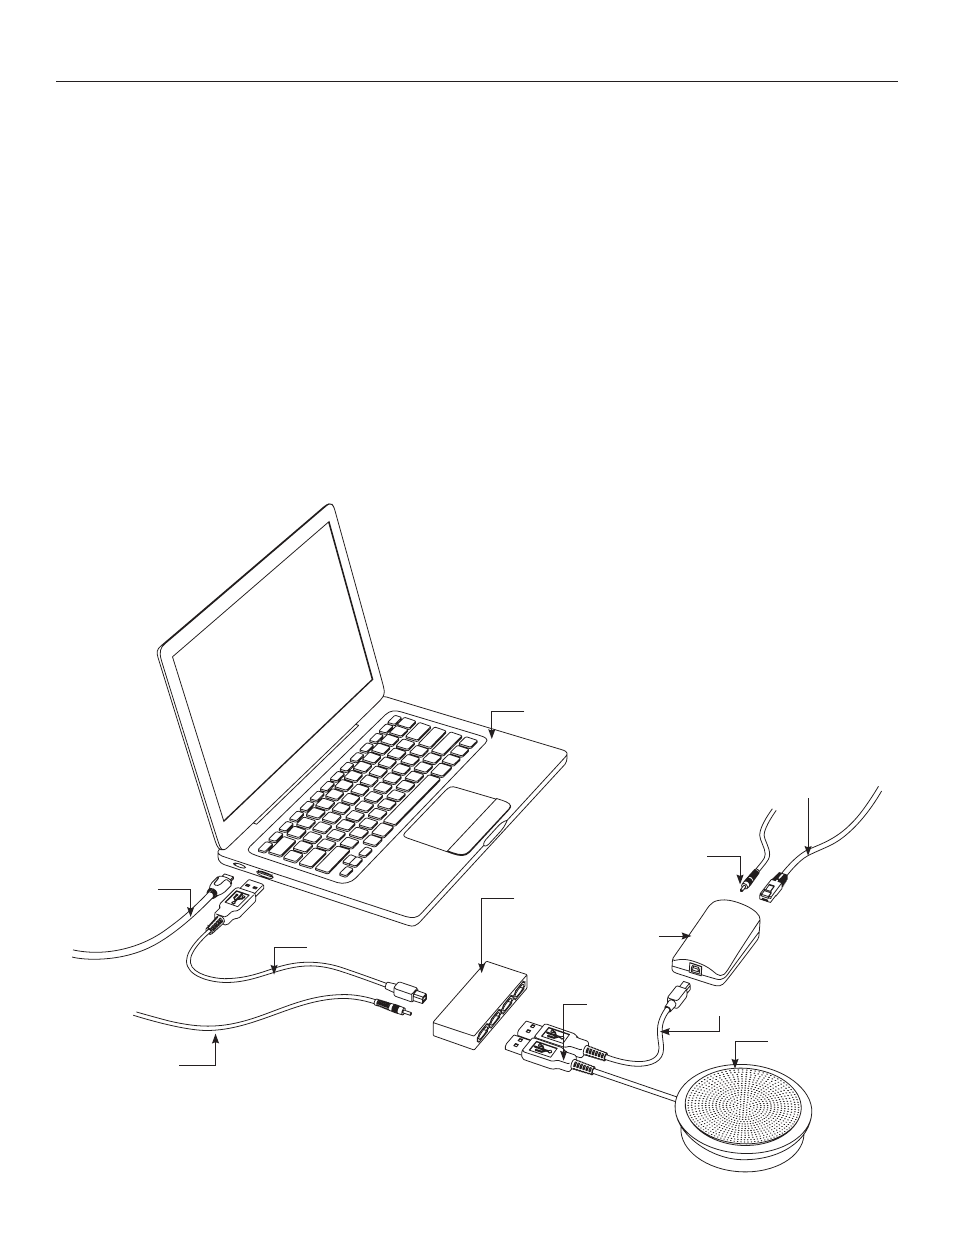
Connections (see wiring diagram below)
1. Connect your CAT5 cable to the local CAT5 to USB extender,
which should be located near your computer. Connect the local
CAT5 to USB extender power supply at this time.
NOTE:
The CAT5 cable should only be connected between the
ViewShare Advantage and the local CAT5 to USB extender. Do
not connect to a server or network.
2. Lower the ViewShare Advantage screen.
3. Use the 6’ USB cable to connect the local CAT5 to USB extender
to the USB Hub.
4. Connect the speakerphone to the powered USB hub.
5. Connect the USB hub to your computer. Connect the USB hub
power supply at this time.
NOTE: The computer may recognize the USB hub as a new
component but it does not require any additional drivers. The
USB hub does not need to be used if your computer has two
open USB ports.
CAT5 Connection
To Screen
120 Volt Power
Video Cable
to Projector
120 Volt Power
Local CAT5 to
USB Extender
6' USB Cable
USB Cable
3' USB Cable
Powered
USB Hub
Laptop
USB Speakerphone