Installation (continued – Da-Lite Tensioned Conference Electrol User Manual
Page 3
3
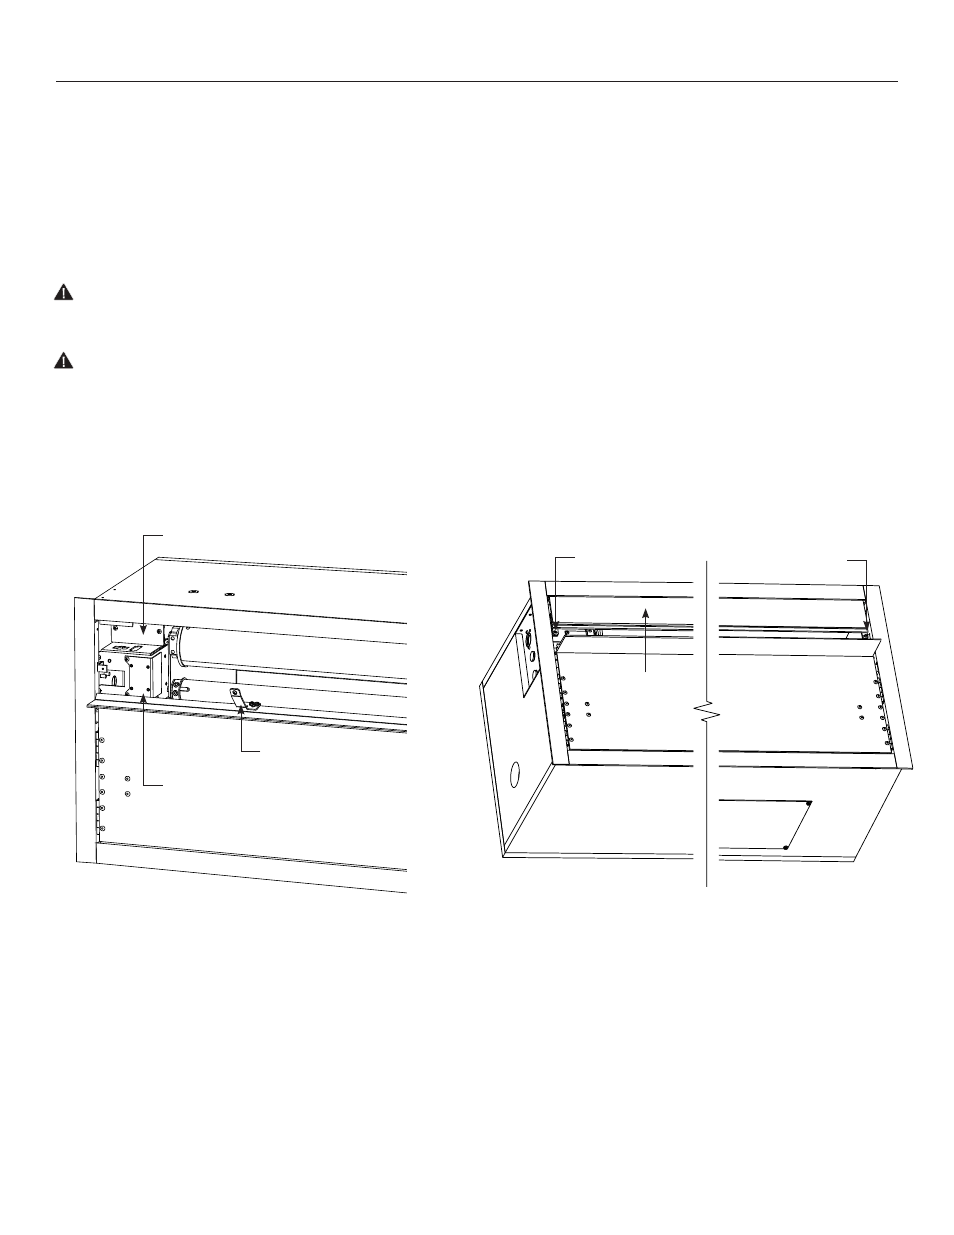
6. Remove shipping brackets by removing the hex head screws
from aluminum slat and case. Slat should move freely (Figure 2).
(Only if the roller assembly is pre installed.)
7. Test installation by operating the screen several times. Be
prepared to stop the screen. Standard Duty Cycle: 1MIN. ON/3
MIN. OFF. The fabric door (rear door) will not close until the wall
switch is placed in the up position and when the screen motor
stops at its limit switch in the up direction.
CAUTION: Excessive continuous operation may cause the
motor to overheat. If this happens the motor will shut off
until it cools to a normal operating temperature.
ATTENTION! Le fonctionnement continu et excessif peut
provoquer une surchauffe.Si cela se produit, les moteurs
s'arrêteront jusqu'à qu'ils se soient refroidis à la température
normale de fonctionnement.
8. Run the screen down enough to open the fabric door. Insert
the access door on the flanges and reinstall the screws to
secure the door.
Installation (continued
Figure 2 – Bottom of Case
Figure 3 – Bottom of Case
Shipping Bracket
Secondary Low
Voltage Cover
Primary Junction Box Cover
Access Door
Door Screw
Door Screw