Assembly- / dismantling instructions, Irony s back accessories, Transport safety screws – Austroflamm Irony S User Manual
Page 10: Cladding, Upper baffle plate, Baking compartment
english
8 Irony
S
5. ASSEMBLY- / DISMANTLING INSTRUCTIONS
Transport Safety Screws
Attention: Before lifting the Irony from the pallet,
remove the two transport safety screws from the
pedestal that are marked in yellow.
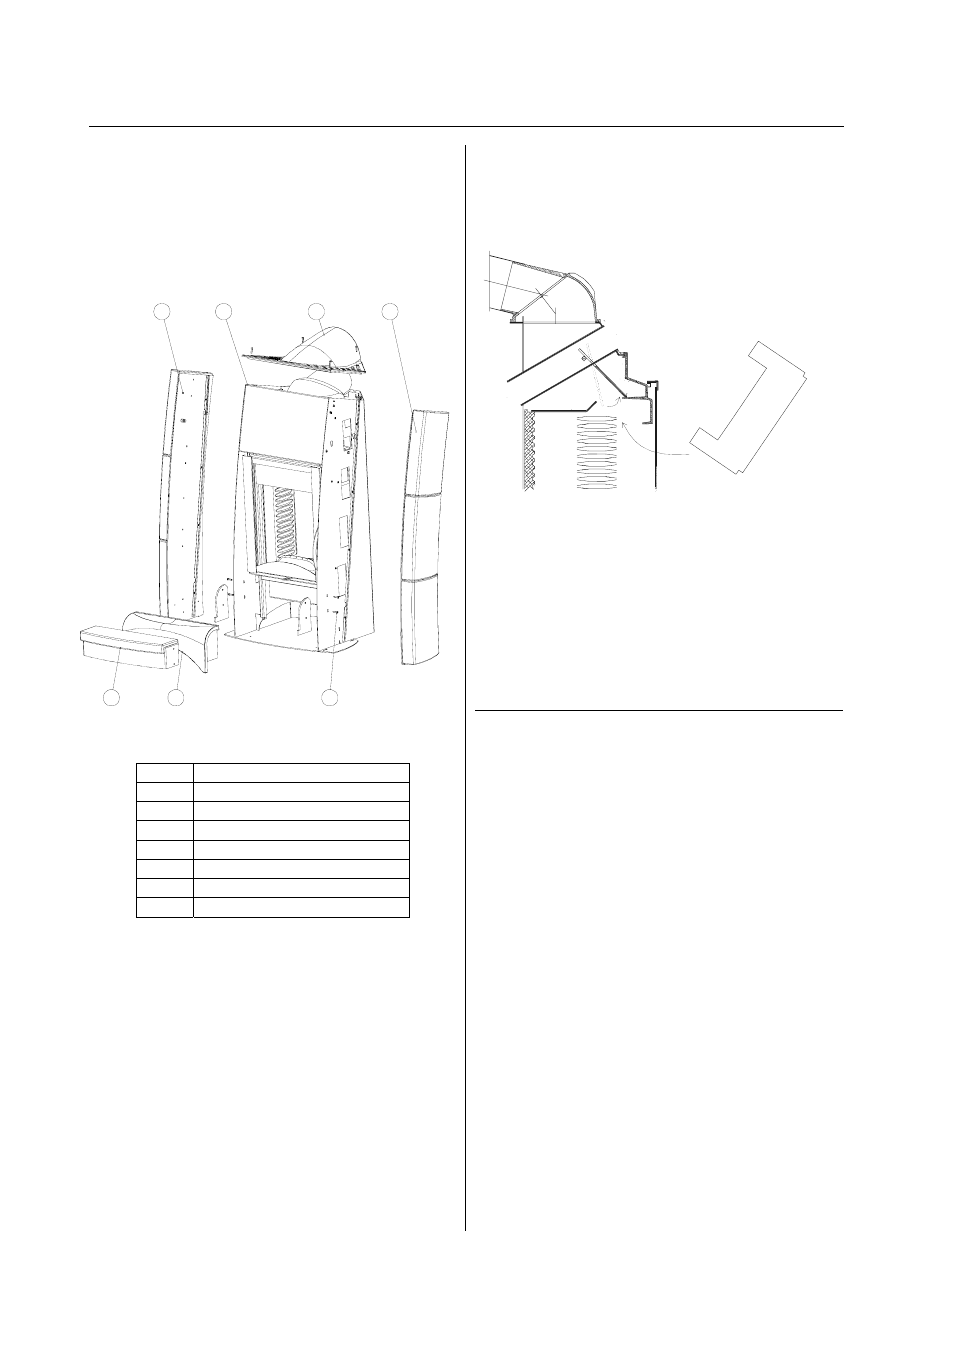
Cladding
Fig. 6: Cladding components
Item Description
1 cover
2 front
3
ash collection tray – small
4
ash collection tray – large
5 shell
right
6 shell
left
7
hexagon socket screw
The following cladding units can be removed for
easier transport:
1. Remove the four hexagon socket screws from
the cover (Item 1) and lift the cover out of
position.
2. The lateral cladding units (Items 5 and 6) can
now be lifted in an upward direction and then
to the sides. Take care that you do not injure
your fingers!
3. In order to avoid damaging the ash collection
tray (Item 3 or Item 4), please remove the
hexagon socket screws, two on each side (left
and right, Item 7) and remove the ceramic unit
toward the front.
The components are re-assembled in reverse
order.
Upper baffle plate
Fig. 7: Insertion of the upper baffle plate
Insert the upper baffle plate with the “U“ at the top,
and in the direction of the arrows shown in Fig. 7,
Items 1, 2 and 3 into the upper part of the
combustion chamber. The upper baffle plate is not
used with the Irony S Back.
6. IRONY S BACK
Accessories
Baking compartment
The Irony S Back is different from the Irony S in
that it features a fully functional baking
compartment.
This baking compartment is heated from three
sides (from the left, right, and from behind). Hint: In
order to achieve the most even distribution of heat,
the food to be heated should be turned after half of
the baking time has been reached.
The temperature in the baking compartment is
regulated by the amount of fuel and the air control
sliders (see above). The actual temperature can be
read on the baking-compartment thermometer.
Clean the inside of the baking compartment as you
would other stove components (see above). Avoid
fat-containing vapors, because these leave
deposits that are very difficult to clean off.
1
2
3
4
5
6
7
2
1
3