Accutone A10 User Manual
Page 5
part a. getting comfortable.
Hooking all the parts together!
A.2
Hooking all the parts together!
A.2
part a. getting comfortable.
7
6
connection & preparations.
connection & preparations.
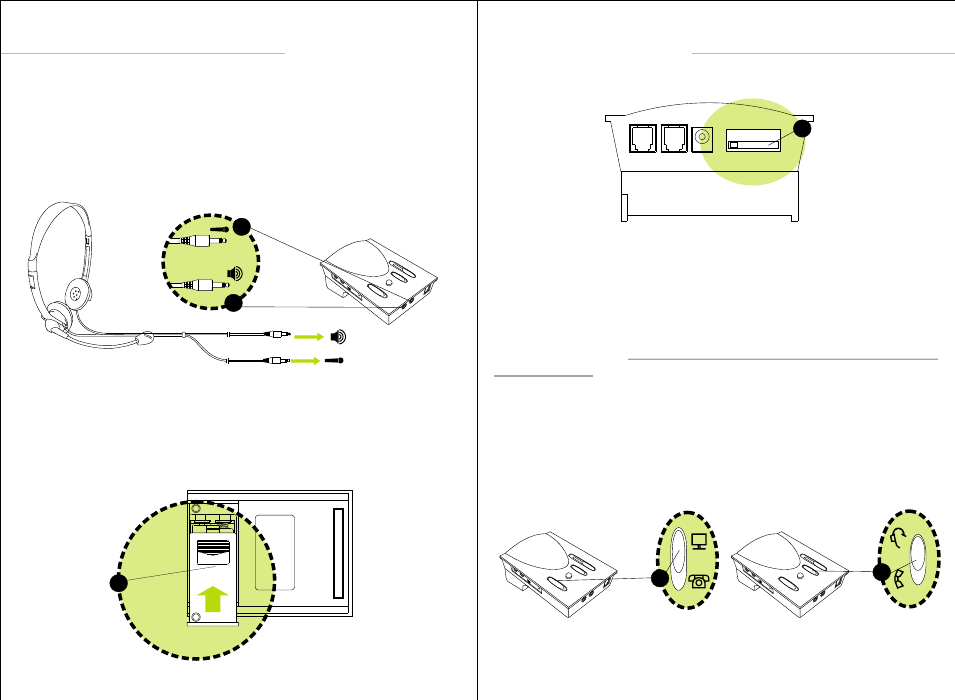
To the computer headset:
This applies only to computer headset with separate microphone and
speaker plugs. Insert the Speaker Plug of the headset to the Jack on the
Front Panel with the "Speaker" sign (9) and the Microphone Plug to the
Jack with the "Microphone" sign (10).
A.2.4 Inserting Batteries
Replacing Batteries:
Slightly depress the compartment lid and slide it outwards. Install batteries
with polarities according to the battery diagram inside the compartment.
Close the lid and turn the power "ON". Two UM-3 (AA) batteries are
required. Alkaline batteries are recommended.
9
10
OPEN
16
A.2.5 Configure the Control Unit
The 6-position Configuration Switch (2) at the back panel allows you to
select the proper setting so that the unit will work with your telephone base
unit. The control has 6 positions, which are (1 - 2 - 3 - 4 - 5 - 6). Wear the
headset over your head and switch the Handset/Headset Switch (11) to
the Headset position. Make sure to turn down the volume adjustment to
protect your ear. Check to see if the Telephone/Computer Switch (8) is
set to telephone position, if not, make sure it is. Now switch the 6-position
Configuration switch slowly until you can hear a clear dial tone.
If you receive a clear dial tone sound, then the receiving connection is
working. Note that there may be 2 matching settings, choose the clearer
setting or either one if both perform the same. There is at least one setting
which matches your telephone.
1 2 3 4 5 6
. . . . . .
2
8
11