Dolmar HEDGE HT-355 User Manual
Page 8
8
Removing or installing shear blade
CAUTION:
•
Before removing or installing shear blade, always
be sure that the tool is switched off and unplugged.
•
When replacing the shear blade, always wear
gloves without removing blade cover so that hands
and face does not directly contact the blade.
Failure to do so may cause personal injury.
NOTE:
•
Do not wipe off grease from the gear and crank.
Failure to do so may cause damage to the tool.
•
For specific way of removing and installing shear
blades refer to the reverse of a package for
accessory shear blades.
Removing the shear blades
Reverse the tool and loosen four screws.
1
2
009295
NOTE:
•
Be careful not to get your hands dirty as grease is
applied in the shear blade driving area.
Remove the under cover.
1
2
009296
Remove the gear housing cover.
1
009297
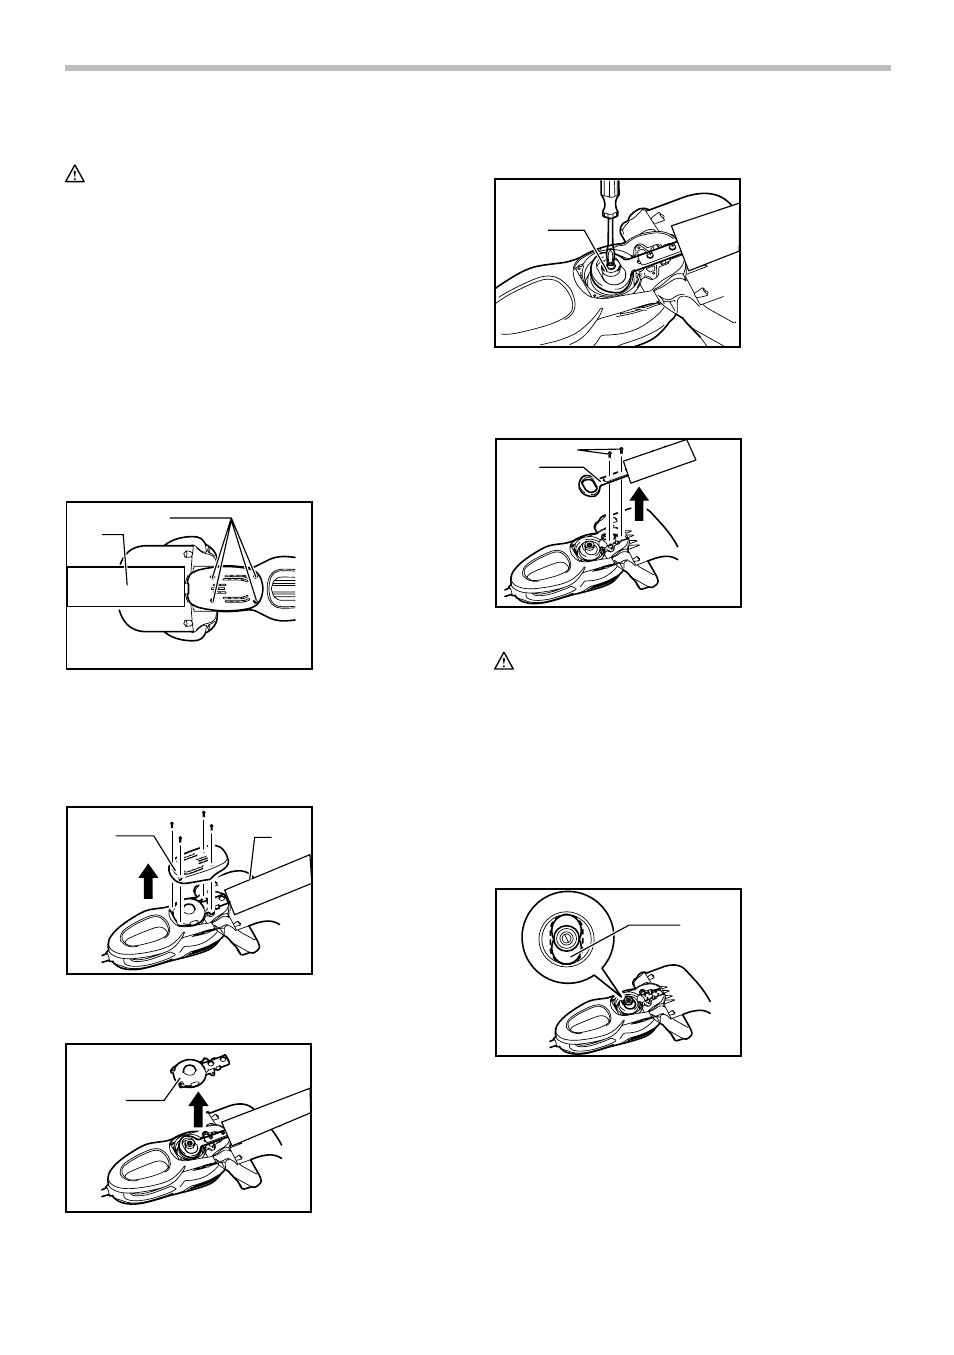
Set the crank at the angle as shown in the figure with a
slotted bit screwdriver.
1
009298
Remove two screws from the shear blades and the
shear blade unit will be taken out.
1
2
009299
CAUTION:
•
Return the gear to the original position in such a
manner as it was installed if it should be taken
away by mistake.
Installing the shear blade
Prepare 4 removed screws (For under cover), 2 screws
(For shear blade), gear housing cover, under cover, and
new shear blades.
Adjust the crank position as shown in the figure. At this
time, apply some grease provided with new shear
blades to the periphery of the crank.
1
009300
Overlap the oval hole in the upper blade with that in the
lower one.
1. Crank
1. Screws
2. Shear blade
1. Crank
1. Gear housing
cover
1. Under cover
2. Blade cover
1. Screws
2. Blade cover