Drying time chart – AEG 1263 User Manual
Page 11
Attention! The text in this document has been recognized automatically. To view the original document, you can use the "Original mode".
34
Drying time chart
Indicative values for dry clothing
Degree of drying
Type of fabric
Exampies of iaundry/
ciothing
Cottons to be completely
dried
Towels, T-shirts, fully
dried sheets, tea-cloths,
bathrobes
Cupboard dry
Easy care, synthetic and
mixed fabrics which do
not need ironing
Synthetic mjx jumpers,
blouses, household
linen, bady clothes,
socks, underwear
Iron dry
Cottons and linens which
need ironing
Sheets, tablecloths, tea-
cloths
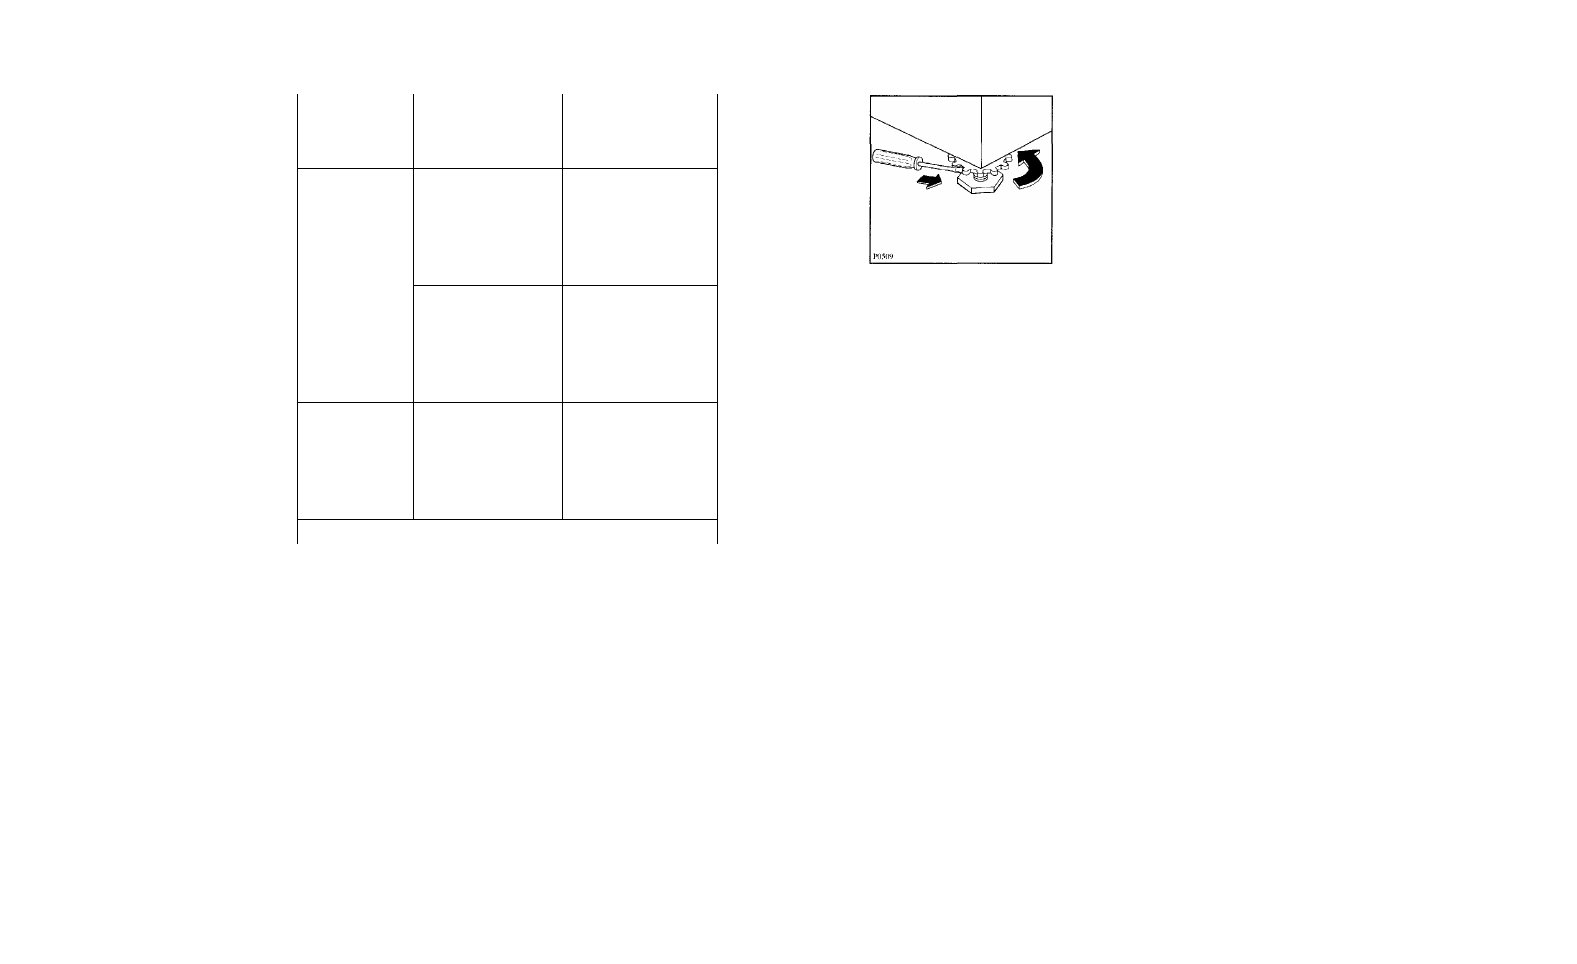
Lock the feet in position by fully tightening up the locknuts.
The appliance must be level and resting on all four feet. It must
not tilt when pressure Is exerted on one side only. If necessary,
use a spirit level to check that it is perfectly level.
The floor must be clean, dry and free of any wax residue or other
polish to prevent any risk of sliding. Never use viscous substances
to move the appliance by sliding it across the floor!
It is inadvisable to stand the appliance on long pile carpet or rugs
or on layers of foam rubber, as this could make it unstable. Place
a rubber mat beneath the appliance if the floor is made of very
small tiles.
If the appliance is to be placed on non-solid flooring, especially
made of wooden joists and flexible boards, a waterproof wood
panel, 15 mm thick, must be secured with screws to at least two
of the floor joists. If possible, the machine should be placed in a
corner of the room, as this is where the joists are most firmly fixed
and have less tendency to flex.
Never use wedges of wood, cardboard or other similar materials
to compensate for unevenness in the floor.
If space is tight and you cannot avoid placing the machine next to
a gas oven or coal burning stove, a sheet of insulating material
(85 x 57 cm), covered with aluminium foil on the side facing the
oven or stove, must be fitted between the two appliances.
Before building the machine in under a fitted kitchen worktop,
remove the cover and install a special protective plate, which is
available from your local Service Centre.
11