À warning, Leveling of range, Backguard installation – Avanti GR-24BG User Manual
Page 8: Anti-tip bracket installation, Installation of your gas range
Attention! The text in this document has been recognized automatically. To view the original document, you can use the "Original mode".
INSTALLATION OF YOUR GAS RANGE
À WARNING©
HAVE THIS RANGE INSTALLED BY A QUALIFIED INSTALLER.
Improper
installation,
adjustment,
alteration,
services,
or
maintenance can cause injury or property damage. Consult a
qualified installer, service agency or the gas supplier.
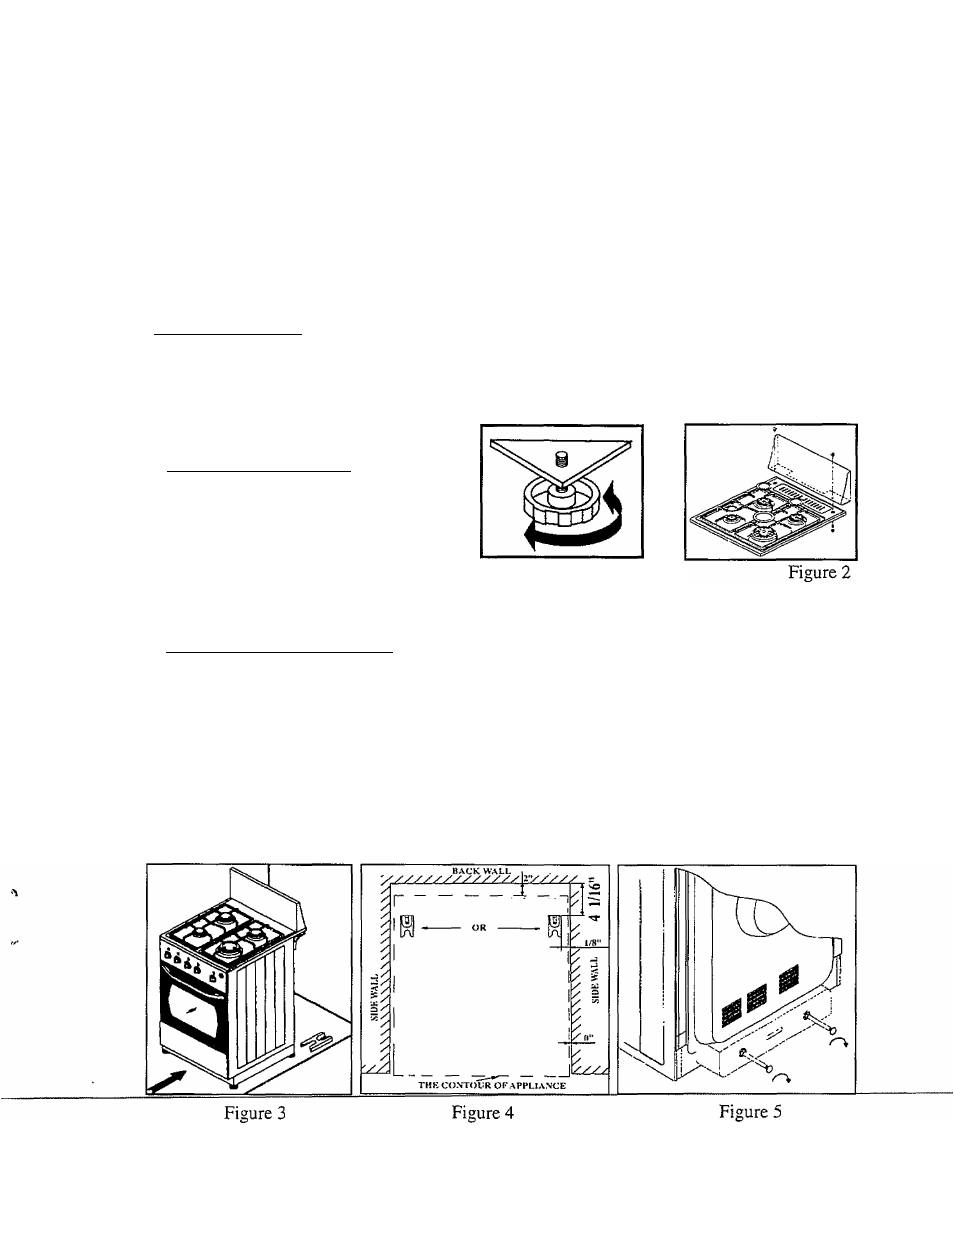
> Leveling of Range
The range must be level to obtain proper cooking results. The screwed leveling legs located on
the corner brackets at the bottom of range should be adjusted by turning them clockwise to
make the range higher or counter-clockwise to lower the range until the range is level {See
Figure 1). Use a level on the cookware supports to check the leveling of the range.
Backguard Installation
•
Place the backguard on top of the
cook top at the rear of the range
( Figure 2)
•
Line up the holes on the backguard
with the holes on cook top.
•
Fasten the backguard to cook top by using the
screws, washers and nuts supplied with the range.
Figure 1
Anti-Tip Bracket Installation
To reduce the risk of tipping the appliance by abnormal usage or improper door loading, the
appliance
must
be
secured
by
properly
installing
the
anti-tip
device
packed
with
the
appliance.
1.
Place the anti-tip bracket on the floor as shown in Figure 4. If there is no sidewall, the
dimension given as 1/8” will be the distance of right/ieft side of appliance to right/left side
of anti-tip bracket. Anti-tip bracket can be installed on either right or left side.
2.
Mark the locations of 2 holes of anti-tip bracket on the floor.
3.
Use a 5/16” masonry drill bit and insert plastic anchor.
4.
Secure bracket to floor using screws supplied.
5.
Slide appliance into position. (Figure 3)