Blacks. decken, nos. 1000 and 1101 drills, P.t.l safety rules for power tools, Grounding – Black & Decker 1101 User Manual
Page 2: Grounding (continued), Extension cord, Switch, Chuck
Attention! The text in this document has been recognized automatically. To view the original document, you can use the "Original mode".
Blacks. Decken, NOS. 1000 AND 1101 DRILLS
P.T.L SAFETY RULES
FOR POWER TOOLS
2
.
3.
4.
6.
1. KNOW YOUR POWER TOOL--Read owner's manual care
fully. Learn its applications and limitations as well as the
specific potential hazards peculiar to this tool.
GROUND ALL TOOLS ~ UNLESS DOUBLE-INSULATED. If
tool is equipped with three-prong plug, it should be plugged
into a three-hole electrical receptable. If adapter is used to
accommodate two-prong receptacle, the adapter wire must
be attached to a known ground. Never remove third prong.
KEEP GUARDS IN PLACE and in working order.
KEEP WORK AREA CLEAN. Cluttered areas and benches
invite accidents.
AVOID DANGEROUS ENVIRONMENT. Don't use power tool
in damp or wet locations. And keep work area well lit.
KEEP CHILDREN AWAY. All visitors should be kept safe dis
tance from work area.
7.
STORE IDLE TOOLS. When not in use, tools should be
stored in dry, high or locked-up place — out of reach of
children.
8.
DON'T FORCE TOOL. It will do the job better and safer at
the rate for which it was designed.
9.
USE RIGHT TOOL. Don't force small tool or attachment to
do the job of a heavy duty tool.
10.
WEAR PROPER APPAREL. No loose clothing or jewelry to
get caught in moving parts. Rubber gloves and footwear are
recommended when working outdoors.
11.
USE SAFETY GLASSES with most tools. Also face or dust
mask if cutting operation is dusty.
12. DON'T ABUSE CORD. Never carry tool by cord or yank it to
disconnect from receptacle. Keep cord from heat, oil and
sharp edges.
13.
SECURE WORK. Use clamps or a vise to hold work. It's
safer than using your hand and it frees both hands to
operate tool.
14. DON'T OVERREACH. Keep proper footing and balance at all
times.
15.
MAINTAIN TOOLS WITH CARE. Keep tools sharp at all
times, and clean for best and safest performance. Follow
Instructions for lubricating and changing accessories.
16.
DISCONNECT TOOLS. When not In use, before servicing,
when changing accessories such as blades, bits, cutters, etc.
17.
REMOVE ADJUSTING KEYS AND WRENCHES. Form habit
of checking to see that keys and adjusting wrenches are
removed from tool before turning it on.
18.
AVOID ACCIDENTAL STARTING. Don't carry plugged-in tool
with finger on switch.
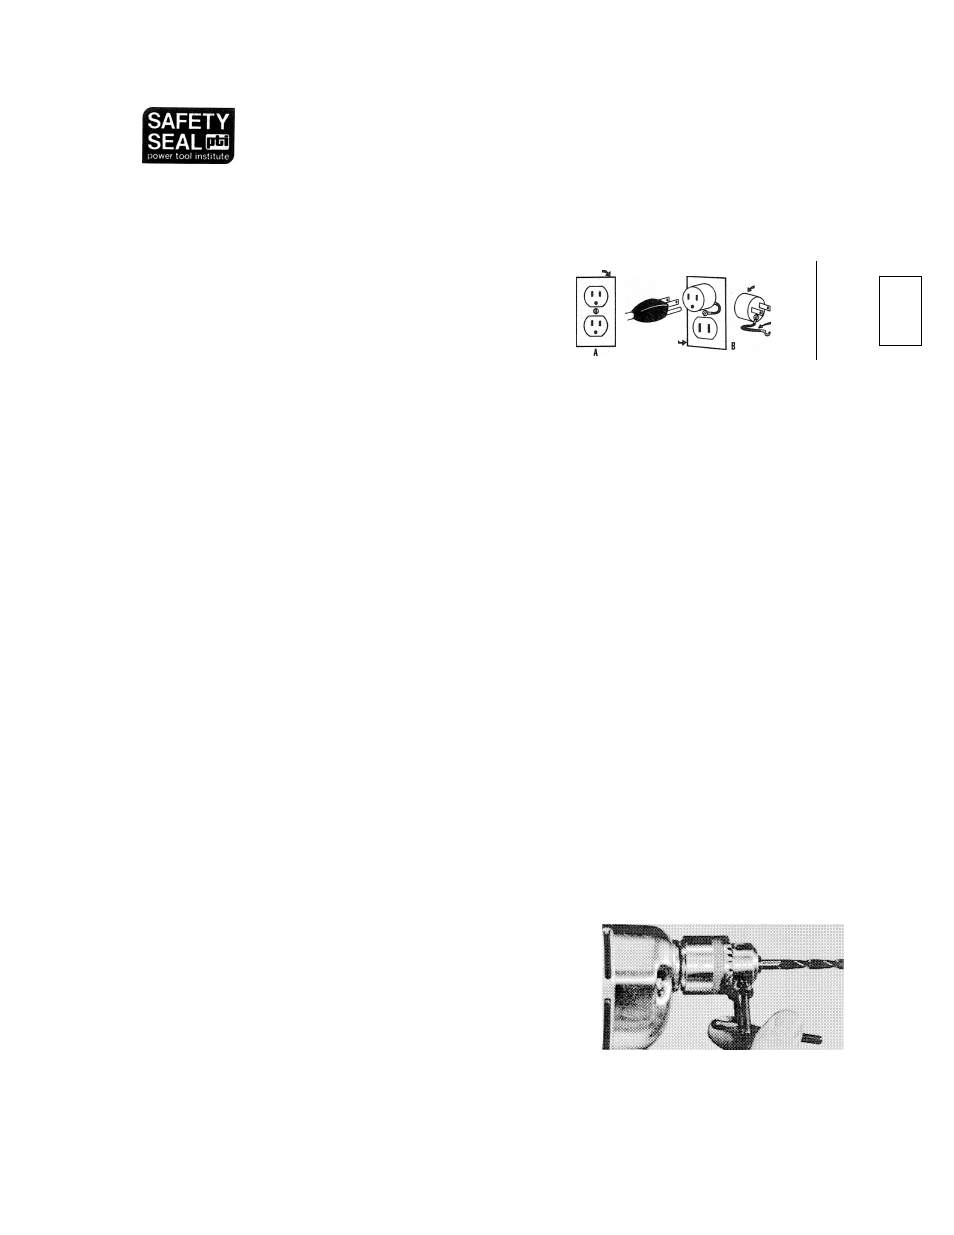
GROUNDING
These units are equipped with approved 3-conductor power cord
and 3-prong grounding type attachment plug to be used with the
proper grounding type receptacle. In accordance with the
National
Electrical
Code,
Canadian
Electrical
Code,
and
Underwriters' Laboratories specifications. The green colored
conductor in the cord is the grounding wire. Never connect the
green wire to a "live" terminal.
If your unit requires less than 150 volts it has a plug that looks
like Fig. “A". It will fit directly into the proper type of 3-wire
grounding receptacle. The unit is then grounded automatically
each time it is plugged in.
Shown in Fig. '‘B" is a special grounding adapter (not allowed
in Canada by the Canadian Electrical Code) which is available
from your dealer and will permit using a 2-wire receptacle.
The green grounding wire extending from the side of the adapter
must be connected to a Permanent Ground.
GROUNDING (Continued)
If the unit requires from 150 to 250 volts, it has a plug like
Fig. “C". No adapter is available and the plug must be used in
the proper 3-wire grounding receptacle.
If you use an extension cord, be sure that it is a 3-conductor,
grounding type cord. Grounding must be continuous from the
tool plug to the grounded receptacle.
GROUNDED OUTLET BOX
/
GROUNDING
PRONG IS
LONGEST OF
THE 3 PRONGS
ADAPTER
GROUNDED
OUTLET BOX
GREEN
GROUNDING
WIRE
GROUNDED OUTLET BOX^
GROUNDING
PRONG IS
LONGEST OF
©
m
©
THE 3 PRONGS
C
EXTENSION CORD
When using the tool at a considerable distance from power
source, a 3-conductor, grounding-type extension cord of ade
quate size must be used for safety, and to prevent loss of power
and over-heating. Use the table below for 120-volt tools. For
220-volt tools, see same chart but use a wire size corresponding
to an extension cord length shown which is V
2
the length of
extension to be used.
P.T.I. Safety Rule #12 applies to Extension Cords as well as the
Tool Power Cord. Before using cords, inspect them for loose or
exposed wires and damaged insulation. Make any needed repairs
or replacement before using your power tool.
Ext. Cord Length in feet . .
Required Wire Size (A.W.G.)
.25 50 75 100 150 200
.18 18 18 18 16 16
SWiTCH
To start drill, depress trigger switch; to stop drill, release trigger.
To lock trigger in "ON" position for continuous operation, or
when using Drill In a Vertical or Horizontal Stand, depress
trigger and push in locking button (located behind the trigger),
then gently release trigger. To release locking mechanism, de
press trigger fully, then release it.
CHUCK
Turn collar to open chuck jaws. Place bit in chuck so that end
rests on chuck bottom. Tighten chuck collar by hand. Place
chuck key in each of the three holes, and tighten in clockwise
direction. It's Important to tighten chuck with all three holes.
This is a safety feature that prevents bit slippage and motor
damage. To release bit, turn chuck key counterclockwise in just
one hole, then loosen chuck by hand.
Form No. 97142