Installation of hub caps (optional), Final assembly of mower, Assembly of grass catcher (hardware e) – MTD 112-518R000 User Manual
Page 7
Attention! The text in this document has been recognized automatically. To view the original document, you can use the "Original mode".
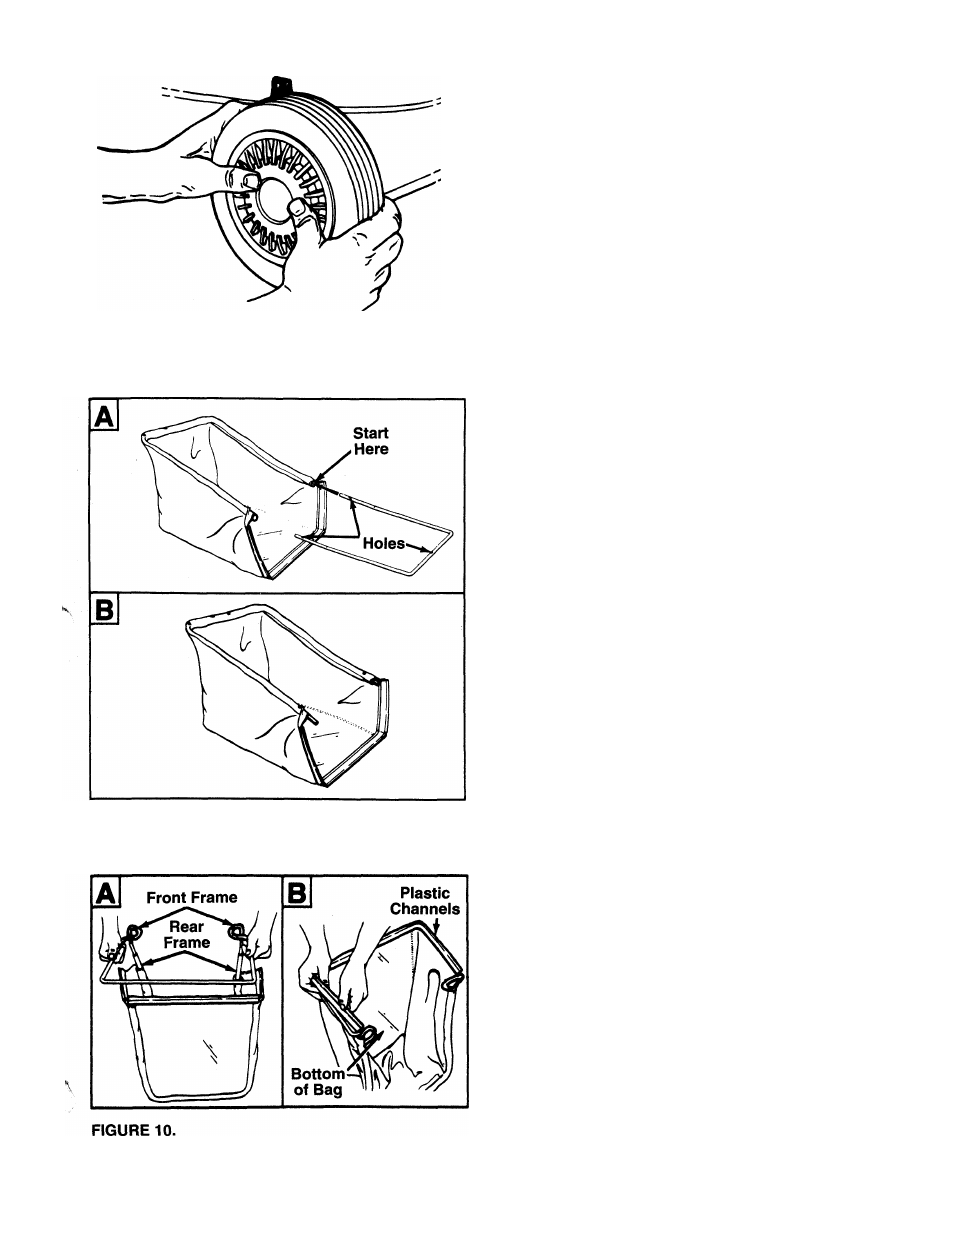
FIGURE 8.—Optional Hub Caps
INSTALLATION OF HUB CAPS (Optional)
1. If your mower is equipped with hub caps which
have four tabs, line up the tabs on the hub caps
with the holes in the wheels. Push to lock in posi
tion.
2.
If your mower is equipped with 2“ wide tires,
place hub caps in position against the inner hub
of the wheel. Press firmly around the center por
tion of hub cap in a circular motion, similar to
installing a lid on a round, plastic container. See
------ figure 8. The hub caps are flexible and will snap
over the 3-1/2" diameter wheel hubs.
NOTE: It may be helpful to place the hub caps in hot
tap water for several minutes to make them pliable
before installing, especially if the temperature is less
than 60P F.
3.
For other types of hub caps, simply press into
place on wheel hub.
FINAL ASSEMBLY OF MOWER
Make certain
all
nuts and bolts are tightened securely.
ASSEMBLY OF GRASS CATCHER (Hardware E)
NOTE: Make certain the grass bag is turned right side
out before assembling (warning label will be on the
outside).
1. There are three holes in the rear frame. With the
------- holes on the upper side as shown in figure 9A,
insert one end of the rear frame into the cloth
channel on the edge of the grass catcher bag.
Feed all the material on one side of the frame,
then work it around the frame. See figure 9B.
FIGURE 9.
2. Slide the ends of the front frame assembly into
the ends of the rear frame as shown in figure
— 10A.
Secure front of bag to front frame by slipping
plastic channels on sides and bottom of bag over
frame. See figure 10B.