Preparing your saw for use, A. getting ready, Read your operator's manual carefully – Poulan 2300 AV User Manual
Page 7: Have the following available, C. attaching the bar and chain
Attention! The text in this document has been recognized automatically. To view the original document, you can use the "Original mode".
PREPARING YOUR SAW FOR USE
A. GETTING READY
1. READ YOUR OPERATOR'S MANUAL
CAREFULLY.
Your Operator's Manual has been developed to help
you prepare your saw for use and to understand its
safe operation. It is important that you read your
manual completely to become familiar with the unit
before
you begin assembly or attempt operation. Your
Poulan® Dealer is available to show you how to
operate your saw. Be sure to ask for his assistance.
2. HAVE THE FOLLOWING AVAILABLE:
a. Protective gloves.
b. Approved, marked fuel container.
c. Regular, leaded or unleaded gasoline.
d. 2-cycle engine oil
(See page 9).
e. Bar and Chain Oil
(See page 10).
f. Standard screwdriver.
g. Phillips screwdriver.
h. 1/2 inch wrench.
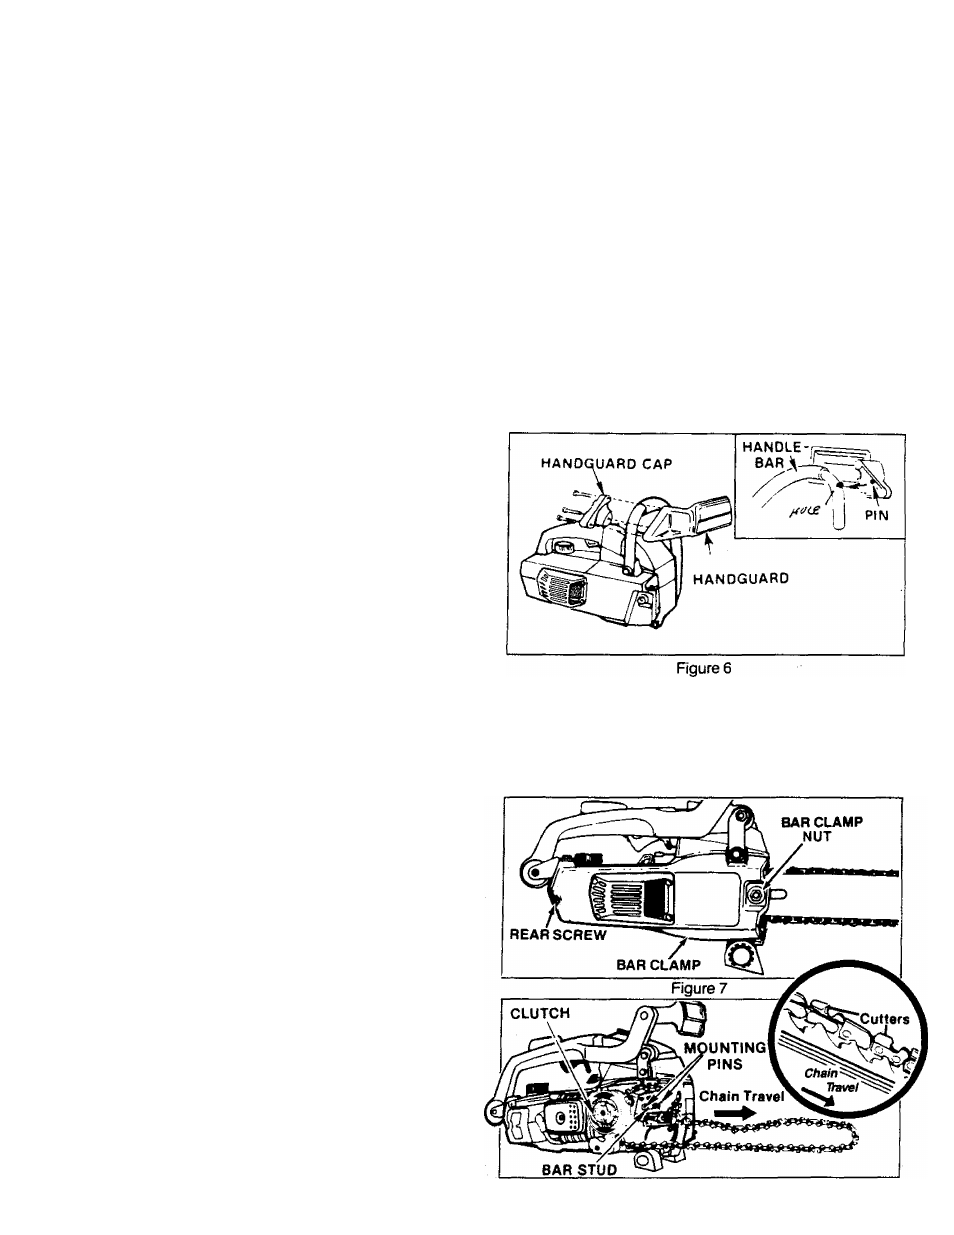
ATTACHING THE HANDGUARD — MODELS 1800,1800 SUPER, 2000,2000 AV, 2300AV
(Model 2300 CVA is assembled with the Handguard on the saw).
The Handguard is a protective device
designed to
reduce the chance of your left hand contacting the
chain if your hand slips off the front handlebar.
• Lift and carry the chain saw by the handlebar,
not
by the handguard.
• Keep the handguard securely fastened at all
times.
Check the handguard screws each time the
saw is used.
To install:
1
. Align the Handguard and Handguard Cap around the
handlebar as shown in Figure
6
.
2. Fit the mounting pin on the Handguard into the hole in
the handlebar. Figure
6
, (inset).
3. Insert the 3 mounting screws into the 3 holes on the
Handguard Cap.
4. Turn each screw a little at a time clockwise, with a Phillips
screwdriver until the Handguard Cap and Handguard
meet and there is no gap between the two parts.
^WARNING
Do not use the saw without the handguard in place.
Always immediately replace the handguard if it
becomes damaged, broten or is otherwise removed.
C. ATTACHING THE BAR AND CHAIN
A WARNING
Do not start engine without guide bar and chain
completely assembled. Otherwise, the clutch can
come off and serious injury can result.
B Your saw is equipped with a Reduced-Kickback
Guide Bar and a Low-Kickback Chain.
B Use only the Reduced-Kickback Guide Bar and
Low-Kickback Chain specified for your chain saw
model, when replacing these parts. See
“Specifications.”
CAUTIO
n
TI Wear protective gloves when handling
or operating your saw. The chain is sharp and can
cut you even when it is not moving!
\
1
. Remove the following parts as shown in Figure 7.
'
Use a standard screwdriver and a 1/2 inch
Wrench.
a. ) Bar Clamp Nut.
b. ) Rear Screw.
c.
) Bar Clamp.
Figure 8