Controls, Declutch blade before starting, Lubrication – MTD 243-540 User Manual
Page 4: Maintenance
Attention! The text in this document has been recognized automatically. To view the original document, you can use the "Original mode".
ASSEMBLY
STARTING INSTRUCTIONS
Your newedger is shipped preassembled with the exception
of the handle, rear, wheels, and throttle control.
1. Remove the edger and all parts from the carton. Make
certain that all loose parts and literature are removed
from carton before carton is discarded.
2. Assemble the lower handle into the slots in the rear of
the frame. Line up the holes in the handle with the holes
in the frame and insert the axle bolt through the wheel,
Belleville washer, frame, handle, lockwasher and secure
with hex nut as shown on the parts drawing;
3. Assemble the upper handle assembly to the lower handle
with four carriage bolts, lockwashers and nu'ts.
4. Assemble the clutch rod to the clutch handle and pivot
bracket assembly and secure with cotter pins.
5. Check the lubrication section of this manual for proper
engine lubrication care.
CONTROLS
ENGINE — One lever operates the choke, regulates the
engine speed and stops the engine. Ref. No. 74.
1. Fill the crankcase with oil. See Lubrication section of
this manual.
2. Fill the gasoline tank with "regular" gasoline.
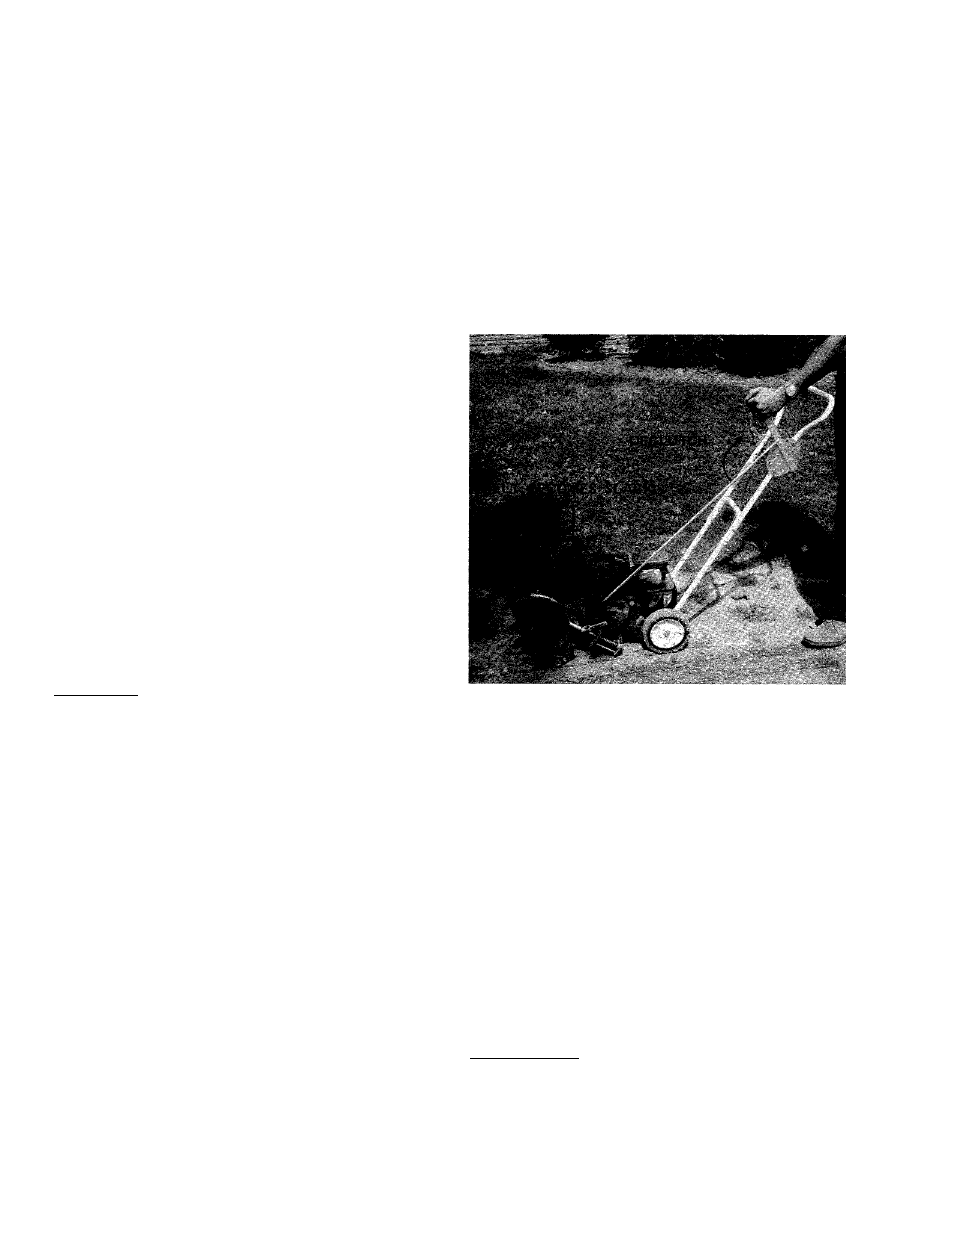
3. Move the clutch control adjustment lever back as far as
it will travel and engage the pin in the clutch plate (ref.
no. 6) (See photo below).
4. Set the engine control in the "start" position.
5. Grasp the starter handle and pull out the cord rapidly.
Return it slowly to the engine. If the engine does not
start after two pulls, move the engine control to the
"fast" position.
DECLUTCH BLADE BEFORE STARTING.
LUBRICATION
CLUTCH CONTROL ADJUSTMENT - The clutching and
declutching of the belt is accompanied by moving the
clutch handle. To declutch pull the handle towards you as
you operate the edger. When you push the handle forward,
the blade engages. To operate the clutch handle, move it to
the left so the pin clears the clutch plate. Ref. No. 6.
BLADE PLANE ADJUSTMENT - The cutting blade can
be adjusted from vertical to horizontal position by releasing
the lever on the pivot bracket assembly and rotating the
spindle housing. The notches will hold it in any position.
Ref. No. 25.
WHEEL ADJUSTMENT — You can raise and lower the
front wheel of your edger by unscrewing the axle bolt and
using the different holes in the end of the wheel bracket on
base assembly. Ref. No. 63.
By becoming familiar with all the controls and
adjustments before you operate your edger, you will be
able to easily adjust your edger to a variety of cutting and
trimming conditions. While the engine is running, DO NOT
ATTEMPT TO MAKE ANY ADJUSTMENTS.
ENGINE — Fill sump with oil. Use a high quality detergent
oil classified "For Service MS". Nothing should be added to
the
recommended
oil.
SUMMER
—Use
SAE
30.
WINTER-(Below 40° F.) Use SAE 5W-20 or SAE 10W.
Directions: Place the engine level. Remove filler plug. FILL
THE OIL SUMP TO POINT OF OVERFLOW.
Pour slowly.
WHEELS -
lubrication.
The wheels have no bearings and require no
CUTTER HEAD BEARINGS - The two ball bearings in
the cutter head are lubricated and sealed at the factory and
require no lubrication. Lubricate all other moving parts
with engine oil.
MAINTENANCE
BLADE REMOVAL — Use a wrench on both sides of the
blade when removing it for replacement.
BELT REMOVAL — To remove the V-Belt, remove the belt
guard on the engine pulley and the belt guard on the
spindle housing. Replace with a 3/8 x 31.2" V-Belt. (Part
Number 754-142.)