Remove generator from carton, Carton contents, Installing tray and battery – Generac 7500 User Manual
Page 5
Attention! The text in this document has been recognized automatically. To view the original document, you can use the "Original mode".
Generac Portable Products 7500EXL Extended Life Generator
Your generator requires some assembly and is ready
for use after it has been properly serviced with the
recommended oil and fuel.
If you have any problem s w ith the assem bly of
your generator, please call the generator helpline
at 1-800-270-1408.
IMPORTANT:
Any attempt to run the unit before it has
been serviced with the recommended oil will result in
an engine failure.
REMOVE GENERATOR
FROM CARTON
• Set the carton on a rigid fiat surface with “This Side
Up” arrows pointing upward.
• Carefully open the top flaps of the shipping carton.
Review “Cold Weather Operation” on page 9.
• Cut down corners at one end of carton from top to
bottom and lay that side of carton down flat.
• Remove all packing material, carton fillers, etc.
• Remove the generator from the shipping carton.
CARTON CONTENTS
Check all contents. If any parts are missing or
damaged, call the generator helpline at
1-800-270-1408.
• The generator
• Electric start battery cables
• Generator and engine owner’s manuals
• Locking 20 Amp and 30 Amp plugs
• Battery charge cables
• Battery tray mounting bracket/hardware
• Spare spark plug and air filter element
• Spark plug wrench
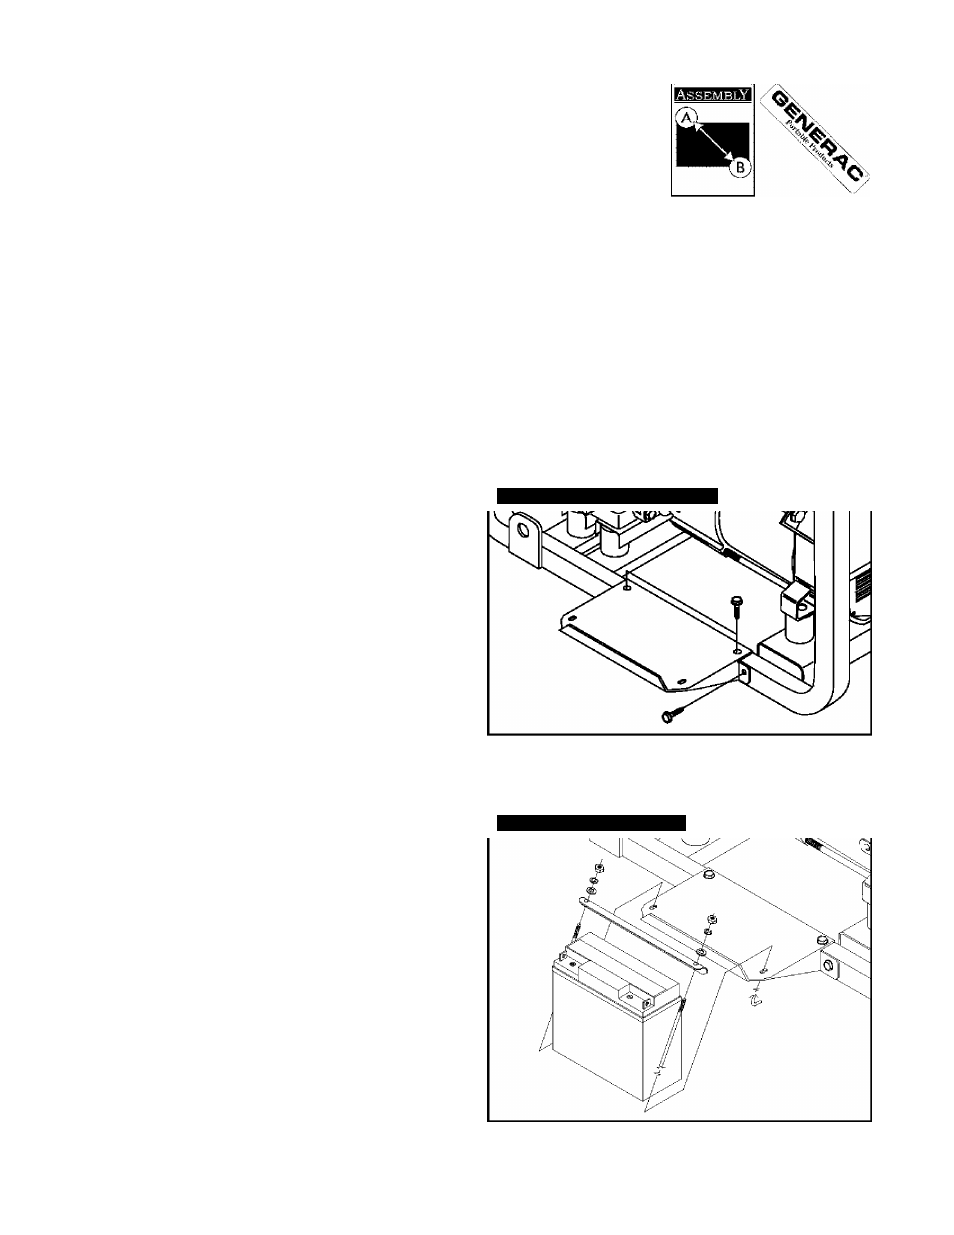
INSTALLING TRAY AND
BATTERY
You must purchase and install a 12 Volt DC battery
(Series U1-109). The battery should be serviced with
electrolyte fluid and fully charged prior to installation,
install the battery as follows:
• Find the battery tray and fasteners shipped loose in
the carton. The battery bracket,
two 1"
J-bolts, two
lock washers and two hex nuts are included.
• Remove the four battery tray screws from base.
• Position the battery tray and install (Figure 2).
Figure 2 — Installing Battery Tray
Set battery onto tray and attach bracket, J-bolts, lock
washers, flat washers, and hex nuts (Figure 3).
Tighten hardware with 3/8” wrench.
Figure 3 — Installing Battery