Handle position, Throttle, Warning j – MTD 112-112-033 User Manual
Page 7: Lubrication
Attention! The text in this document has been recognized automatically. To view the original document, you can use the "Original mode".
Cutting
height
will
be
raised
as
front
levers
are
moved to the front, and rear levers are moved to
the rear.
Cutting height will be lowered as front levers are
moved to the rear, and rear levers moved to the
front. All wheels must be positioned at the same
height.
For rough or uneven lawns, move the wheels to a
position which will give a higher cutting height.
HANDLE POSITION
The upper handle can be adjusted to a high or low
position. The adjustment is made by removing the
hex nuts, lock washers and curved head bolts and
reassembling
in
the
other
position.
A
V
2
"
wrench
is required. See figure 8.
FIGURE 8.
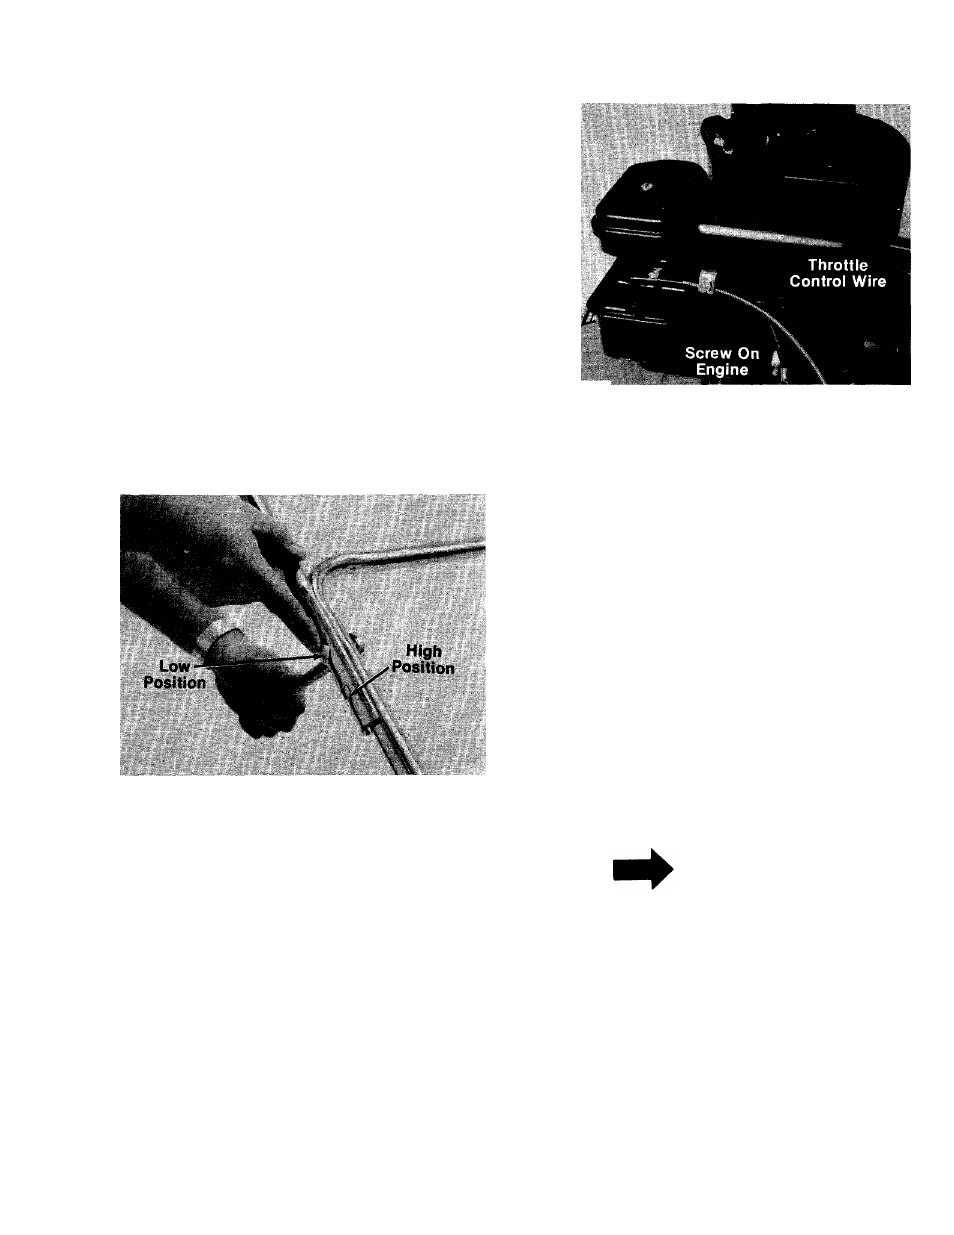
THROTTLE
If
adjustment
becomes
necessary,
the
throttle
control wire assembly can be reset as follows:
1.
Loosen,
but
do
not
remove,
screw
securing
throttle
control
wire
assembly
at
engine.
See
figure 9.
2.
Move
throttle
control
lever
on
handle
to
“FAST” position.
3.
Move lever, to which control wire is fastened
at
engine,
to
full
open
position
and
retighten
screw
to
secure
throttle
control
wire
assembly.
FIGURCT
CARBURETOR ADJUSTMENTS
^ WARNING J
If any adjustments are made to the
engine
while
the
engine
is
run
ning
(e.g.
carburetor),
disengage
all
clutches
and
blades.
Keep
clear
of
all
moving
parts.
Be
careful
of
heated surfaces and muffler.
Minor
carburetor
adjustment
may
be
required
to
compensate
for
differences
in
fuel,
temperature,
altitude and load.
All
carburetor
adjustments
should
be
made
with
the
air
cleaner
on
engine.
Air
cleaner
mounting
screw must be in carburetor when engine is run.
Best adjustment is made with a fuel tank half full
of gasoline.
To
adjust
the
carburetor,
refer
to
the
separate
engine manual packed with your mower.
LUBRICATION
IMPORTANT
Always
stop
engine
and
disconnect
spark
plug
wire
before
cleaning,
lubricating
or
doing
any
kind
of
work on lawn mower.
Wheels
—The
wheels
require
no
lubrication.
However,
if
the
wheels
are
removed
for
any
reason, lubricate the surface of the axle bolt and
the inner surface of the wheel with light oil. A 4 oz.
plastic
bottle
of
light
oil
lubricant
is
available.
Order part number 737-0170. Engine oil may also
be used.
If your unit is provided with optional ball bearing
wheels, lubricate at least once a season with light
oil.