Know your unit, Application, Installing front handle – Ryobi HT920Dr User Manual
Page 6: C. know your unit, A. installing front handle, Assembly instructions, Rules for safe operation
Attention! The text in this document has been recognized automatically. To view the original document, you can use the "Original mode".
RULES FOR SAFE OPERATION
KNOW YOUR UNIT
APPLICATION
This unit is intended for househoid purpose oniy.
Use the Hedge Trimmer for;
• Trimming and the forming of hedges, shrubs, and
bushes with a branch diameter of up to 3/8 inch.
Lock-On Tab
Front Handle
Lock-Off Button
Rear Handle
Switch
Trigger
Extension
Cord
Retainer
Cutting Biade
ASSEMBLY INSTRUCTIONS
INSTALLING FRONT HANDLE
After removing your hedge trimmer from its carton,
remove the front handie, screw, and iock nut from the
piastic bag. Using a fiat biade screwdriver, which is the
oniy tooi needed for assembiy, instaii as foiiows:
2
.
A
WARNING: To prevent serious personai
injury, the handie and blade guard must be
installed when operating this unit.
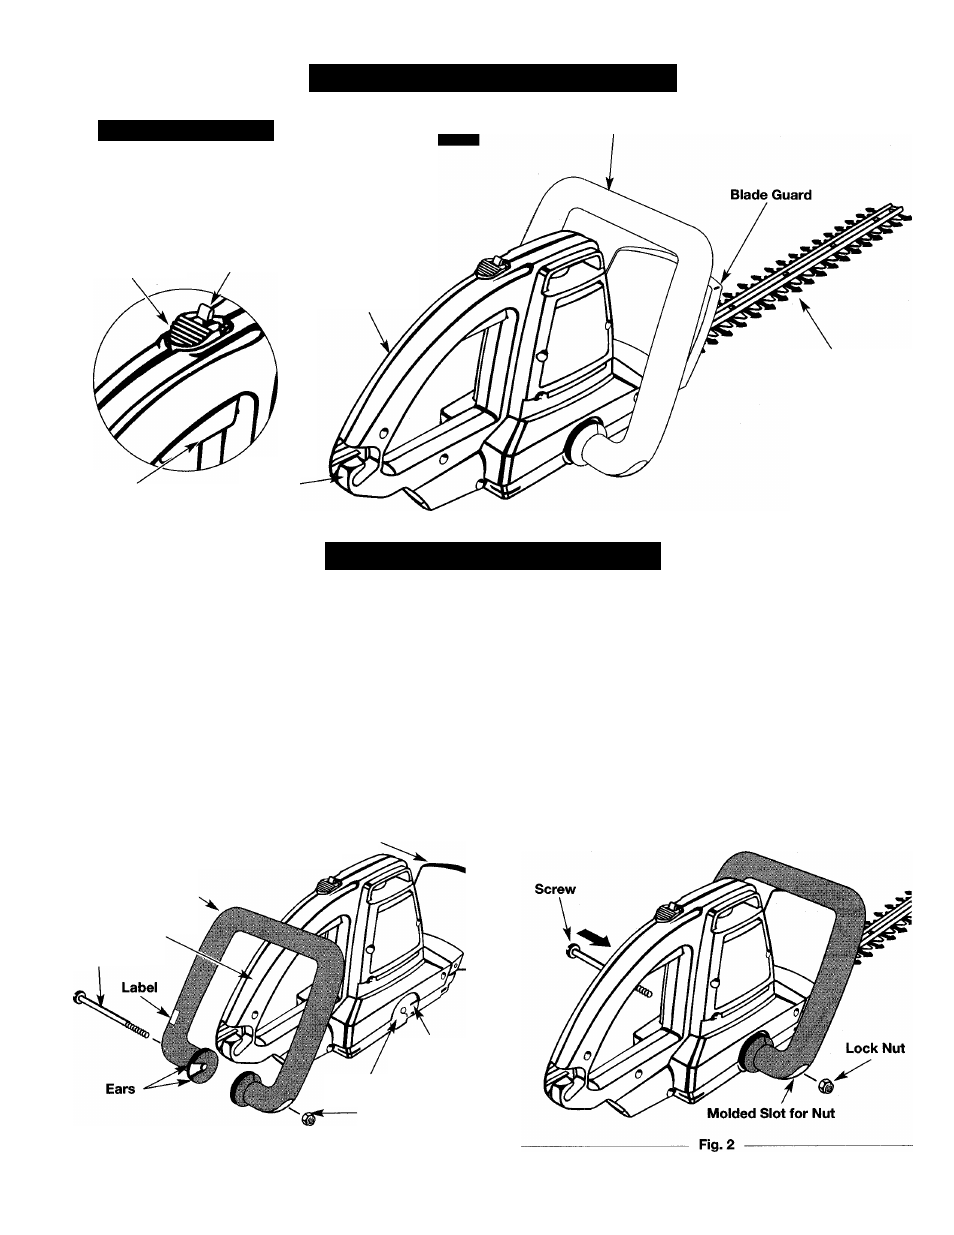
1. Orient front handle so that the side with the label will
be located on the left side of your hedge trimmer
(Fig. 1).
Blade Guard.
Front Handle
Rear Handle
Screw
Raised
Key Slot
Handle Slot
Lock Nut
4.
6
.
7.
Place the front handle parallel to the blade guard of
your hedge trimmer as shown in figure 1, then fit the
ears of the front handle into the handle slots on the
motor housing.
Rotate handle back and forth until recessed key slot
in handle engages and locks in position with raised
key slot in motor housing.
Place your trimmer on a workbench and place lock
nut into molded slot in front handle (Fig. 2).
Insert screw through the front handle and motor
housing (Fig. 2).
Start the screw threads into the lock nut.
Tighten screw securely with a flat blade screwdriver.
Fig.1