Accessory and selector settings, Adjusting stitch length, Adjusting needle-thread tension – SINGER 5147 User Manual
Page 24: Satin stitching
Attention! The text in this document has been recognized automatically. To view the original document, you can use the "Original mode".
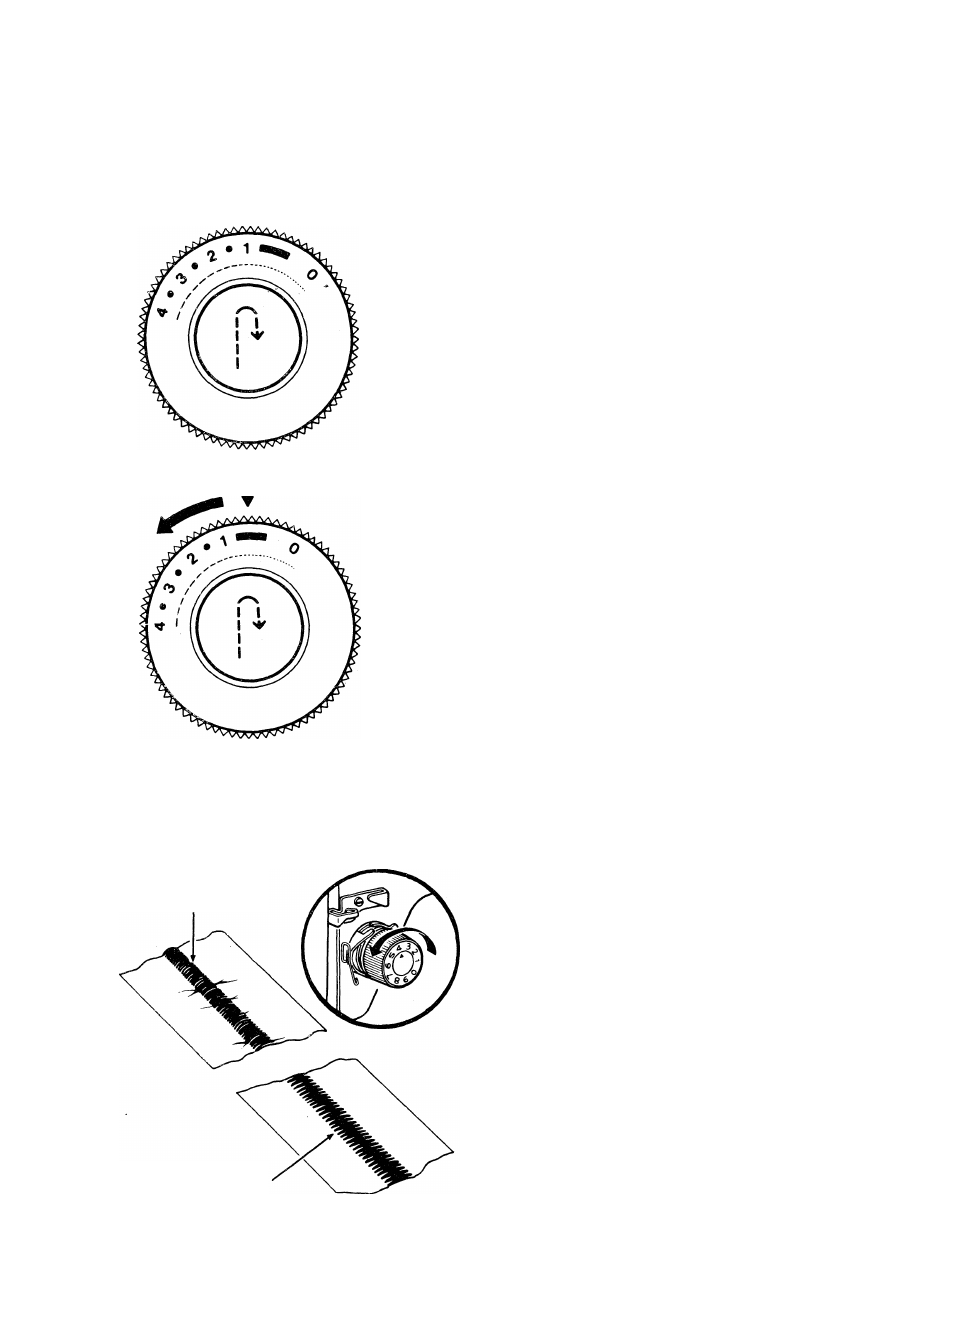
Incorrect
Correct
satin stitching
When you wish to produce a satin stitch, make
a test sample first so you can adjust stitch
length and thread tension properly. Soft fabric
may require a backing to ensure a firm stitch.
Crisp organdy, lawn or a fusible Interfacing are
suitable for this purpose.
Accessory and Selector Settings
• Pattern Selector; 1
• Stitch Width; 1 -5
• Stitch Length; 0 to 1
• General Purpose Needle Plate
• General Purpose Foot
ADJUSTING STITCH LENGTH
• Turn stitch length selector dial to 1.
• Run the machine at a slow speed and slowly
turn stitch length dial toward the left until
stitches are closely spaced and form a
smooth surface.
ADJUSTING NEEDLE-THREAD
TENSION
Satin stitching requires less tension than
straight stitching or open zig-zag stitching.
Furthermore, the wider the stitch, the lighter the
tension on the thread must be. Notice the
stitching on your sample. If the fabric Is
puckered, lower the needle-thread tension by
turning the tension dial to a lower number.
22