SINGER W162 User Manual
Page 7
Attention! The text in this document has been recognized automatically. To view the original document, you can use the "Original mode".
t>4\
jJWtij .-
^
' «it
■-
■¿..'. .
.,. •••^. .
.ax-
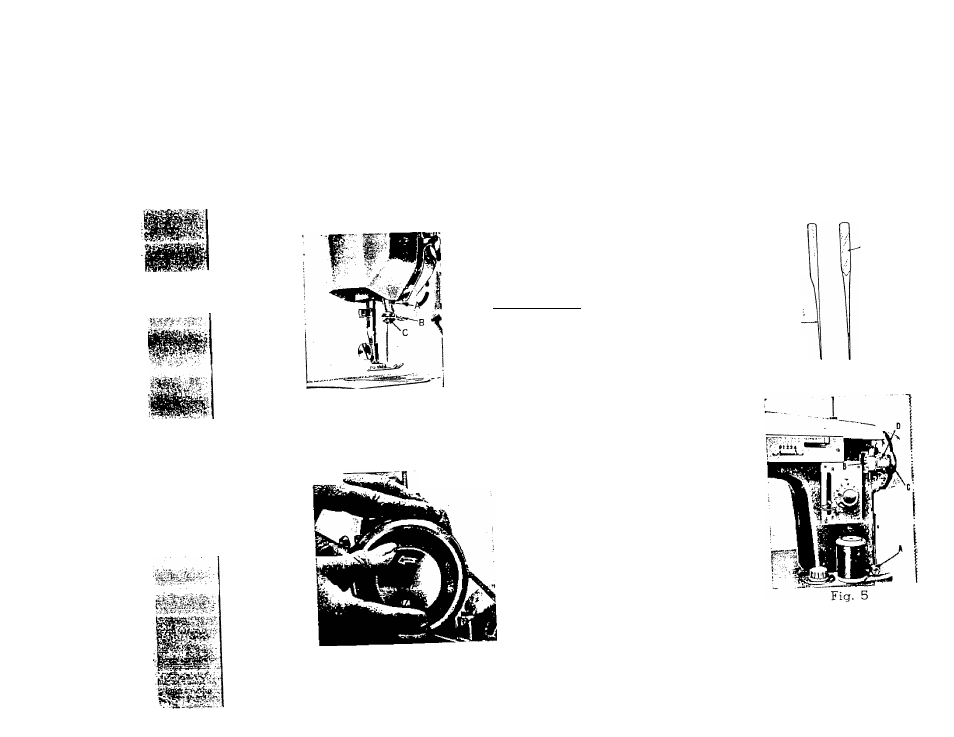
Fig. 3
SETTING THE NEEDLE
See Fig. 3. Raise the needle bar A to its
highest point, turning wheel toward you by hand.
Tlien loosen the needle clamp scr^ B and
d-e needle can be inserted into clamp C. Place
needle (flat side to right) in the needle clamp
and push it upward as far as fl will
needle clamp hole, tightening the needle clamp
screw securely with a screw driver.
After changing needle make one complete revolution
of balance wheel by hand to be sure the needle is in the
correct position.
FLAT i
si
'
uface
;
SIDE;
:
roo
\'
ed
SIDI
HOW TO WIND THE BOBBIN
Turn the clutch in the center
ipSl^^f toal
you to disengage tie se.ving
5
).^ Pass thread
on the spool pm on the be_d
¿
Fig. 4
through tension disc A. Insert thread
through a hole on edge of bobbin and
place bobbin on spindle (B) of winder.
Be sure that the notch in the bobbin
fits over the small pin on the spindle.
Place pulley (C) against hand wheel
by pressing lever (D) and set machine
in motion. When the bobbin is fully
wound, the action of the winder stops
automatically.
Remove
from
spindle
and cut off loose thread end used to
start winding. Before starting to sew
again, tighten clutch by turning it away from Y .
Tf the bobbin winds unevenly, adjust tne oonoiu
■
tenicn disc (A) to tte ,№ or left
=<="”;
When the disc is in the proper position, tighten s- .
^