Inserting and removing the bobbin case and bobbin, Threading the machine, Preparing eor sewing – SINGER 132B26 User Manual
Page 6: Tension of the bobbin thread (fig 18), Preparing for sewing
Attention! The text in this document has been recognized automatically. To view the original document, you can use the "Original mode".
INSERTING AND REMOVING THE BOBBIN CASE AND BOBBIN
Turn the balance wheel until the needle is above the needle plate.
Push the retainer (1, Fig. 16) to the left like the figure 16, and remove the
bobbin case (2, Fig. 16).
Pull up the latch (1, Fig. 17) and lift the bobbin from the bobbin case.
To insert a full bobbin, raise the latch in center of the bobbin case, and
place the bobbin on the center post of the bobbin case.
Be sure that the thread draws out from the bobbin from left to right.
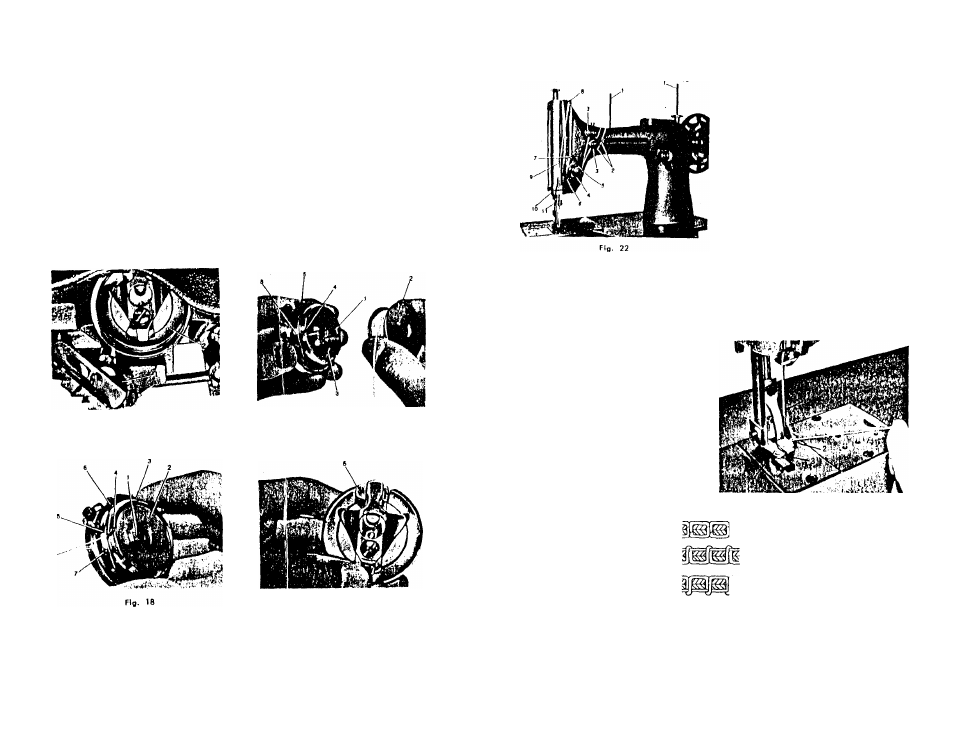
Pull the thread into the cut (4, Fig. 18) in the edge of the bobbin case, and
from you under the tension spring (5, Fig. 18). Then, pass its end from the
back through the hole (6, Fig. 18) in the bobbin case.
Finally, push down the latch to retain the bobbin in position.
Fig. 16
Fig. 17
Fig. 19
— 7 —
from you
THREADING THE MACHINE
Raise the needle bar to its highest
point, learl the thread from the hole
(I) through the thread guide (2), from
above between the retaining discs (,'i),
and from right to left around the ten
sion discs (4), over the spring (6), un
der the slack thread regulatrrr (6), up
through the guard (7), from right to
left through the hole in the take up
lever (8), down through the thread
guide (9) and the thread guide (10),
through the needle clamp hole (It),
then through the eye of the needle
1 ,
leaving the end of the thread about 10 cm long.
PREPARING EOR SEWING
With the lelt hand hold the end
of the needle threarl, leaving it (piite
slack from the end to the needle.
Turn the hand pulley toward you
until the needle moves down and up
again to its highest position, thus
catching the under thread.
T'hen, pull the end of the needle
thread you are holding, then the
bobbin thread will be brought up
with it through the needle hole in
the needle plate.
TENSION OF THE
BOBBIN THREAD (Fig
18
)
If it is necessary t(i alter
the tension on the bobbin
thread, slightly turn the screw
(7) to the right to increase it
or turn the screw to the left
to decrease it.
Fig. 23
I" Perfect stitching.
- Tight tension of needle thread
Loose tension of needle thread.
Fig. 24
— 8