SINGER 2118 User Manual
Page 27
Attention! The text in this document has been recognized automatically. To view the original document, you can use the "Original mode".
Four-Step Buttonholes (Cont’d.)
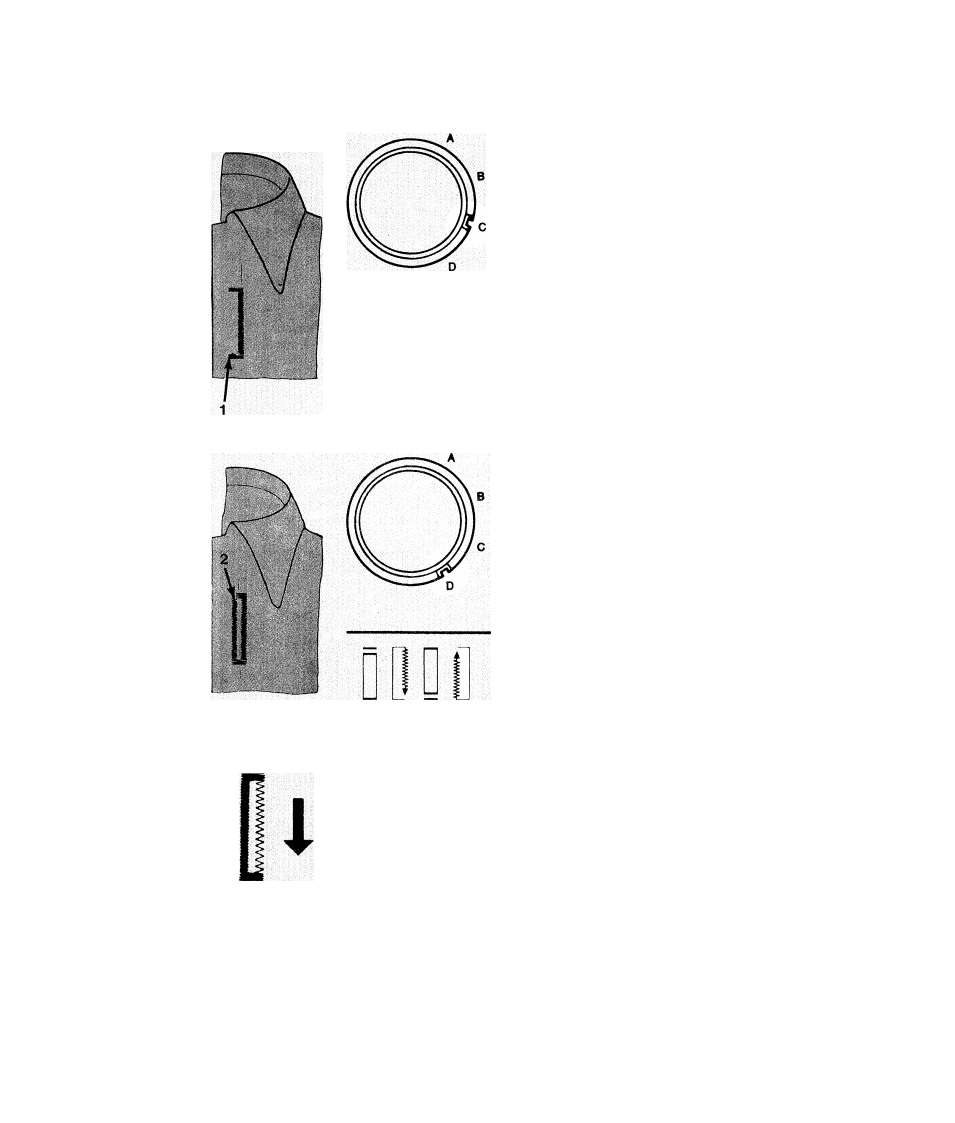
Step C: Front Bartack
* Raise needle out of fabric.
^ Him stitch-length dial to “C”.
Sew four stitches ending at point (1).
n
A B C D
Step D: Left Side Stitching
^ Raise needle out of fabric.
* Turn stitch-length dial to “D”.
^ Sew side stitching until it meets rear bartack
at (2). The buttonhole is now complete.
A B C D
t
Changing Stitch Density
To obtain a similar stitch density on both sides
of the buttonhole, the balance control may need
adjustment as follows:
^ With balance control centered, make a test
buttonhole.
^ If stitches on right side are too far apart,
move control downward.
* If stitches on right side are too close, move
control upward.
Re-center control after all buttonhole sewing is
complete.
25