L 1 j – SINGER 814 Stylist User Manual
Page 28
Attention! The text in this document has been recognized automatically. To view the original document, you can use the "Original mode".
ZIG-ZAG STITCHING (Continued)
Before moving selector, make sure stitch
length dial is OFF buttonhole settings
and needle is above fabric
To produce a zig-zag stitch pattern, move
the stitch width selector dial from the
straight-stitch setting j to any zig-zag
setting to the right. Stitch width is in
creased as the dial is moved to the right.
ADJUSTING WIDTH OF DESIGN
Adjusting Stitch Width
L 1 J
Button Sewing
Decorative
Stitching
at Narrow
Most used Widths
Setting for
Single-Needle
Work
Adjusting Stitch Placement
ADJUSTING STITCH PLACEiVIENT
Before moving selector, make sure stitch
length dial is OFF buttonhole settings
and needle is above fabric
Most of your basic zig-zag stitching will
be done in center ( ^ ) needle position.
Left ( L ) and right ( J ) settings are
used for special stitch placement as in
button sewing.
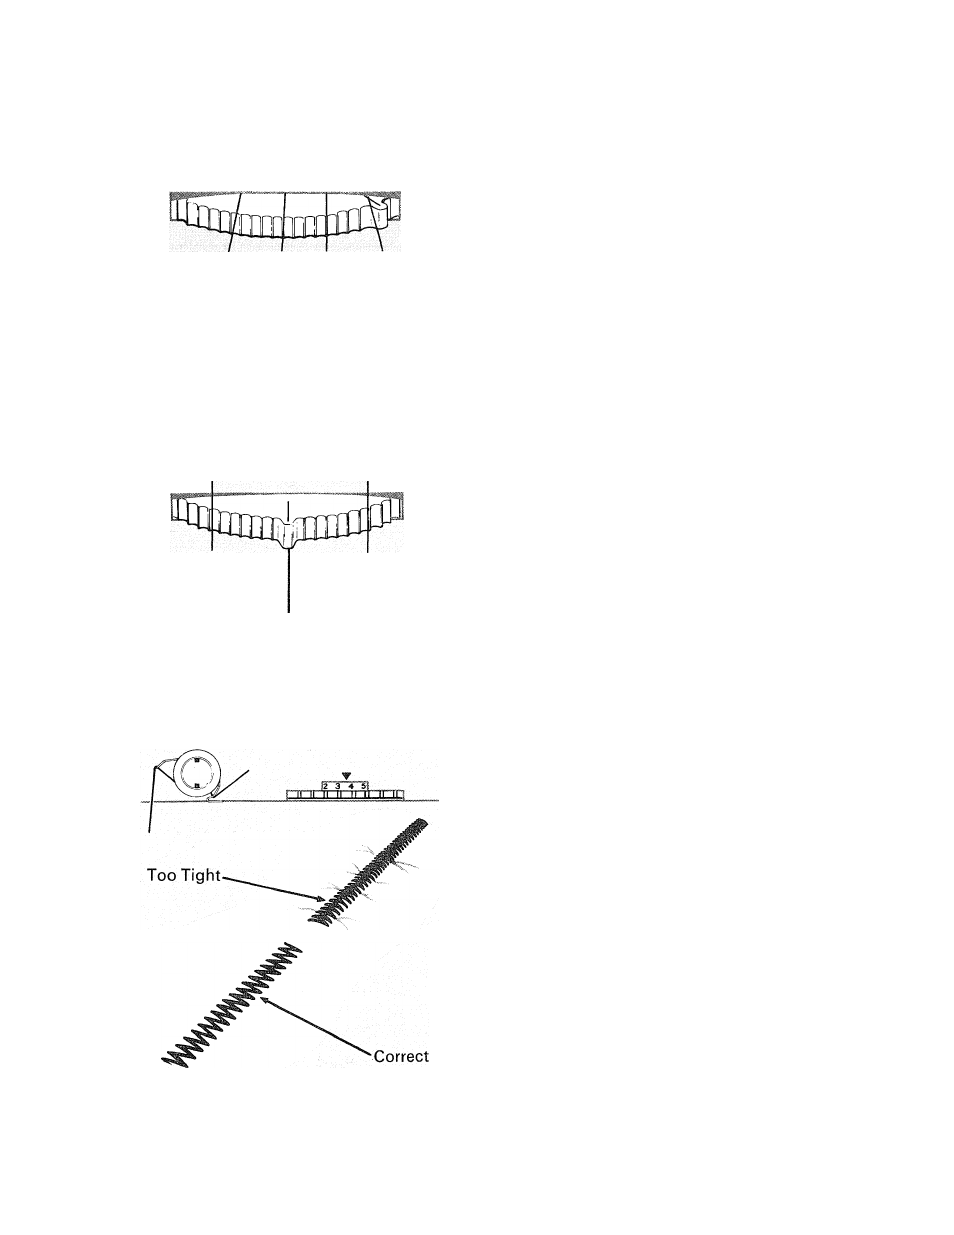
Adjusting Needle-Thread Tension
ADJUSTING
TENSION
NEEDLE-THREAD
Basic zig-zag stitching requires less
needle-thread tension than straight stitch
ing. Make a test sample with the fabric
and thread you plan to use so that you can
adjust the tension properly. The stitches
should lie flat against the fabric without
causing the fabric to pucker.
If the stitches are not flat and the fabric is
puckered, lower the needle-thread tension
by turning the dial to a lower number.
26