Twin needle sewing, R8. twin needle sewing – SINGER 6217 User Manual
Page 39
Attention! The text in this document has been recognized automatically. To view the original document, you can use the "Original mode".
r
8. TWIN NEEDLE
SEWING
Twin needle sewing produces two parallel
lines of closely-spaced decorative stitching.
You can sew with either one or two thread
colours.
Your machine is not supplied with the twin
needle or spool pin. These may be obtained
from your local SINGER stockist as optional
accessories.
Recommended settings
Stitch Selection:
Needle Position:
Stitch Width:
Stitch Length:
Foot:
Needle Plate:
Desired stitch
II
2-5
General Purpose (B)
General Purpose (A)
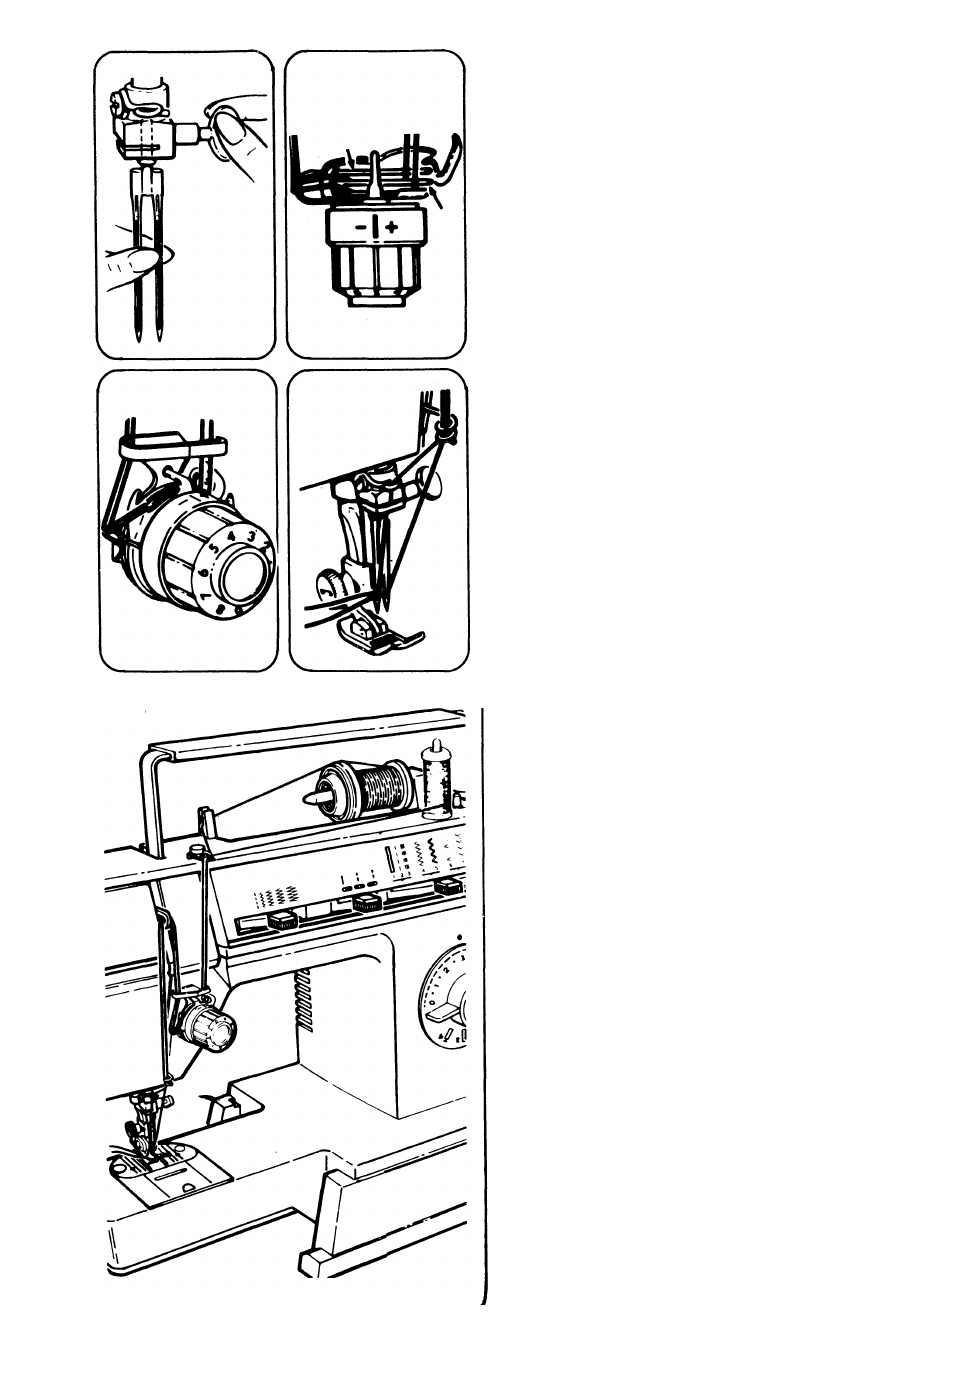
• Turn the machine off.
• Insert the twin needle with the flat side of
the shank toward the rear of the machine.
• Thread the machine as you normally would
for single needle stitching, except pass the
thread between the centre and the back
tension discs A, and through the left eye
of the twin needle.
• Insert a second spool pin into the hole on
the top cover of the machine, as illustrated.
• Thread the machine in the usual way,
except pass the thread from the second
spool between the centre and the front
tension discs B, as shown.
• Pass the thread through the remaining
points, making certain to omit the thread
guide just above the needle and pass
thread through right eye of needle.
• Draw both threads under the foot and back
along with the bobbin thread.
• Slowly lower the needle into the hole in
the needle plate by turning the hand wheel
toward you to make sure the needle clears
the plate.
• Make sure not to use a stitch width greater
than that what is recommended when twin
needle stitching.
37