Sears 51271 User Manual
Page 11
Attention! The text in this document has been recognized automatically. To view the original document, you can use the "Original mode".
Once your icemoker is In operotion, throw
ciwcsy the first few botches of ice cubes.
This will
flush away any Impurities in the water line. Do the
same thing after vacations or long periods when ice
isn't used.
I^Sscorcf th^i first
SIX
^plossfuls of wroter
in the
kitchen sink. This will eliminate the slight "plastic"
taste temporarily imparted to the water by the
water reservoir,
CAUTION:
Linder certain rare circumstances, ice
cubes may be discolored, usually appearing with
a green-bluish hue. This unusual discoloration is
apparently due to a combination of factors such os
certain characteristics of local waters, household
plumbing and the accumulation of copper salts in an
inactive water supply line that feeds the icemaker.
Continued consumption of such discolored ice cubes
may be injurious to health. If your ice cubes are
discolored, discard them and contact your Sears
Service Center.
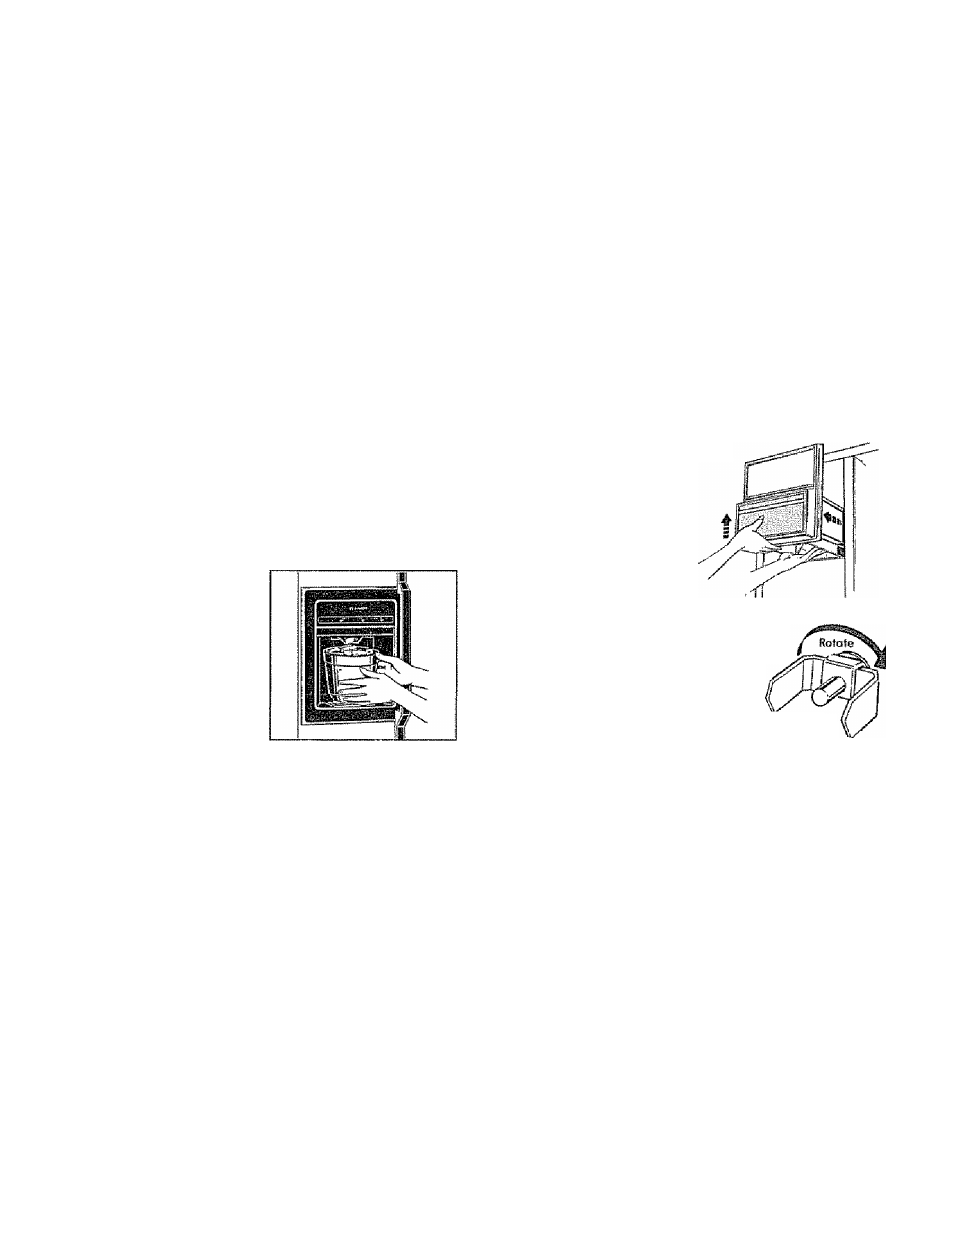
To Dispense (ce and Wafer
For ice,
set selector
switch to CUBED ICE or
CRUSHED ICE.
For water,
simply
position
container
beneath word "WATER'.'
Grip
container
gently
near
the rim and press rim firmly
against dispenser cradle.
CAUTION: Never put fingers or other objects
into the ice crusher discharge opening.
When dispensing ice,
some crushed ice may be
dispensed even though you selected CUBED ICE. This
happens occasionally when o few cubes accidentally
get channeled to the crusher.
Sometimes a mound of snow will form on the
door in the ice chute. This condition is normal, and
usually occurs when you hove dispensed crushed ice
repeatedly. The snow will eventually evaporóte.
The water system provides approximately six
successive 6-ounce glassfuls,
after which it fakes
several hours for replenished water reservoir supply
to cool. You probably will not drain all the chilled
water from the reservoir on o single occasion.
The first glass of water dispensed may be
warmer than the following ones.
This is normal.
Dispensed water is chilled, not iced.
For colder
water, simply add ice before dispensing water.
To stop dispensing,
release pressure from cradle
ond withdraw slowly to catch Iasi bits of ice or drops
of water.
Some slight dripping may occur
following
dispensing of crushed ke or chilled water. If
excessive, wipe the spill dry immediately.
Do not pour water in spill shelf because it is not self
draining—pour It in the kitchen sink. Cleon the spill
shelf and its grille regularly—see page 12.
If Ice Clumps Form in Storage Bin,..
if ice is not used often, ice clumps can form In the
storage bin, resulting in temporary malfunction of
the dispenser mechanism.
If
this happens, remove
storage bin from freezer compartment, break up
ice dumps with fingertip pressure and discard
remaining clumps.
Replace bln before remaining cubes melt and fuse
together.
To remove ice cube
storage bin,
lift the left
corner to free the bin
from the shelf and pull the
bin straight out while
supporting it at front and
bock.
To replace bin,
slide the bin back until the tab on
the bin locks into the slot in the shelf.
If bin does not go all the way
back, remove it and rotate the drive
mechanism 1/4 turn. Then push bin
back again until the tab on the bin
locks into the slot in the shelf.
Drive
mechanism
IF ice is noi used oFfen, old cubes will become
cloudy and faste stale.
Empty the ice storage bin
periodically and wash it in lukewarm woter.
Move Feeler arm to OFF Jup) position when:
• the home water supply is to be off for several hours.
• the Ice storage bin is to be removed for a period
of time.
• going away on vocation, (Also turn off the valve in
the water supply line to the refrigerator.)
IF this is your First icemaker,
you
will
hear
occasional sounds thot may be unfamiliar. They
are normal ice-making sounds and ore not cause
for concern.
A water filter accessory kit to help purify off-tasting
incoming water and a water supply accessory kit
to help connect the icemaker to the cold woter
line are optionol at extra cost—see page 15.
n