How to install your home drinking water system, Step 5 – Sears WaterWorks RO 2000 User Manual
Page 10
Attention! The text in this document has been recognized automatically. To view the original document, you can use the "Original mode".
- HOW TO INSTALL YOUR HOME DRINKING WATER SYSTEM -
MAKE REMAINING RO CONNECTIONS - continued
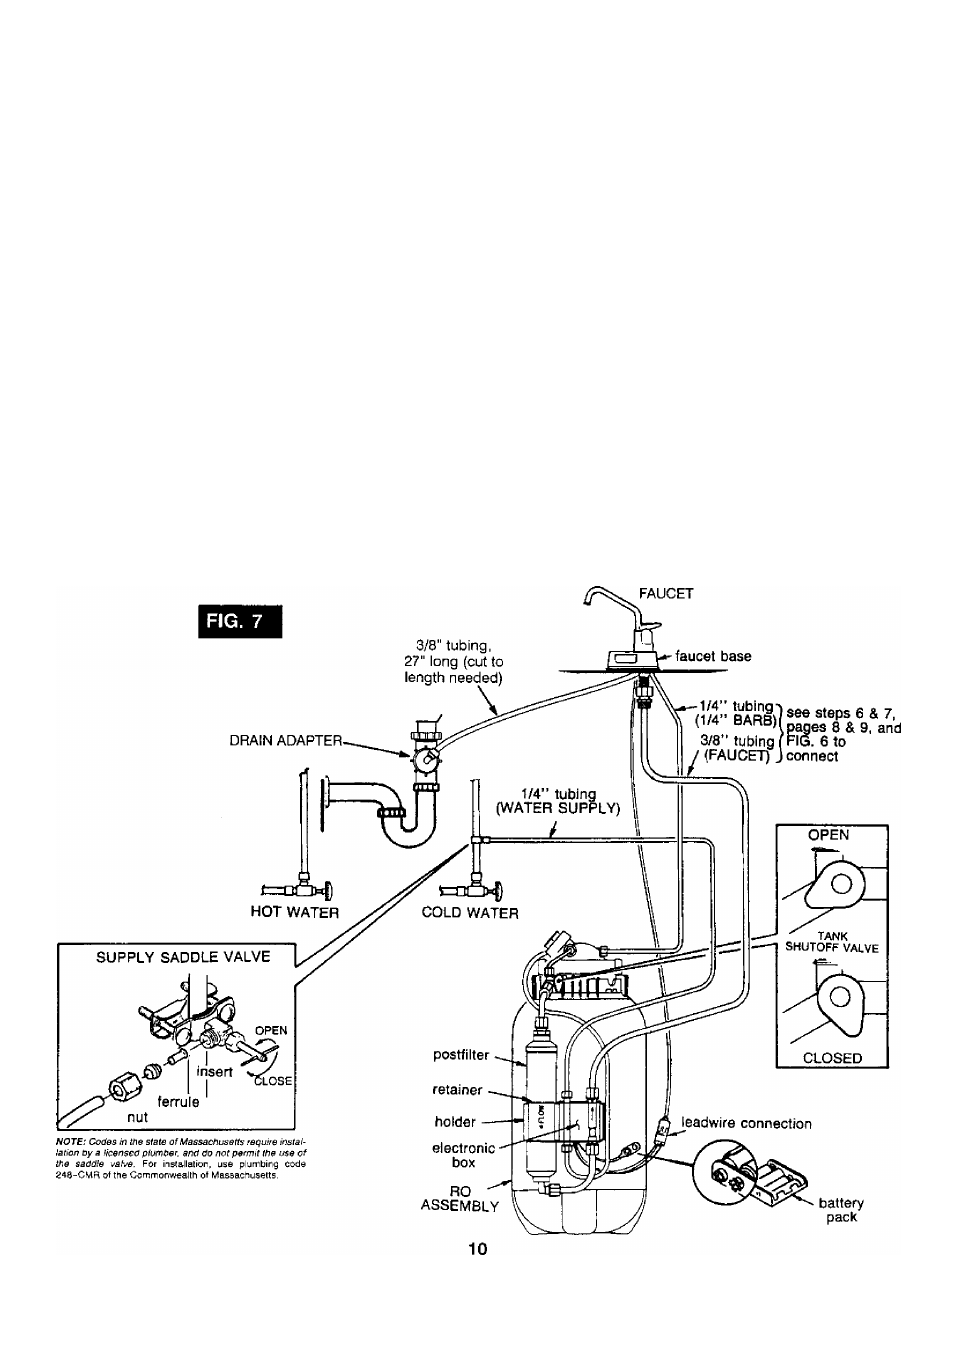
C. CONNECT TUBING TO WATER SUPPLY
Use the tubing insert, ferrule and nut, at the water
supply saddle valve, to fasten the remaining 1/4”
tubing (marked “WATER SUPPLY”). Tighten the
nut with a wrench.
B. CONNECT TUBING, FAUCET TO DRAIN TUB
ING CONNECTOR
Looking at FIG, 7 and page 16, run the 3/8” x 27"
tubing from the RO faucet, to the connector at the
adapter you installed in the sink drain pipe. Cut this
tubing as needed to route in as straight of a run as
possible without dips, loops, low spots or kinks.
Be sure the end of the tubing is cut square, then
push the end into the connector until it stops (about
11/16"). Pull on the tubing to be sure it is held se
curely.
STEP 5
— SANITIZING, PRESSURE TESTING, PLACING IN "SERVICE”
D. Fasten the faucet base and electronic box lead-
wire connectors together, routing where dry, and
out of the way.
A. DO THE SANITIZING PROCEDURES, PAGE
15. THEN, CONTINUE WITH STEP B.
B, Double check all tubing connections to be sure
they are tightened.
C. Open the house main water supply valve and
the supply saddle valve (turn handle fully out). Open
the tank shutoff valve. . .see below.
D. In about 4 hours, pressure will start to build in
continued on next oaae