Assembly instructions – Sears 308.70002 User Manual
Page 6
Attention! The text in this document has been recognized automatically. To view the original document, you can use the "Original mode".
ASSEMBLY INSTRUCTIONS
IMPORTANT: WE ADVISE YOU TO ASSEMBLE THE TENT ONCE BimRg QQINO CAMPING TO BECOME PAMli
1ДЯ
withthf
ASSEM9LY
OF
THE TENT,
for
THIS MODEL. IT IS RECOMMENDED TWO PEOPLE BE INVOLVED IN SETTING UP THIS TENT.
NOTE: PLEASE LOOK AT THE REPLACEMENT PARTS DIAGRAM TO SEE HOW YOUR FRAME
HAS BEEN COLOR COOED FOR EASY SET UP.
• To ргсЯопд the life of the tent floor, select a level, clean area for the campsite.
* To prevent damage to the zipper, unzip the doors and window flaps to allow air to enter the tent.
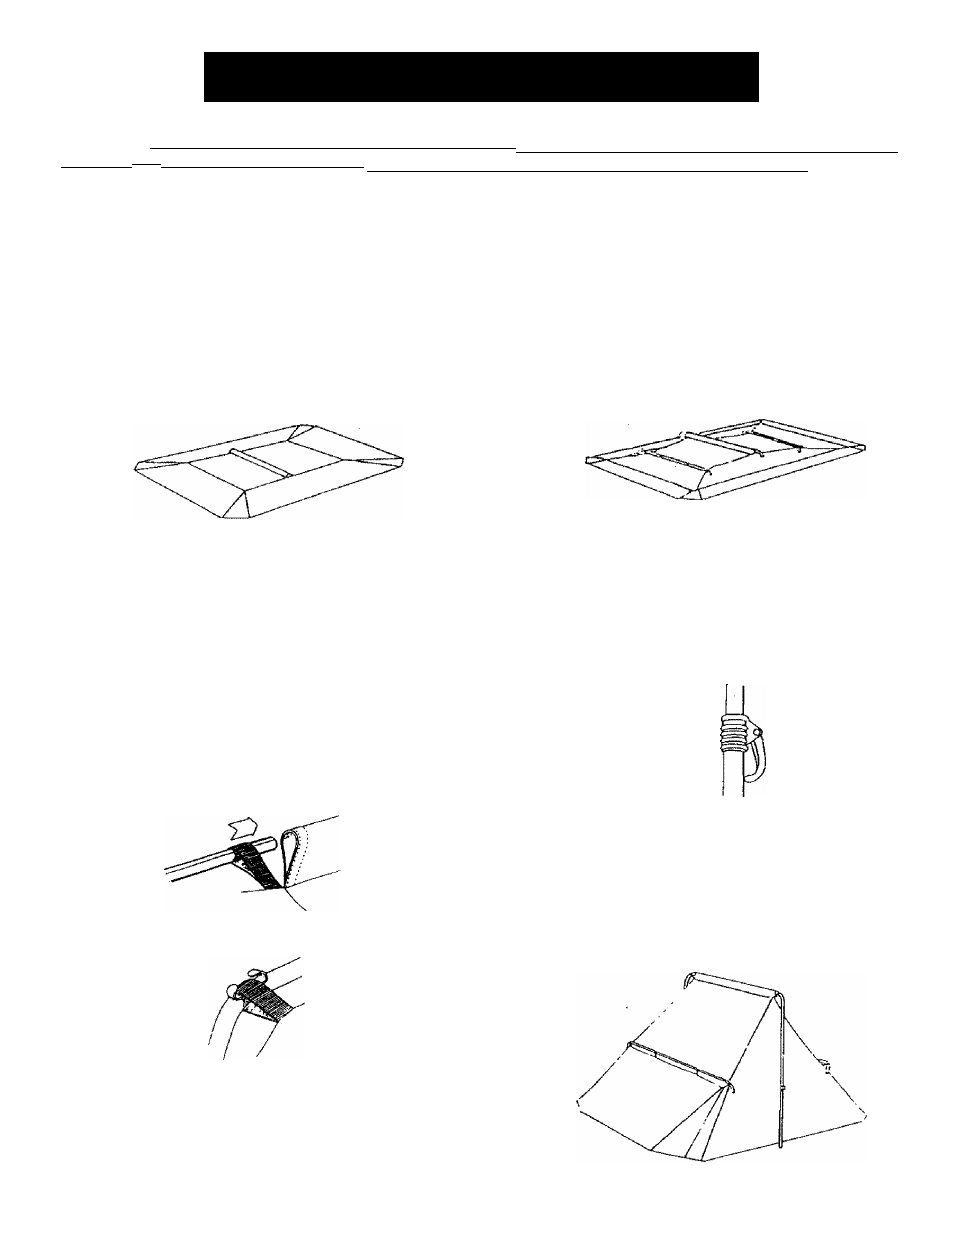
STEP 1:
Separate all frame sections by color.
STEP 2: Spread tent out flat, floor side down.
STEP 3;
NCR'S:
Make sure poie sleeves do not catch on pole while
inserting.
Stake down tent
inserting stakes through stake
loops at each corner. Hammer stakes into the
ground at a 45‘’ angle by using a hammer or
mallet- Make sure to pull tent out even and tight.
Stake down remaining loops.
The top center section of the frame, called the
“center ridge pole", consists of two bent sections,
color coded red, one with plain end and one with
swage.
Join these sections together by sliding the straight
end of each pole through the loop and into the
sleeve at opposite ends on the center of the roof.
STEP 5: There are two center upright sections, color coded
red. The center upright section consists of two
straight poles corded together and one friction lock
pole (this has a plastic clamp attached at one end).
Extend two straight sections and insert one with
the reduced end up, through the plastic clamp and
into the steel pole section. Repeat with the
remaining upright section.
Pull loops over curve and attach to C-clips.
STEP 4:
Locate "side ridge poles", color coded blue. The
side ridges of the tent have 3 sleeves. Repeat
above step 3, inserting poles through comer loops
and then the sleeves.
Join each upright section to the curved end of the-
center ridge pole.
STEP 6: With the help of another, on the opposite side, lift
and push up on the upright sections to raise tent.
Adjust center height by adjusting friction locks.
Once raised, clip tent to frame.