Operation – Sears 975502 User Manual
Page 8
Attention! The text in this document has been recognized automatically. To view the original document, you can use the "Original mode".
OPERATION
« Use 20 ozs. of oil. For type and grade of oil to use, see
“ENGINE” in
Customer Responsibilities section of this
manual,
•
Pour oil slowly. Do not over fill.
» Check oiffeve! before each use. Add oil if needed. Fill to
full line on dipstfck-
•
To read proper level, tighten engine oil cap each time.
•
Reinstall engine oil cap and tighten.
•
Change the oil after every 25 hours of operation or each
season. You may need to change the oil more often under
dusty, dirty conditions.
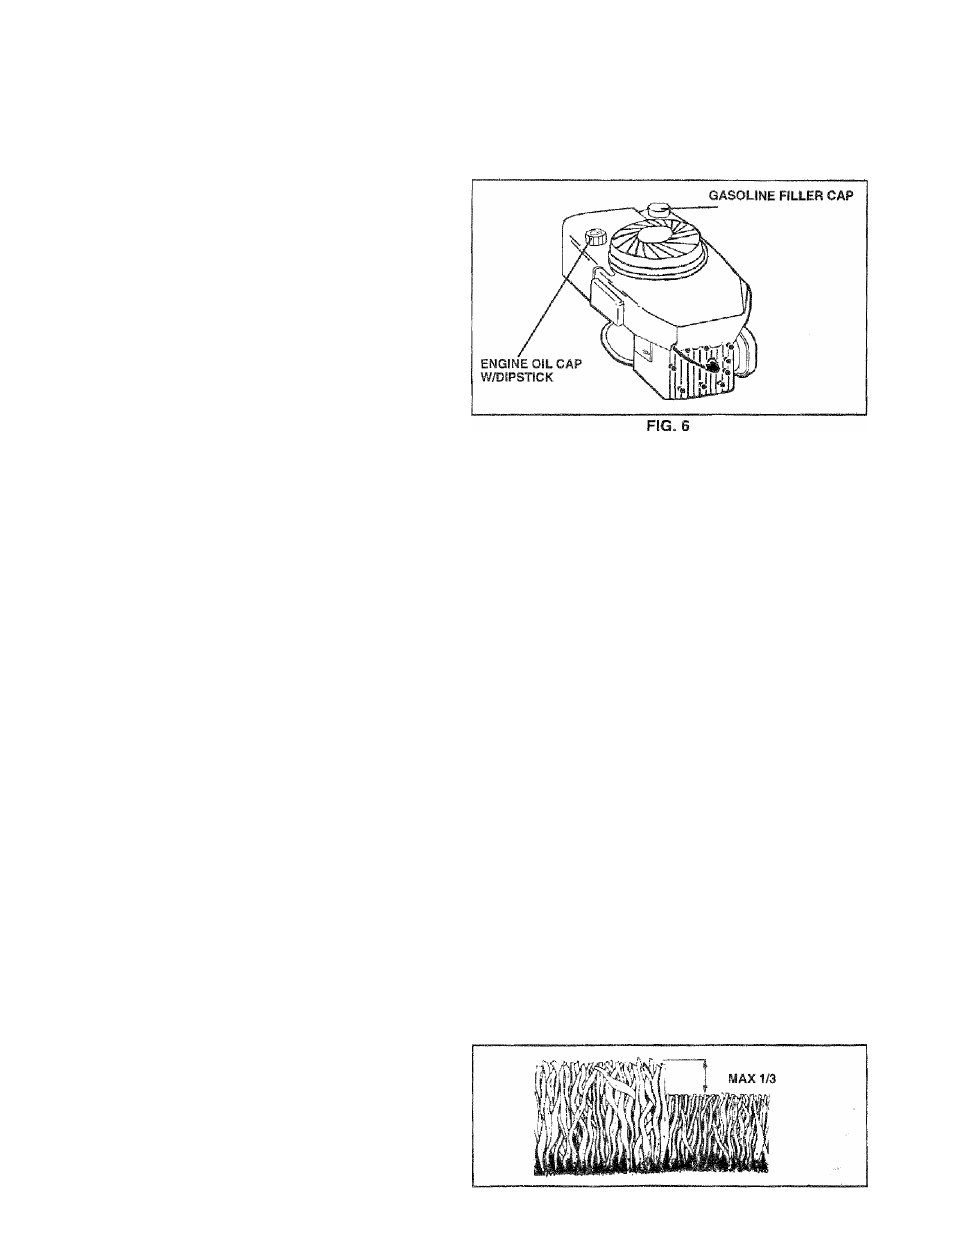
GAS
(See
Fig. 6
)
« Fill gasoline tank with fresh, clean, unleaded gasoline.
DO NOT USE PREMIUM GASOLINE. BE CAREFUL
NOT TO OVER FILL TANK.
WARNING: Experience indicates that alcohol blended
fuels (called gasohol or using ethanol or methanol) can
attract moisture which leads to separation and formation of
acids during storage. Acidic gas can damage the fuel
system of an engine while in storage. To avoid engine
problems, the fuel system should be emptied before stor
age of 30 days or longer. Drain the fuel tank, start the
engine and let it run until fuel lines and carburetor are
empty. Use fresh fuel next season. See Storage Instruc
tions for additional information. Never use engine or
carburetor cleaner products in fuel tank or permanent
damage may occur,
TO START ENGINE
•
To start a cold engine, push primer five (5} times before
trying to start. Use a firm push. This step is not usually
nec6,ssary when starting an engine which has already
run for a few minutes.
® Hold operator presence control bar down to the handle
and pul! starter handle quickly. DO NOT allow starter
rope to snap back.
.
- To STOP engine, release operator presence control
bar.
NOTE: In cooler weather it may be necessary to repeat
priming steps, in warmer weather over priming may cause
flooding and engine will not start. If you do flood engine,
wait a few minutes before attempting to start and DO NOT
repeat priming steps.
MOWING TIPS
•
Under certain conditions, such as very tall grass, it may
be necessary to raise the height of cut to reduce
pushing effort and to keep from overloading the engine
and leaving clumps of grass dippings.
® For extremely heavy cutting, reduce the width of cut by
overlapping previously cut path and mow slowly.
® For better grass bagging and most cutting conditions,
the engine speed should be set in the fast position.
» For side discharge lawn mowers, cutting in a counter
clockwise direction, starting at the outside of the area
to be cut, spreads grass clippings more evenly and
puts less load on the engine. To keep clippings off of
walkways, flower beds, etc., make the first cuts in a
clockwise direction.
® Pores in cloth grass catcherscan become filled with dirt
and dust with use and catchers will collect less grass.
To prevent this, regularly hose catcher off with water
and let dry before using.
Keep
top
of
engine
around
starter
clear
and
clean
of
grass
clippings
and
chaff.
This
will
help
engine
air
flow
and extend engine life.
MULCHING MOWING TIPS
IMPORTANT;
FOR BEST PERFORMANCE, KEEP MOWER
HOUSING FREE OF BUILT-UP GRASS AND TRASH. SEE
“CLEANING” IN CUSTOMER RESPONSIBILITIES SECTION
OF THIS MANUAL.
•
The
Special
mulching
blade
will
recut
the
grass
clip
pings
many
times
and
reduce
them
in
size
so
that
as
they
fall
onto
the
lawn
they
will
disperse
into
the
grass
and
not
be
noticed.
Also,
the
mulched
grass
will
biodegrade
quickly
to
provide
nutrients
for
the
lawn.
Always
mulch
with
your
highest
engine
(blade)
speed
as
this
will
provide
the
best
recutting
action
of
the
blades.
»
Avoid
cutting
your
lawn
when
it
is
wet.
Wet
grass
tends
to
form
clumps
and
interferes
with
the
mulching
action.
The
best
time
to
mow
your
lawn
is
the
early
afternoon.
At this time the grass has dried and the newiy cut area
will not be exposed to the direct sun.
®
For
best
results,
adjust
the
lawn
mower
cutting
height
so
that
the
lawn
mower
cuts
off
only
the
fop
one-third
of
the
grass
blades
(See
Fig.
7).
If
the
lawn
is
over
grown
it will be
necessary to
raise the height of cut to
reduce
pushing
effort
and
to
keep
from
overloading
the
engine
and
leaving
dumps
of
mulched
grass.
For
extremely
heavy
mulching,
reduce
your
width
of
cut
by
overlapping previously cut path and mow slowly.
®
Certain
types
of
grass
and
grass
conditions
may
re
quire
that
an
area
be
mulched
a
second
time
to
com
pletely
hide
the
clippings.
When
doing
a
second
cut,
mow across or perpendicular to the first cut path.
»
Change
your
cutting
pattern
from
week
to
week.
Mow
north to south one week then change to east to west the
next
week.
This
will
help
prevent
matting
and
graining
of the lawn.
8
FIG. 7