Anti-tip de¥ice, Oven, Replacing the – Sears 36725 User Manual
Page 20: Light
Attention! The text in this document has been recognized automatically. To view the original document, you can use the "Original mode".
ANTI-TIP DE¥ICE
If your range is removed for cleaning,
servicing or any reason, be sure anti>
tip
device
is
re-engaged
properly
when tbe range is replaced. Failure
to take this precaution could result in
tipping of the range and cause Injury.
When replacing the range:
1. Hook the loose end of the chain onto the bracket by
slipping the nearest link of the chain into the slot in
the bracket, making sure the chain is pulled as tight
as possible and that there is no excess slack in the
chain after chain is attached to the bracket,
• Excess slack in the chain could allow the range to
tip over,
2. Slide the range all the
way
back into the counter.
Once the range is pushed back in place, there will be
a small amount of slack in the chain. This is normal.
NOTE: To Insure the device Is installed and re-en
gaged properly, carefully try to tip the range
forward. The device should secure the range
and not allow it to tip.
(Electric model shown;
Opposite side used for Gas models)
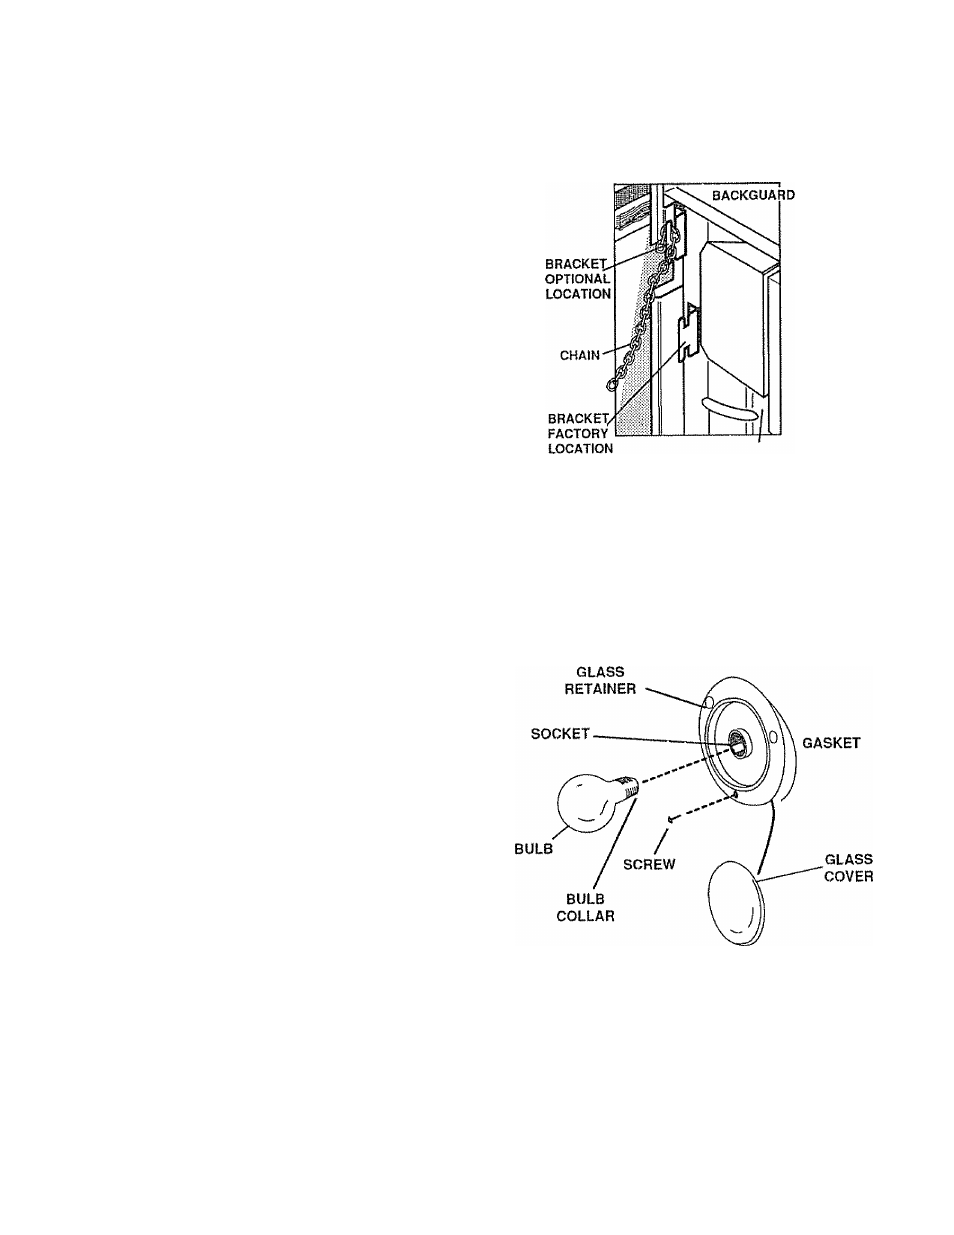
REPLACING THE
OVEN
LIGHT
Be sure that the light switch is in the OFF position.
A
Do
not touch hot oven bulb with wet
hands. Oo not wipe oven light area
with wet cloth. Unplug or disconnect
the electrical supply to range before
removing.
Never touch the electrically live collar on the bulb when
replacing it.
Electrical power must be shut off if you have to
replace a broken bulb.
1. Remove t he three screws and lift of 1 the glass retainer,
glass cover and gasket.
2. Replace the bulb with a 40 watt appliance bulb. An
appliance bulb is smaller than a standard 40 watt
household bulb.
3. Replace the gasket, glass cover and glass retainer.
Tighten screws securely.
19
NGMNT14