A caution, Caution – Carrier 31KAX User Manual
Page 10
Attention! The text in this document has been recognized automatically. To view the original document, you can use the "Original mode".
A
CAUTION
Do not splash detergent solution in eyes, and avoid pro
longed contact with skin. Keep detergent and solution out
of reach of children.
c. Before placing cells in washing container, pour in de
tergent. Use approximately 3/4 of cup per cell if con
tainer is about size of cell. Add enough very hot water to
cover cell or cells.
d. After detergent has completely dissolved, place elec
tronic cell (or cells) in container.
e. Soak cells for 15 to 20 minutes, slosh several times, and
remove.
f. Rinse cells with fine water spray.
g. Fill wash container with clean, hot water and soak cells
for 5 to 15 minutes.
h. Remove cells and let water drain from them. If water
draining from them feels slippery, detergent still re
mains. Repeat rinsing until water from them no longer
feels slippery. Inspect for cleanliness.
i. When both cells have been washed and thoroughly
rinsed, check cells for broken wires and bent collector
plates. If none are found, replace electronic cells and
prefilter in cabinet. Observe proper airflow arrows on
cabinet and cells.
j. Dry cells completely before turning on power to air
cleaner. This can be done by letting fan on system fur
nace or air handler run for approximately 30 minutes
before turning on power to air cleaner.
STEP 6. SERVICE GUIDE
A CAUTION
Procedures in this section should be performed only by
qualified service personnel.
A CAUTION
1. During troubleshooting procedures, dangerous line-
voltage circuits are exposed. Use care to avoid hazard of
electrical shock or damage to equipment.
2. Although not lethal, high-voltage output of power sup
ply can produce painful shock.
3. Be sure to properly ground air cleaner and its compo
nents before testing.
4. Do not touch any portion of air cleaner when energized.
Tools and Equipment
Servicing the electronic air cleaner can be accomplished with
only a few tools;
1. Screwdrivers: Long shank, plastic or rubber handles (two
required).
2. Needlenose pliers for stringing ionizing wires.
3. High-voltage jumper cord.
4. High-voltage tester: range to 12 KVDC.
5. Grounding wire.
ELECTRICAL TROUBLESHOOTING GUIDE
The following troubleshooting procedure is a simplified ap
proach to aid the serviceman in repairing any malfunction in
the electronic air cleaner. By following this troubleshooting
procedure, and operation light, the malfunction can be isolated
to certain areas in the electronic air cleaner.
NORMAL OPERATION
For normal operation of an electronic air cleaner, the system
blower should be running and the air cleaner switch should be
“ON.” This will allow the unit to be energized and cause the
light on the power door to glow. Occasional arcing by an elec
tronic air cleaner is normal (the light on the power door will
flicker). This can result when lint or large particles of dirt are
not stopped by the prefilters. The dirtier the electronic air
cleaner becomes, the more likely occasional arcing will occur.
Continuous arcing may indicate cleaning is necessary. (See
cleaning procedures.) The electronic air cleaner should operate
only when the system blower is running.
ISOLATING MALFUNCTIONS
Switch on the electronic air cleaner and energize the blower sys
tem. (See operation of an electronic air cleaner.) If the light does
not glow, remove the cells and replace the door. If the light
glows with the cells removed, the problem is within the cell or
cabinet. Proceed to steps 1 thru 3. However, if the light does not
glow, proceed to steps 4 thru 10.
It may be necessary to perform steps 1 through 3 after complet
ing steps 4 through 10 if there was a malfunction in both
sections.
1. Check spring on cell to see if it is bent, sprung, or de
formed. Check to see that it makes good contact with door.
(Repair or replace.)
Check male and female plug and receptacle and associated
wire connection on power door and cabinet for damage and
proper wiring.
Check air cleaner cells, visually inspecting for:
Heavy dirt accumulation (Wash cells—see cleaning
procedures).
Bent collector plates (Straighten).
Broken ionizer wires (Replace).
Ionizer springs broken or bent (Replace).
1. Check to see that ionizer springs are seated prop
erly in place. Improper seating may cause arcing.
Insulators cracked or broken (Replace).
1. Deterioration of metal around insulator indicates
defective insulator (Replace insulator).
Ionizer grid deformed (Repair or replace).
Check for short between high-voltage contact (found in center
of rectangular ceramic insulator) and frame of cell, with ohm-
meter. Resistance should be infinite, (open circuit)
If the light does not glow when cells are removed:
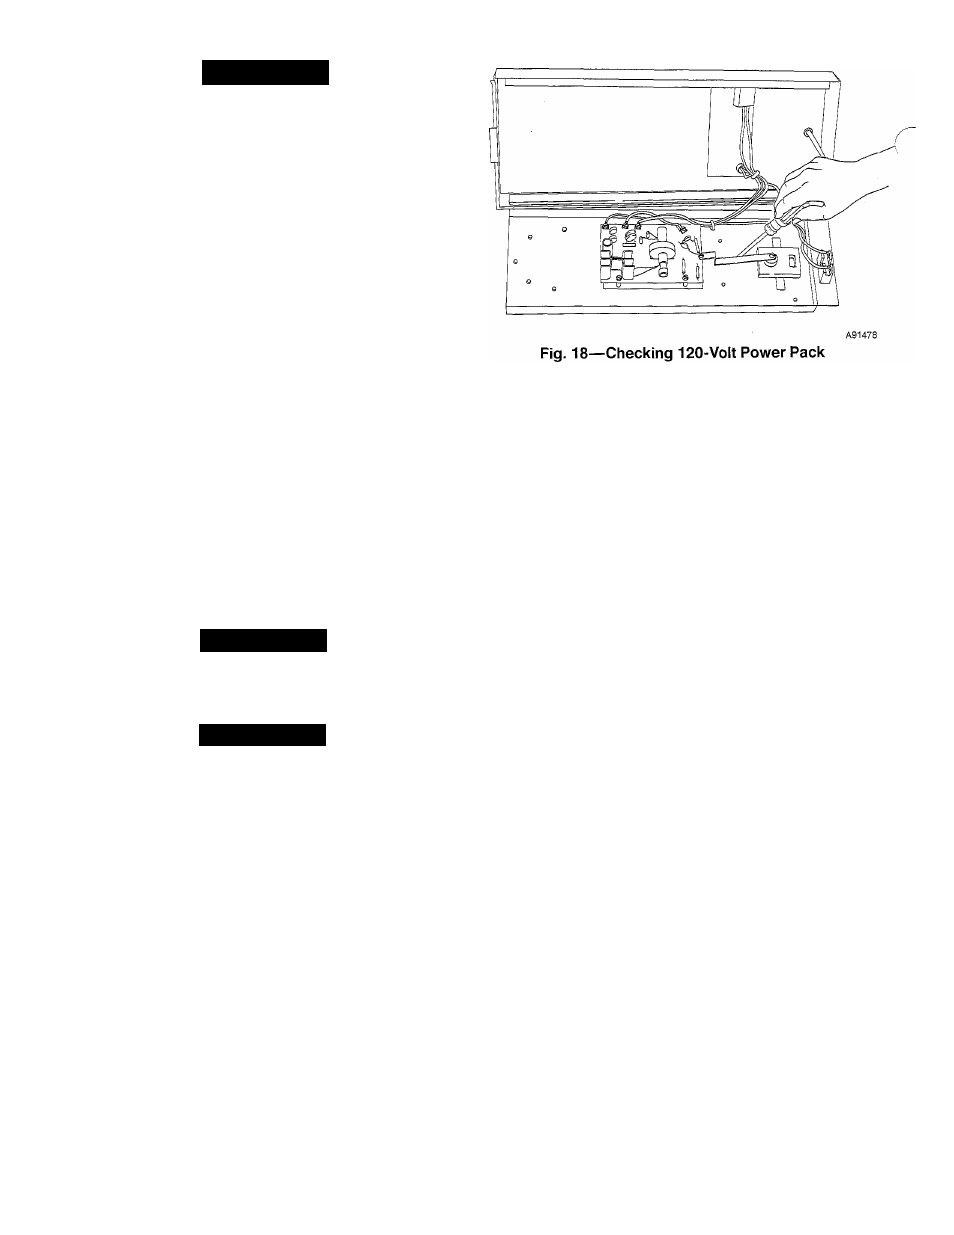
4. Remove power door from unit and check for power to air
cleaner cabinet. This can be accomplished with a volt
meter. Being careful to avoid electrical shock, check out-
2.
3.
b.
d.
f.
10