Zipper's Performance 109-213 User Manual
Nitrous a ssisted d ry s ystem
Use your motorcycle's specific Service
Manual as a guide for any procedure not
detailed in these instructions.
Product Overview
N
itrous
A
ssisted
D
ry
S
ystem
#109-213
This product is legal in California only for
racing vehicles which may never be used
upon a highway.
Please read through the instructions entirely
before performing this installation. If you do feel
not capable to perform this work, we
strongly recommend you find a professional
installer. If you are not entirely confident in
what you are doing, then stop now.
This kit is
designed to be installed on modified engines
using oversize ThunderMax® throttle bodies.
Based on your engine’s output it will likely
require oversize injectors and base map
calibration changes for the selected injectors.
This system is not designed as a “bolt on and
ride Nitrous kit” as will require some degree of
professional tuning. This product is sold as a 2-
part kit, the main component consisting of the air
cleaner backplate with solenoid assembly, air
filter and harness. The bottle and bottle
mounting brackets are sold separately (model
specific). It requires a ThunderMax® ECM and
is best used with the ThunderMax® Auto-Tune
module.
How a ‘Dry’ System Works
A ‘dry’ system introduces the required extra fuel
nitrous demands through the EFI fuel injectors,
rather than using a secondary fuel delivery
system. The ThunderMax® ECM has
programming built it that recognises the nitrous
system and increases the fuel ‘pulse width’
when activated. Once additional fuel is
introduced, it burns with extra oxygen provided
by the nitrous, providing additional power.
Installation
1. Remove the air cleaner cover, element and
backplate from the motorcycle. Retain the
original cover screw for future use.
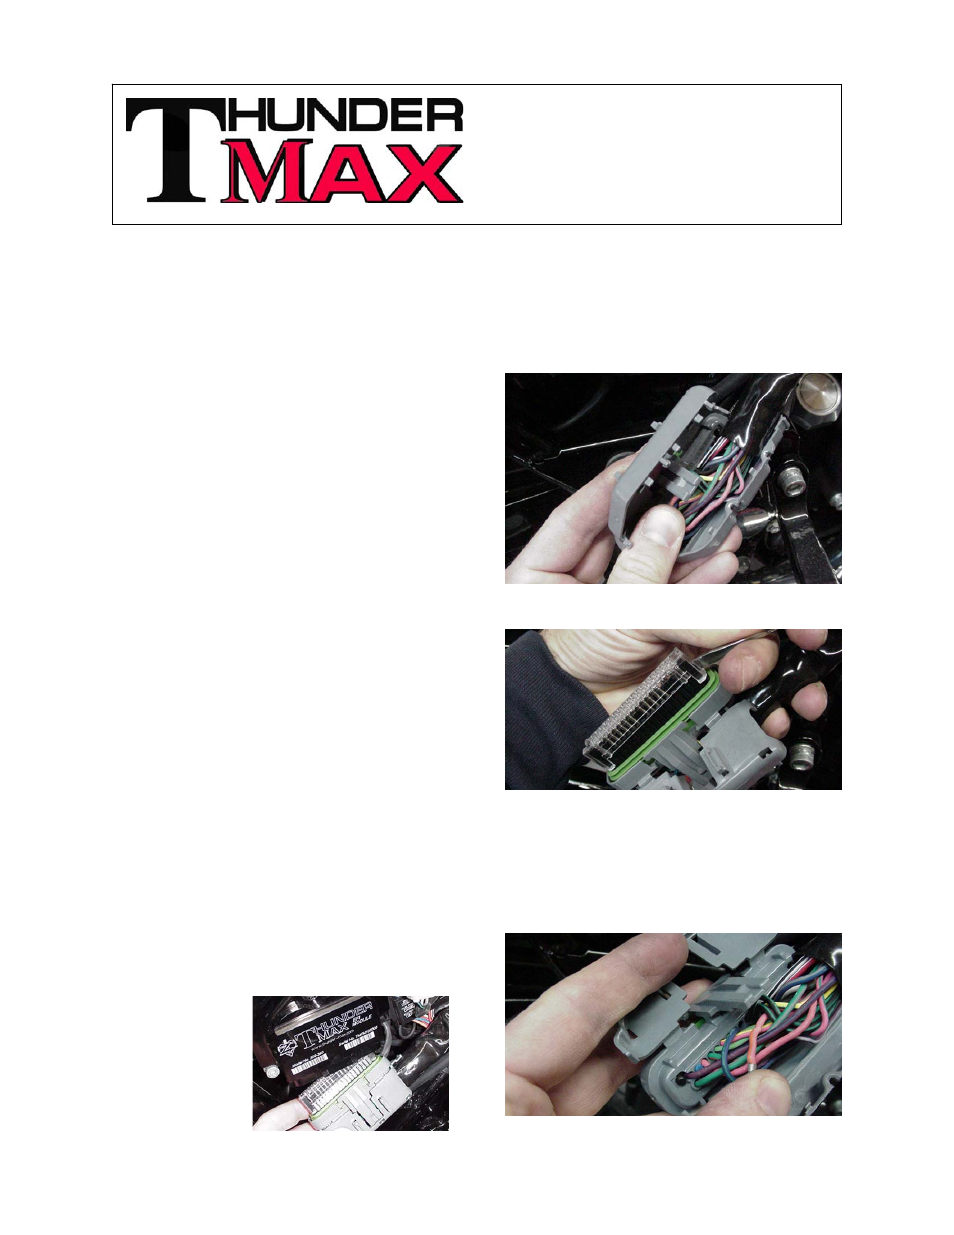
2. Electrical Harness Installation: Remove the
ECM fuse. Disconnect the negative battery
cable. Locate the
ThunderMax®
ECM and
disconnect the
wiring harness
connector from it.
3. Route the NADS electrical harness along the
backbone of the motorcycle and position the end
of the harness near the ECM.
Note: Depending upon your model, you may
need to remove the seat and/or raise
the gas tank to route the harness.
Carefully pry the strain relief (gray housing) of
the ECM connector apart.
4. Depress the tabs on the connector retainer
(clear plastic) and remove it from the connector.
5. Locate positions 9 and 32 on the "wire side"
of the connector. On the nitrous harness, insert
the terminal of the white w/black tracer wire into
position 9 and the terminal of the yellow w/black
tracer wire into position 32. Be sure to insert
them until they "click" into position and are at the
same depth as the other terminals.