Step 4, Step 5 – Winco 2-Wheel Dolly Kit Assembly Instructions for 5 KW thru 9 KW (except storm unit) (2013) User Manual
Page 4
4
3058-03
699-026I
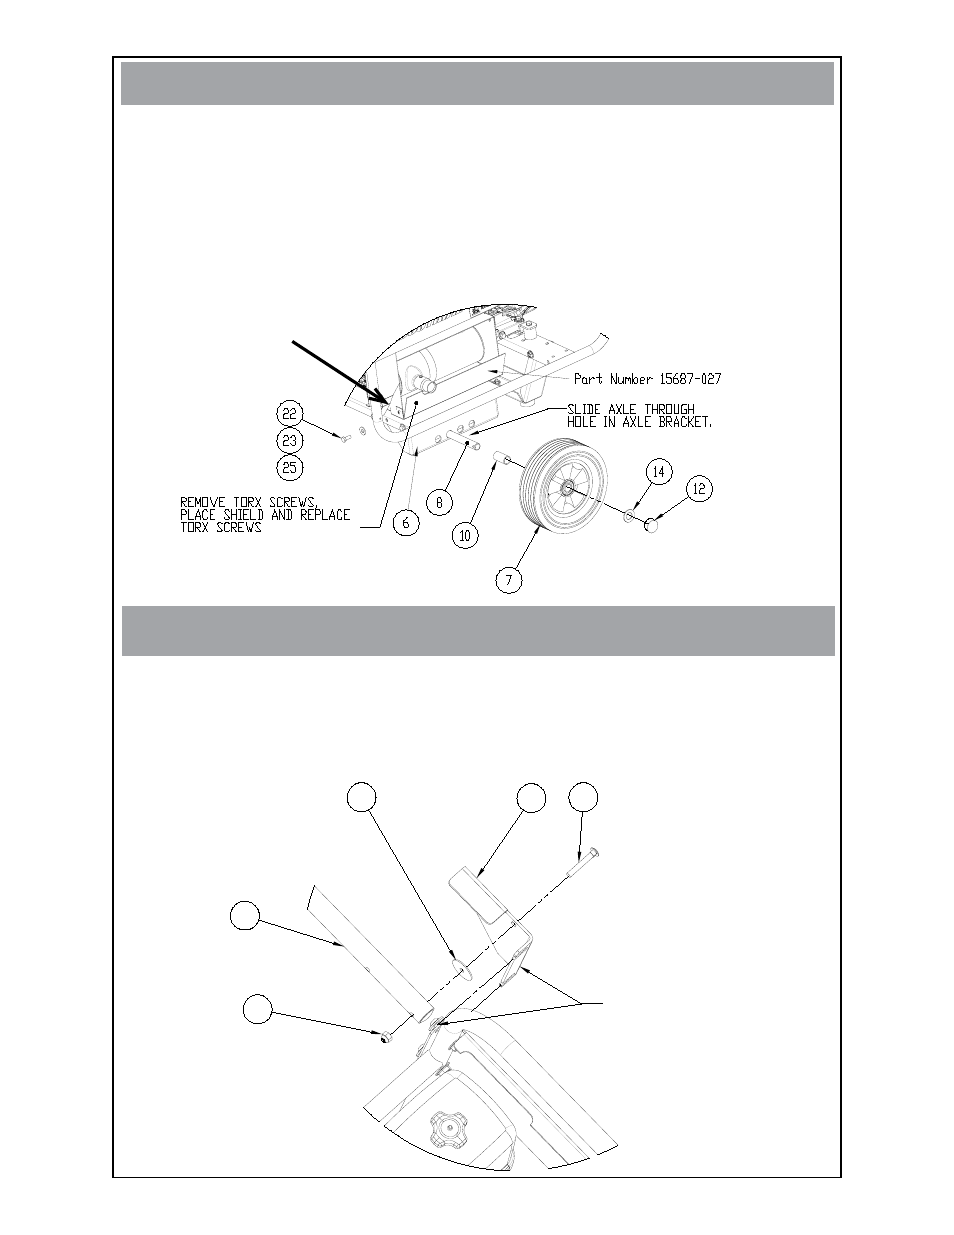
STEP 4
Place both axle brackets (ref. 6) into the rear cross channel of the cradle and bolt
on with hardware (ref. 22, 23, 25)
Remove and discard axle protectors (ref. 9). Place spacer (ref. 0), wheel (ref. 7),
washer (ref. 4) on the axle. Then tab the hubcap (ref. 2) on the axle. Then slide
assembly through the two axle brackets. Place other spacer, wheel and washer
on axle and lower to the ground. Place the other hubcap on the axle.
Remove the bottom two torx screws from the heat shield (A). Place the additional
heat shield in place and replace the two torx screws.
•
•
•
STEP 5
Install hole plugs (ref. 3) into ends of handle (ref. 2). Cut the foam strip (ref. 26)
in half using a scissors. Apply to the underside of the handle supports (ref. & 5).
Bolt left and right handle supports (ref. & 5) to the cradle using hardware on
cradle. Attach handle (ref. 2) using hardware (ref. 7, 5, 8). Tighten the nylock
hex nuts. Do not over-tighten so that the handle will move freely.
•
•
17
15
1
18
2
LOOSEN BOLTS TO CREATE
A GAP BETWEEN THE SIDE
RAIL AND WASHER. THEN
SLIDE HANDLE BRACKET IN
BETWEEN AND RETIGHTEN
BOLTS.
Winco Inc.
Service Dept.
507-357-683
A