Assembly instructions – Vogelzang BK50E User Manual
Page 4
Page 4
/ BK100E
Vogelzang International Corp.
VGZ-023 / 20120410.2
ASSEmblY INSTRUCTIONS
tools
required
CAUTION: STOVE IS HEAVY. mAKE SURE YOU
HAVE ADEqUATE HELP AND USE PROPER
LIFTING TECHNIqUES wHEN ASSEmBLING
KIT AND wHENEVER mOVING STOVE.
Refer to diagram and parts lists at back of this manual.
1. Remove parts from inside of carton. Parts
include: one damper collar (#1), two leg sets (#2),
one door/frame assembly (#3–17), and one hard-
ware pack (#7).
2. Stand barrel on end with plug facing up. Posi-
tion door between the large and small plugs
with the large plug at the 12 o’clock position.
NOTE: On 30 gallon barrels, use end without plugs
for mounting door.
3. Open the feed door and trace around the opening
using a scribe or marking pencil.
4. Open the slide draft and mark the bottom left corner
of the left side opening. Next mark the bottom right
corner of the right side opening.
5. Remove the door assembly from the barrel end.
Using a straight edge and marking tool, scribe a line
between the two marks representing the corners
of the slide draft. Next, scribe a line going up from
each corner mark until it intersects with the mark-
ings for the door opening.
materials
required
(NOTE: The following items are NOT included with your stove)
access the inside of the barrel to attach leg assem-
blies. Center legs so barrel is stabilized and secure
legs to barrel.
9. Align damper/collar toward the rear of barrel. Using
a scribe or marking tool, trace the throat of the collar
onto the barrel top.
10. Cut the flue pipe opening using a sabre saw or
reciprocating saw. De burr opening with metal file.
11. Reposition the damper collar over the newly created
opening. Mark and drill the mounting holes using a
1/4” bit. De burr opening with metal file. Attach the
damper collar using nuts and bolts provided with
kit.
metal File
Drill: Hand or Electric
1/4” dia. Drill Bit
#2 Phillips Screwdriver
10mm Nut Driver or
Ratchet with 10mm Socket
(for Stove Bolts)
Safety Glasses
Safety Gloves
Pencil or scribe
6 foot Folding Rule or
Tape measure
Sabre or Reciprocating Saw
with metal cutting blade
Tin Snips
Steel Barrel(s): Use only 30–55
gal. closed head-style steel
barrel(s).
Flooring Protection: Install on
non-combustible (soil or con-
crete) floor. Non-combustible
floor protection must be pro-
vided under any connector pipe
extending 2” on either side.
Chimney Connector Pipe:
round 6” dia. minimum 24
mSG black or 26 mSG blue
steel stove pipe (straight and/
or elbow(s) as required).
1/2” Sheet metal Screws.
Chimney: Existing 6” Lined ma-
sonry Chimney or 6” Inside Dia.
listed Type HT chimney.
Furnace Cement (manufacturer
recommends Rutland Code 78
or equivalent).
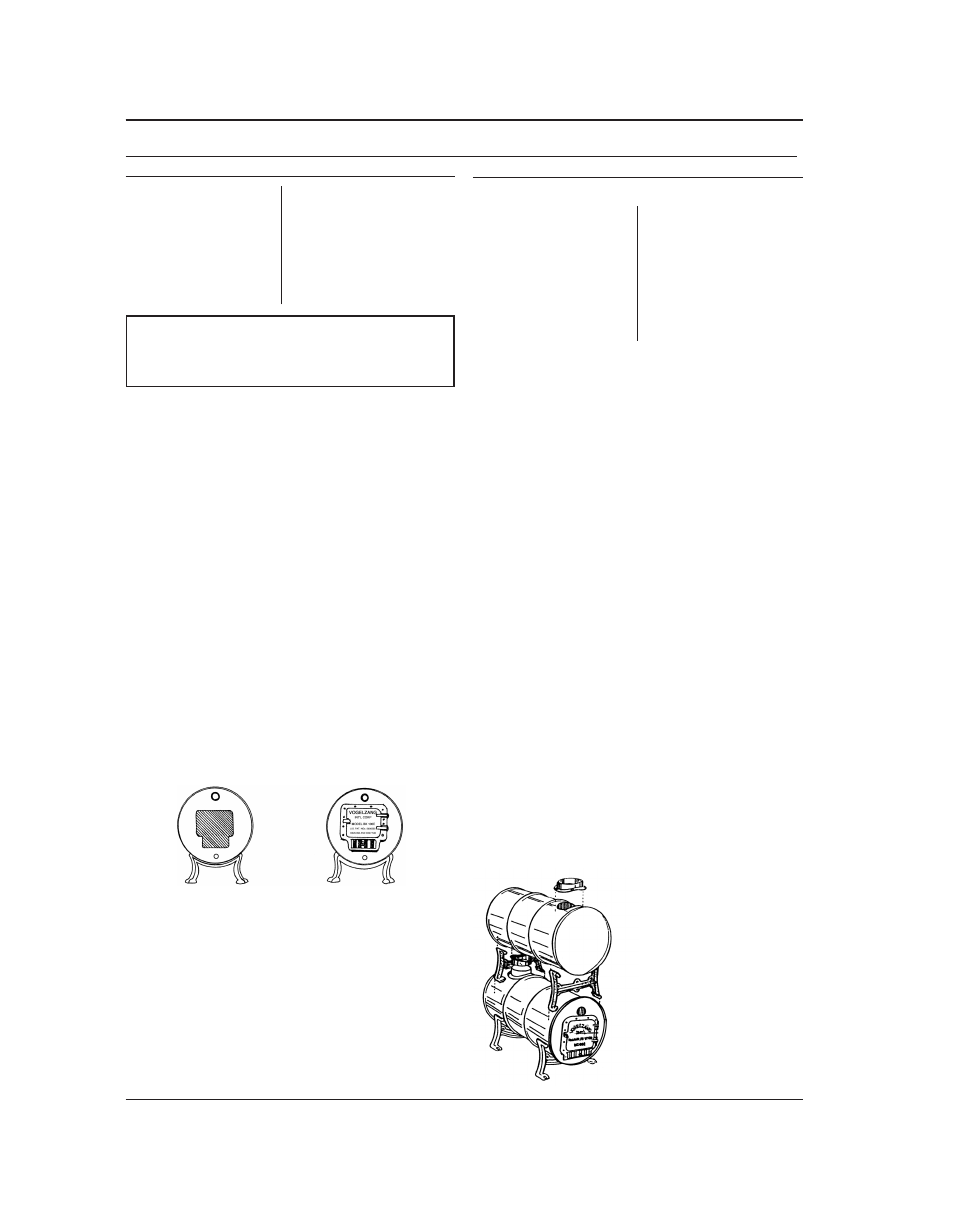
Fig. 1 – Cut opening in end of barrel, drill mounting
holes and install door assembly.
Double Barrel Stove Kit model BK50E
1. After lower barrel has been assembled, place
adapter legs on top of bottom barrel. Mark holes,
drill and attach.
2. Place second barrel on top of lower barrel.
3. Align barrels, mark, drill and cut opening for damper
collar in the bottom of the top barrel to connect to
the damper/collar at rear of the lower barrel.
4. Attach damper collar to bottom of top barrel.
5. Align both barrels and place a piece of 6” blue/black
stove pipe between rear damper/collars of top and
bottom barrels.
6. Secure adapter legs
to top barrel.
7. On opposite (front)
end of top barrel,
mark, cut and attach
damper collar for
chimney connection
(fig. 2).
Fig. 2 – Double Barrel
Stove Kit BK50E
6. Cut the opening for the door and draft using either
a sabre saw or a reciprocating saw with a metal
blade. De burr opening with metal file (fig. 1).
7. Set the door frame assembly over the newly cre-
ated hole. Mark and drill the mounting holes using
a 1/4” bit. De burr opening with metal file. Attach the
assembly using nuts and bolts provided with kit.
8. With the door opening cut, you are now able to
NOTICE: Vogelzang International Corp . grants no warranty, stated or implied for the assembly, installation or
maintenance of your barrel stove kit and assumes no responsibility of any incidental or consequential damages .