Wall mounting, Desk-top installation – Toa N-8600MS User Manual
Page 3
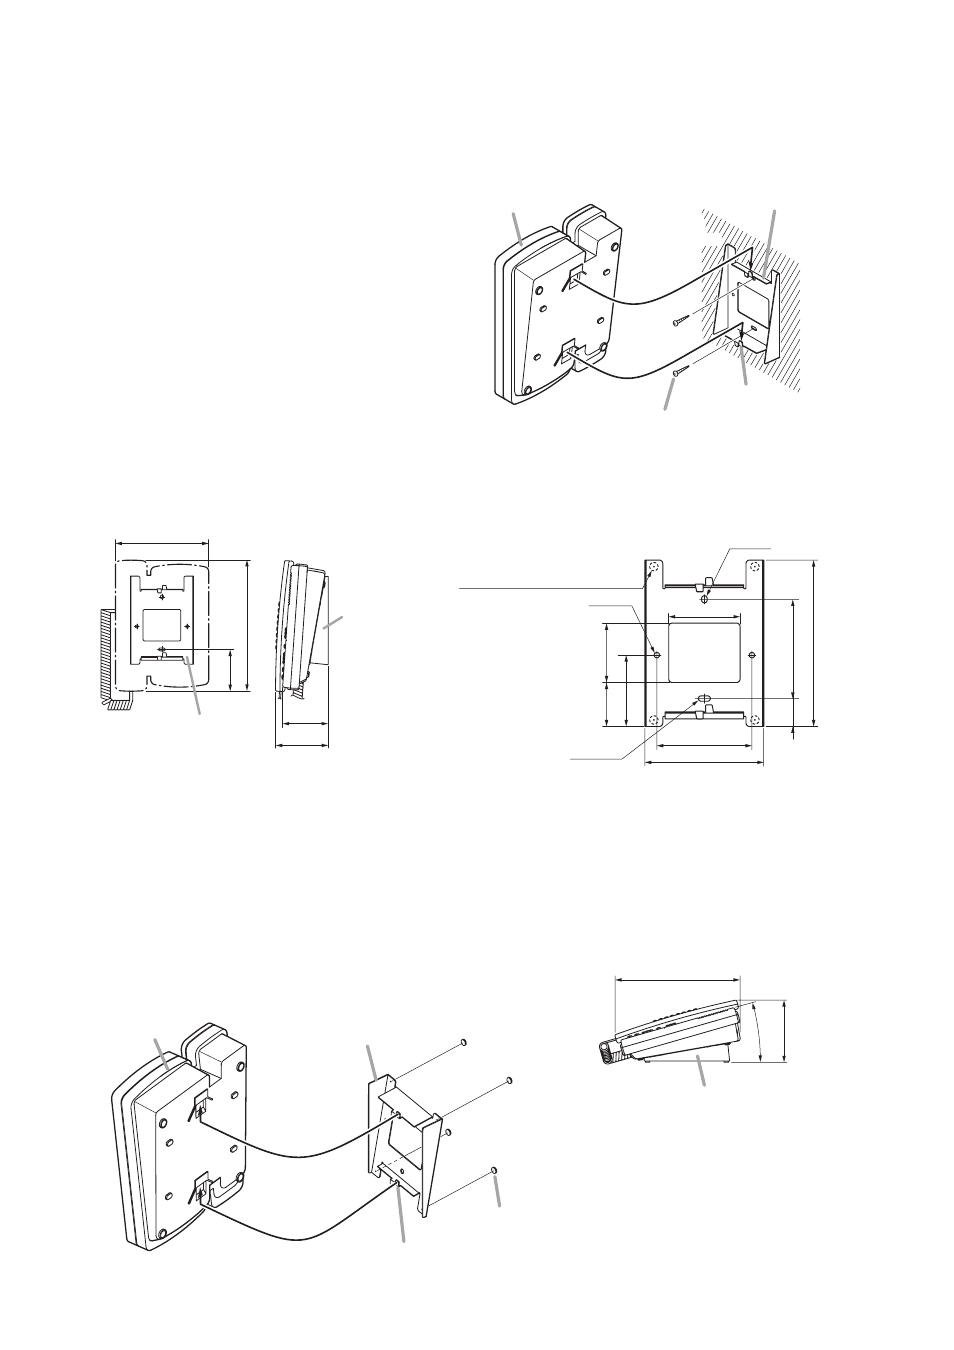
5. WALL MOUNTING
The optional YC-280 Wall mounting bracket is required.
The YC-280 can be mounted to a one-gang electrical box.
5.1. Mounting
Step 1. Install the YC-280 to the wall.
Notes
• Use the appropriate screws for the construction
of wall.
• Wood screws 3.5 x 20 are supplied with the
YC-280.
• No fitting screws for an electrical box are
supplied.
Use commercially available screws.
Step 2. Hang the station on the wall mounting bracket
hook to install.
Push down the station body in the direction
indicated by the arrows.
1
2
YC-280 Wall mounting
bracket (optional)
N-8600MS
Wood screw 3.5 x 20
(supplied with the YC-280)
Hook
Wall
surface
140
83.5
23.5
4.6 x 6
60
80
100
4.5 x 10
2-ø4.5
50
37
60
Rubber foot mounting position
(desk-top application)
148
72.1
83.5
208
66.2
YC-280
YC-280
Unit: mm
5.3. YC-280 Dimensional Drawing
Unit: mm
5.2. Installation Completion Drawing
6. DESK-TOP INSTALLATION
In desktop installations, the front operation panel can be inclined 16˚ from the desk surface for easier operation by
attaching the YC-280 Wall mounting bracket to its bottom surface.
YC-280 Wall mounting bracket
N-8600MS
Hook
Rubber foot
(supplied with the YC-280)
6.1. Mounting
Hang the YC-280's hook on the station's wall bracket mounting slot
to install.
Push up the YC-280 in the direction indicated by the arrows.
6.2. Installation Completion Drawing
205.2
16
°
101.8
YC-280
Unit: mm