Wiring – Toa BS-1015BSW User Manual
Page 3
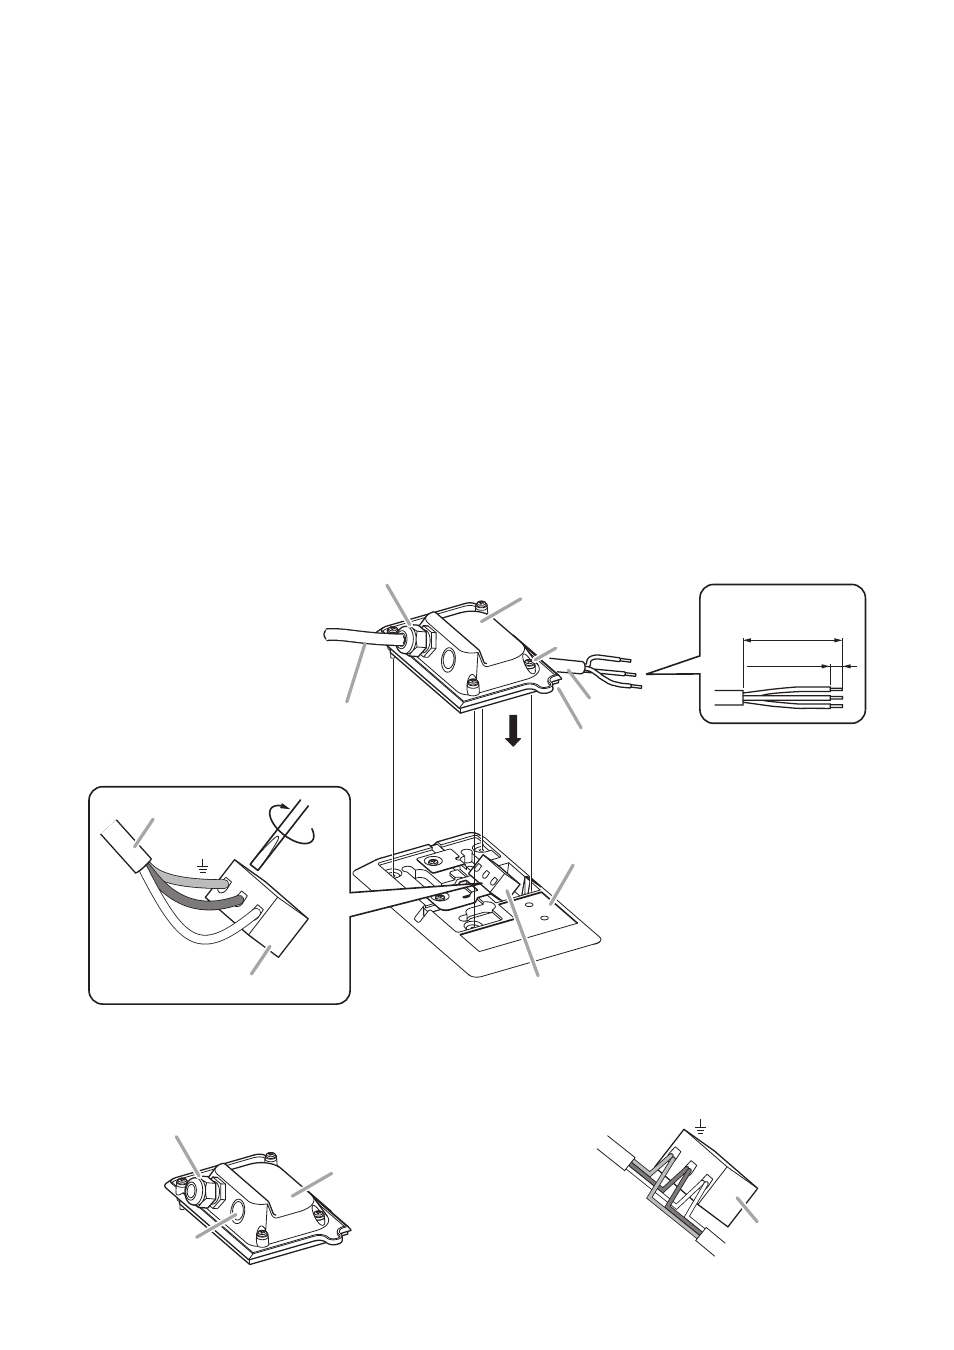
Screw terminal
Terminal cover
(accessory)
Tip
The waterproof gasket is placed along
the inner edge of the terminal cover.
Speaker cable
Speaker cable
Speaker (rear)
To amplifier
Cable gland
Screw
40 mm (1.57")
8 mm (0.31")
[Cable end treatment]
Speaker cable
Tighten
Screw terminal
COM
HOT
1
4
3
2
3
4. WIRING
The terminal cover is not mounted to the speaker unit when shipped from the factory.
Note
To complete speaker installation, be sure to attach the terminal cover after finishing cable connections.
If the unit is left without the terminal cover attached, water or moisture may get inside the speaker, causing the
unit malfunction.
Step 1. Strip the speaker cable jacket.
Step 2. Run the speaker cable through the cable gland.
Step 3. Connect the speaker cable according to the polarity indication at the screw terminal.
Step 4. Mount the terminal cover.
Secure the terminal cover using the 4 attached screws.
In this case, take care not to pinch the wiring, and check that the waterproof gasket is secured into
place.
Notes
• If wiring or the waterproof gasket is pinched between the terminal cover and the unit case, this
causes water or moisture to get inside the terminal cover.
• Be careful not to overtighten the screw. As a rough guide, tighten the screw until the thickness of
the waterproof gasket becomes about half.
[When making a bridge connection]
Remove the knockout on the terminal cover and mount the cable gland PG 13.5 (option) there. Then, run the
speaker cable through the cable gland and connect each pair of cables to the input terminal according to the
polarity indication at the screw terminal.
Terminal cover
Cable gland
Knockout
From the amplifier
To the next speaker
Screw terminal
COM
HOT