Toa F-122C User Manual
Page 8
8
6-2. Exposed mounting (in the case of Step 3-5)
Follow Step 6-1 to mount.
Note
The ceiling reinforcement ring supplied
with the speaker is not used.
HY-BC1 Back Can attached
to suspension pipe
(optional)
Caution
Take care not to pinch the
speaker cable and safety wire
(supplied with the speaker).
Mounting tab
Speaker unit
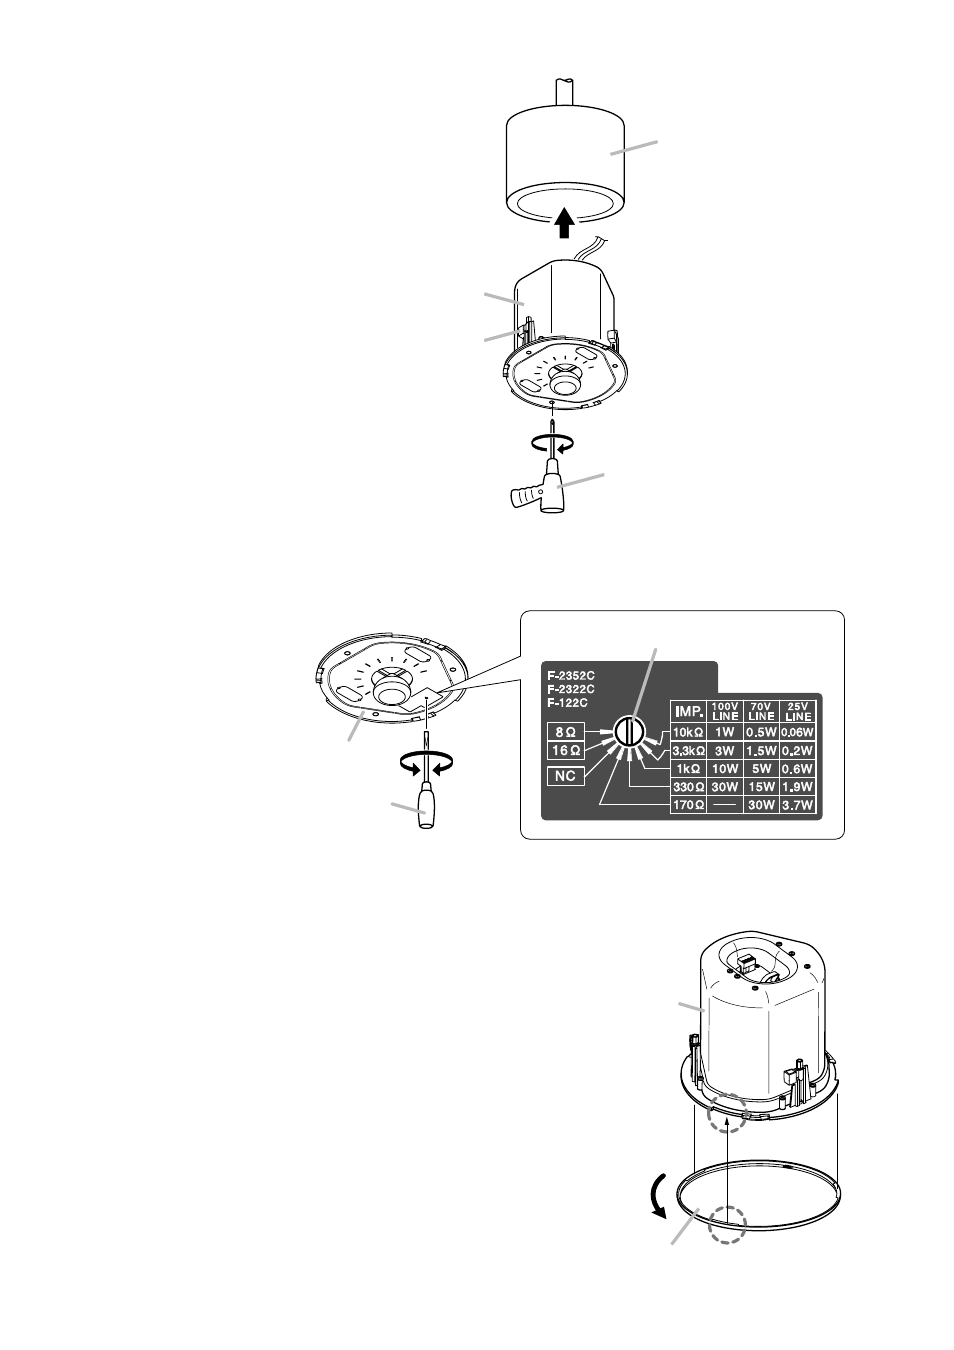
Electric screwdriver
Input selector switch
Speaker's front
Slotted screwdriver
Step 8. Attach the front grille.
Align the tabs (3 places) on the back side of the grille
with the corresponding notches in the unit, then rotate
the grille to full stop in the direction indicated by the
"LOCK" arrow.
Tip
The front grille employs a double-locking system that
clicks into place once partway through rotation, but
only locks into position at its point of full rotation.
Always be sure to rotate the grille to its full stop.
Front grille (accessory)
Tab (3 places)
Notch (3 places)
Speaker unit
LOCK
Important
Never set this switch to low impedance (8
Ω or 16 Ω) when using a high impedance 25, 70, or 100 V
line. Failure to follow this instruction could result in damage to the speaker or amplifier.
Step 7. Set the input power.
Turn the input selector switch (on the unit's front) to set it to the desired input impedance using a
slotted screwdriver.
Note: The switch is factory-preset to 330
Ω.