Gas log installation – Sure Heat Georgian Oak GO18 GO24 User Manual
Page 5
D. Installation to existing gas line in fireplace. A manual on-off valve should be present within easy reach of the
gas log set. If a manual valve is not present, one must be installed prior to the gas log installation.
E. Prefabricated fireplace: Refer to the manufacturer’s fireplace instruction manual for specific information
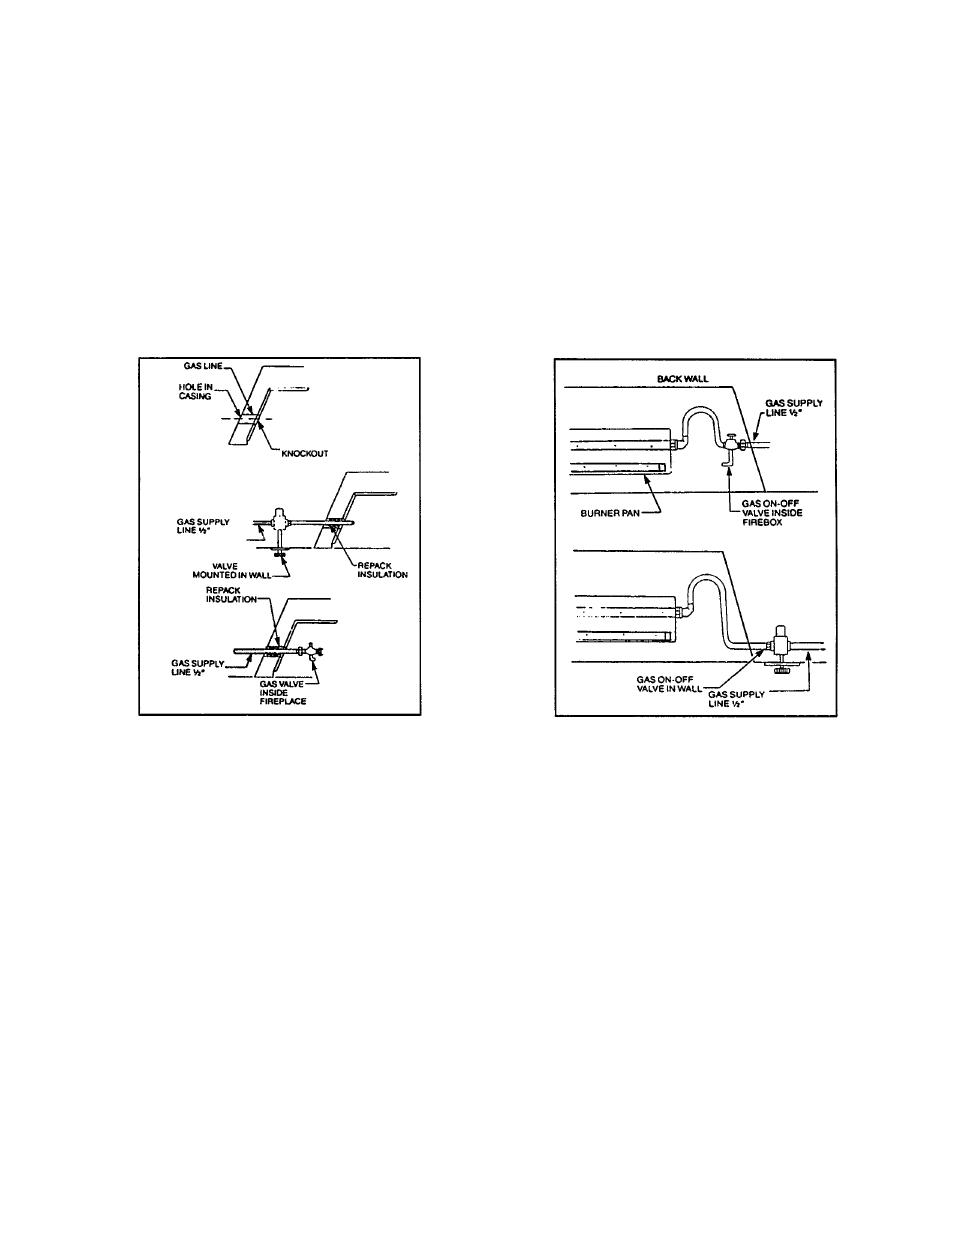
regarding the running of a gas line into that particular model. A typical prefab installation involves the insertion
of a 1/2" gas pipe through the gas line tube provided by each manufacturer from outside the fireplace. The
knockout on the inside of the fireplace is removed as the gas pipe is punched through the fireplace.
F. Masonry fireplaces: A 1/2" gas supply line must be provided to the firebox. Most installations require drilling an
access hole through the masonry wall. The supply line should be secured and sealed by mortar within the access
hole. The supply line should also have an on-off valve either in the wall or inside the fireplace. (See Figure 3B.)
GAS LOG INSTALLATION
(See Figure 1 Parts List as a guide to reference part numbers.)
CONNECTING GAS SUPPLY TO BURNER ASSEMBLY
(If a Safety Pilot Kit is to be used, please refer to separate installation instructions.) These instructions refer to
Natural Gas applications installed without a Safety Pilot Kit. LP/NG Safety Pilot Kit available at your local dealer.
A. Place burner pan assembly in the center of the fireplace.
B. Attach brass 3/8" Flared to 1/2" gas valve (Part #13) to the 1/2" gas supply stub.
C. Attach 3/8" flared tubing (part #15) to burner pan assembly. Attach opposite end to gas supply line by carefully
bending the flared tubing as needed to make the connection. Avoid kinking the flared tubing while bending. If
tubing must be cut, use a tube cutter. Flare the cut end of the tube with a flaring tool.
D. Be certain all connections are tight and use pipe compound on all male threads to seal joints. Test all connections
with a soapy water solution with the gas supply turned on. If bubbles appear on any connection, retighten and
retest. Once it is determined there are no leaks whatsoever, turn off gas supply and move to next assembly step.
— 4 —
Figure 3A - Gas line installation
Prefabricated fireplace
Figure 3B - Gas line installation
Masonry fireplace