Grill assembly – Sure Heat Tuscany CS812 User Manual
Page 9
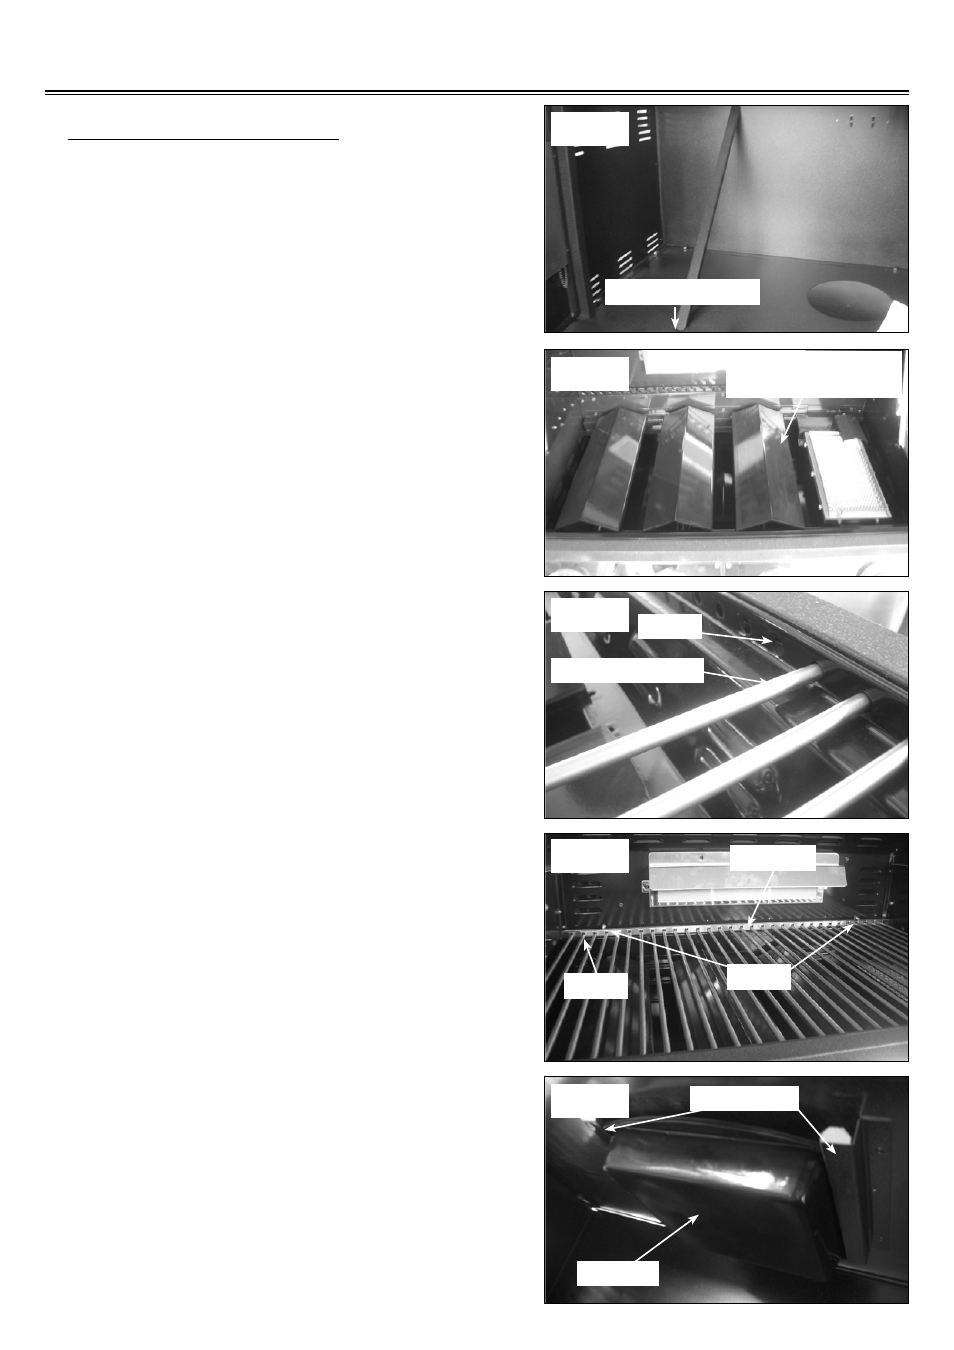
Grill Assembly
INTERIOR PARTS ASSEMBLY
1. Rotate the tank barrier bar away from the cart back,
use a self-tapping screw to secure it on the cart
base. (See Fig. 14)
2. Insert the top row of flavor grids into the cutouts
with triangle ridges facing up. Make sure the flavor
grid with the long side is installed next to the
bottom IR burner. (See Fig. 15)
3. Insert one end of the main cooking rods into the
holes on the top of the front heat shield. (See Fig.
16)
4. Place the other end of the rods into the cutouts on
the rear grate support. Put the cross bar on the
rear ends of the the rods, attach two (2) screws
through the pre-drilled holes on the back of the
hood support to secure the long cross bar in
position. This bar will help to hold the main cooking
rods in position during cooking.(See Fig. 17)
5. Place the drip pan in position under the grill head
assembly. (See Fig. 18)
9
Fig. 14
Fig. 15
Fig. 16
Fig. 17
Fig. 18
Long side of flavor grid
faces bottom IR burner
holes
main cooking rod
cutouts
cross bar
screws
drip pan
drip pan guide
self-tapping screw