Assembly – Sure Heat Cascade X2000 User Manual
Page 17
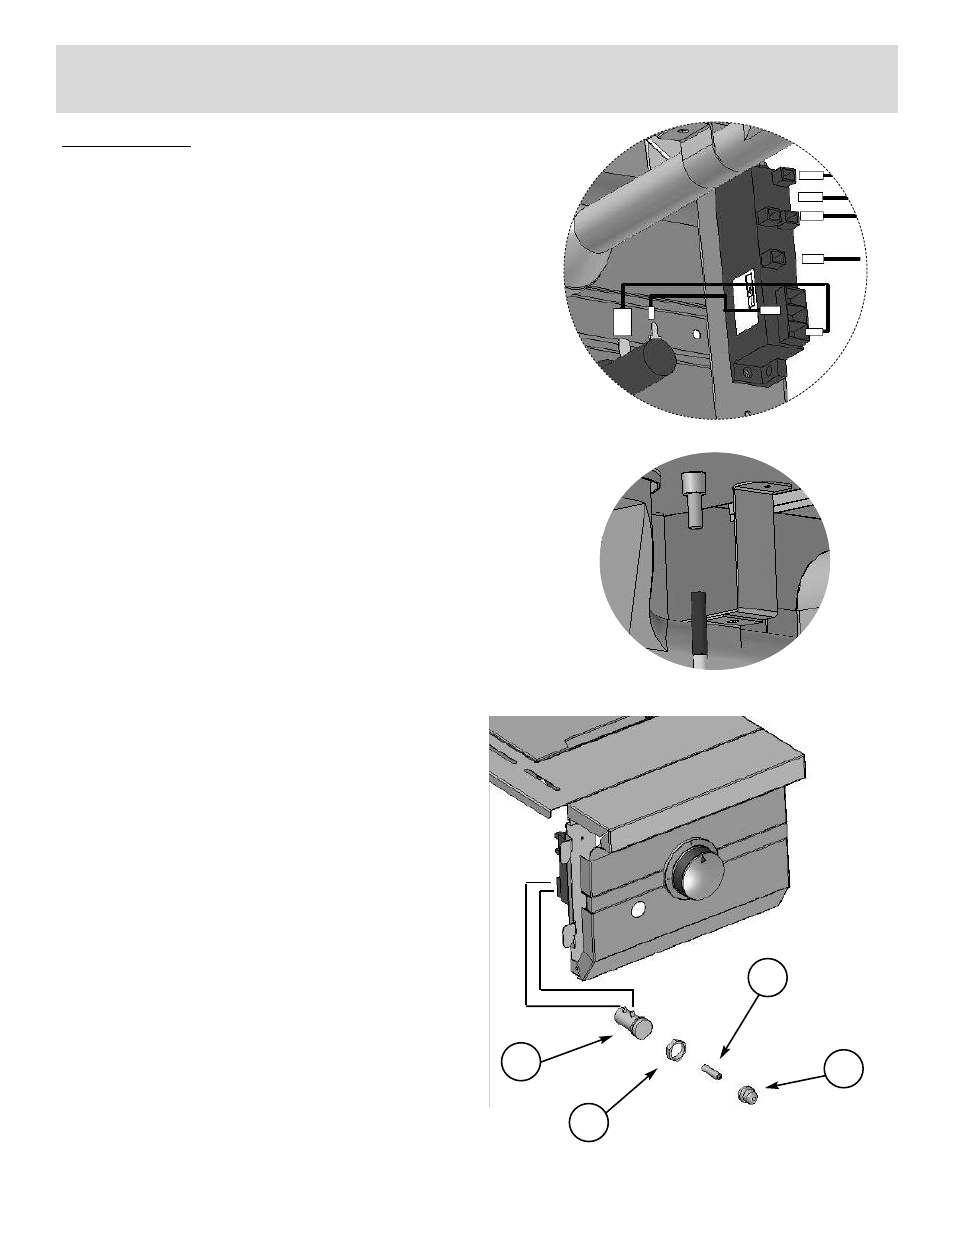
STEP ELEVEN
a. Place the electronic igniter button into the igniter hole on the
front left of the side burner shelf.
b. Secure the igniter in place using the plastic lock nut. Make
sure to tighten securely.
c. Install AA battery, negative side first.
d. Install spring and cap assembly and tighten securely.
e. Attach the two igniter wires to the igniter button and igniter
module.
Note: Make sure you follow the left picture to attach them.
f. Attach loose wire to bottom of cast burner, and then to any of
the open tabs in the igniter. Insert the three igniter wires fed
through the grommeted hole on side of grill cart in Step 9 into
the remaining three holes.
Note: The igniter module is designed in such a way that it
does not matter which terminal tab is used when connecting
igniter wires.
Assembly
17
11a
11b
11c
11d
close-up of igniter wires attaching to igniter module
close-up of igniter wire attaching to burner