Instruction manual, Verifying installation, Com port configuration – StarTech.com PCI2S650DV User Manual
Page 6: Pin assignments
Verifying installation
Once Windows has completed the driver installation, browse to the Device Manager to
verify that the additional ports are displayed. To locate this: Open the Control Panel,
System, Hardware, Device Manager. The new ports will appear under Ports (COM &
LPT).
COM Port configuration
1. From the Device Manager, select the PCI Serial Port you want to configure
(located under Ports (COM & LPT)). Using the right mouse button, click on
the port and select Properties.
2. Open the Port Settings tab, to configure the Bits per second, Data bits,
Parity, Stop bits and Flow control. For further information on the appropriate
settings in these fields, please consult the documentation that was included
with the purchase of the serial device.
3. To set advanced features on the newly installed port, click on the Advanced
button. From here, selec from Enable Auto CTS/RTS Flow Control,
16/32/64 bytes FIFO length and Receive/Transmit Buffer trigger levels.
Please note, the FIFO length can only be modified from within Windows
XP/2000/2003.
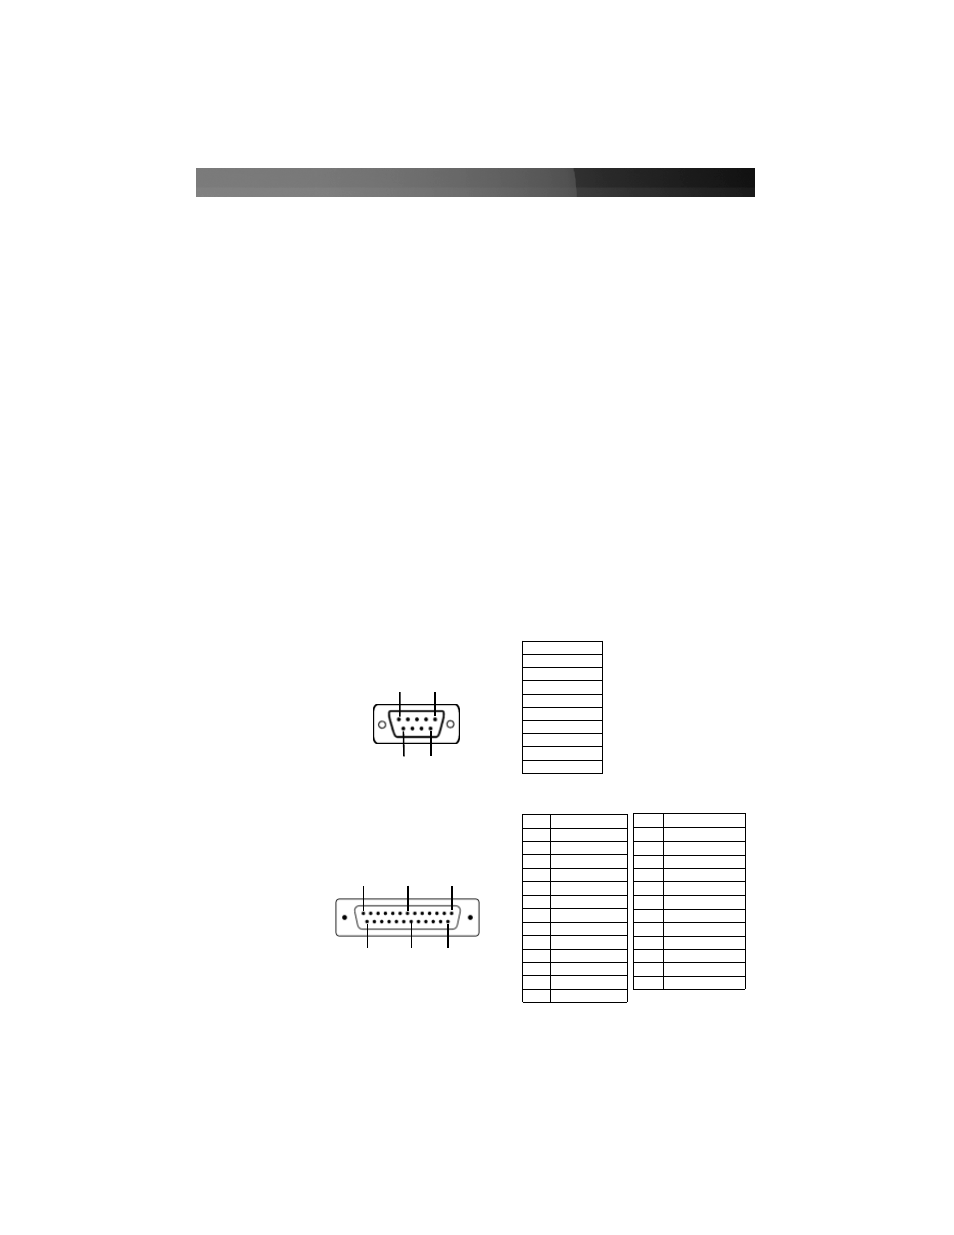
Pin Assignments
Instruction Manual
3
1
9
6
5
DB9 Male
RS-232:
20
13
14
7
25
1
DB25 Male
PIN Signal
1
DCD
2
RD
3
TD
4
DTR
5
GROUND
6
DSR
7
RTS
8
CTS
9
RI
PIN Signal
1
NC
2
TD
3
RD
4
RTS
5
CTS
6
DSR
7
GROUND
8
CD
9
Not Connected
10 Not Connected
11 Not Connected
12 Not Connected
13 Not Connected
PIN Signal
14
Not Connected
15
Not Connected
16
Not Connected
17
Not Connected
18
Not Connected
19
Not Connected
20
DTR
21
Not Connected
22
RI
23
Not Connected
24
Not Connected
25
Not Connected